Download PDF
Download page Working with Contact Flows.
Working with Contact Flows
This section contains general instructions to create a completely new contact flow. For instructions on how to create introductory contact flows, see Examples of Basic Contact Flows.
To create a new contact flow, you must:
- Add a contact flow
- Add modules to the contact flow canvas
- Connect the modules
- Deploy the contact flow
Adding a Contact Flow
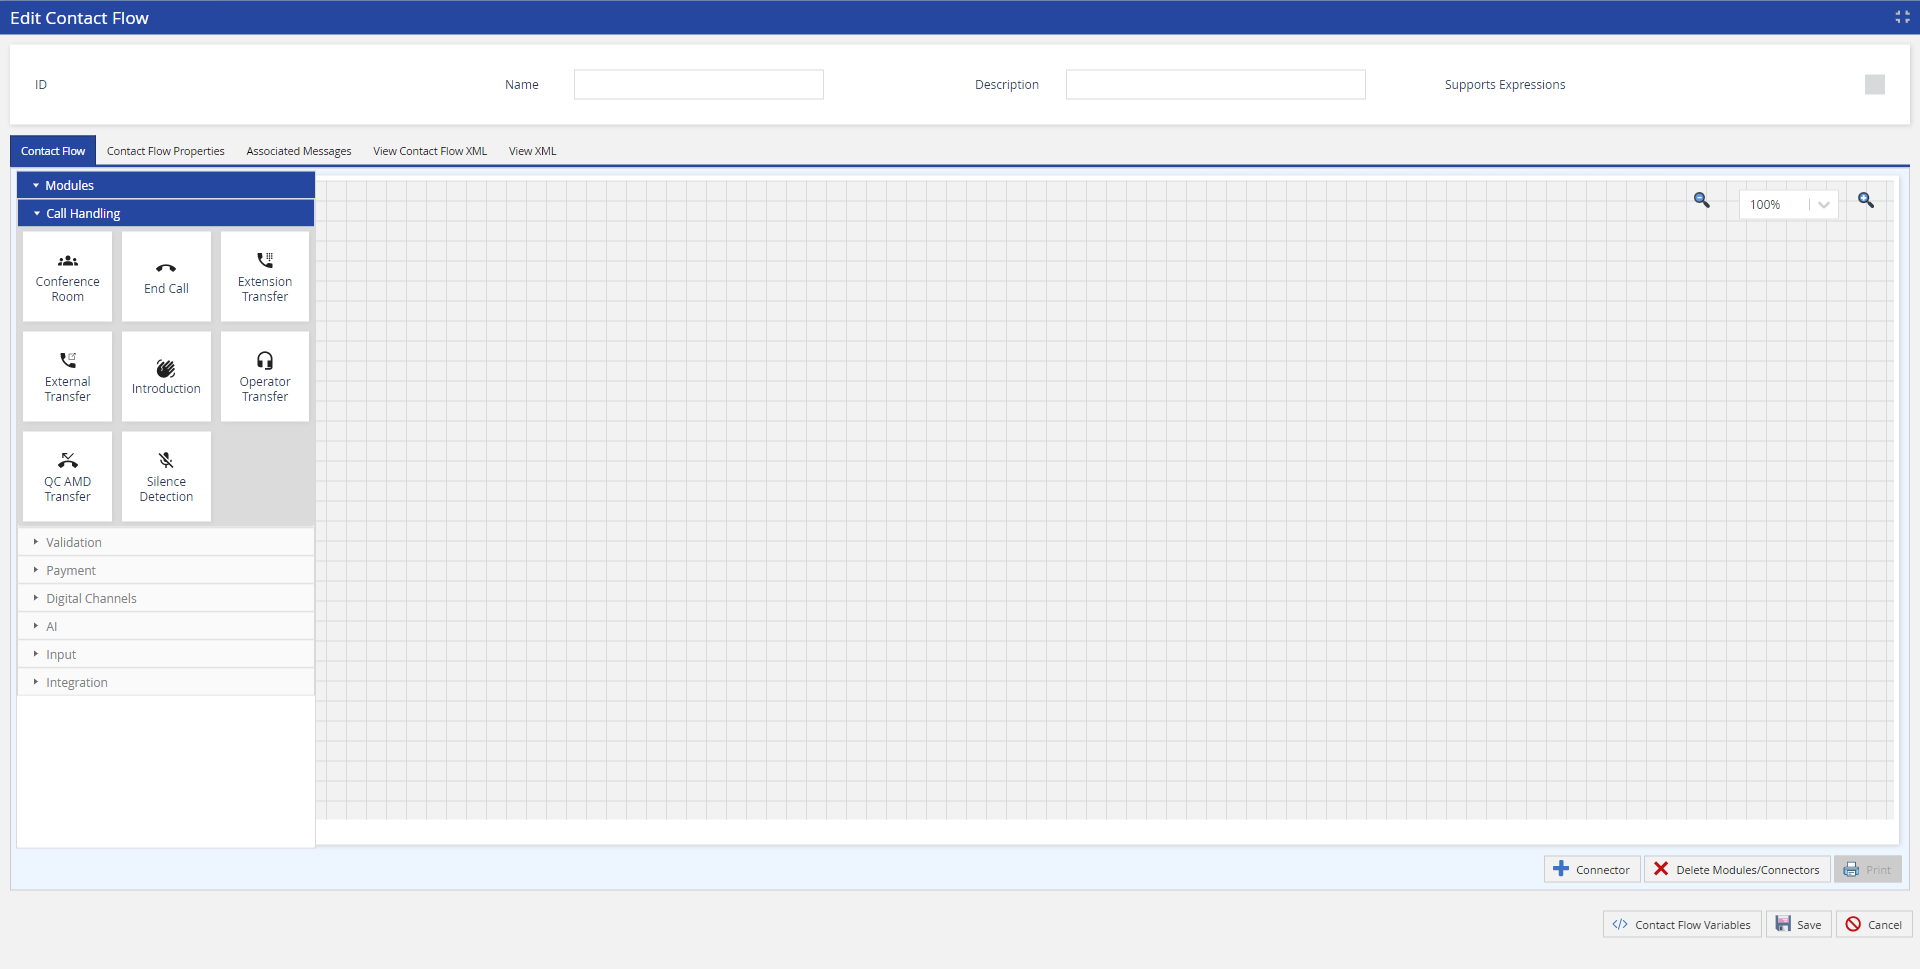
In the Contact Flow Engine, click Add. The Edit New Contact Flow window appears.
- Enter the Contact Flow Name and Description details.
Select the Supports Expressions checkbox if the contact flow will contain the condition and lookup modules.
To define the Contact Flow Properties, double-click the Value cell next to each property and enter an integer value or use the Expression Builder to include variables in the property value. For more information, see Working with Variables.

The following system-level properties are unique within the contact flow. You only need to define these properties once, because they retain their values within the contact flow and in any message that you create using the contact flow. These system properties do not include the module ID as a name prefix after you save the contact flow.
- ACD Proficiency (1-10) Wait Time: the amount of time (in seconds) that the Service Group searches for an agent with a specific proficiency.
- ACD Max Wait Time In Queue: the cumulative amount of time (in seconds) that the system must spend to continue looking for agents with specified proficiencies. This value is generally less than the service Max Hold Time.
- Post Call Digital Message Id: ID of the message used in contact flows to proactively contact customers after a call ends.
The platform first searches only for agents with Proficiency 1 for the wait time you specify. After that, the search expands to include Proficiency 1 and 2 for the additional time specified for Proficiency 2, and so on. If the Max Hold Time for the service has been reached and a properly-skilled agent is not available, the Service Group configuration decides the platform behavior.
Service Group configuration Platform behavior strict_overflow The platform stops attempting to route the call to a properly-classified agent and routes the call to the first available agent, regardless of classification. strict_classification The call will take the failure path, for example, the call is terminated or goes to a voicemail box. Click Ok. The Contact Flow Engine displays a blank canvas ready for the new contact flow.
Adding Modules to the Contact Flow
Add required modules to the contact flow by selecting them from the module menus and dragging them onto the canvas. For more information, see Understanding Modules.
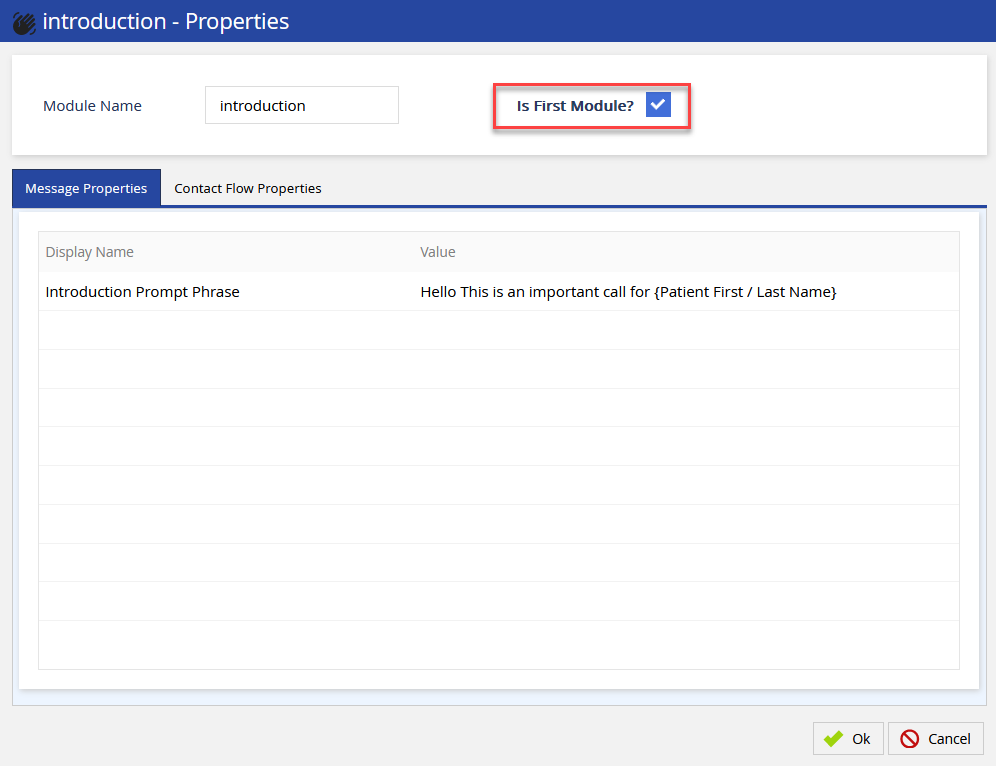
Add a name for each new module.
Module names must be unique and cannot contain any spaces. The name is used as the prefix for all the properties associated with the module.

By default, the first module you create will have the Is First Module checkbox selected. This is the first module the system will look at for determining the contact flow. If your opening module is not created first, you will need to delete the first module you created in order to assign the 'Is First Module' property to the correct module.
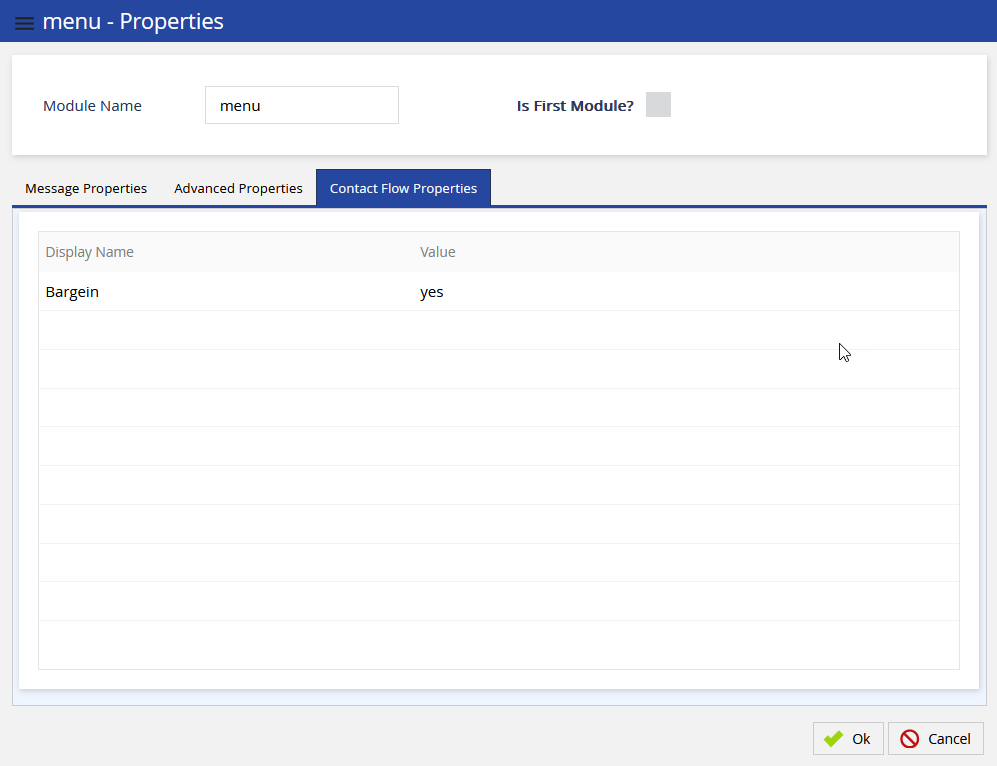
Add the necessary values in the Message Properties and Contact Flow Properties tabs for each module,
The Message Properties tab displays the message field properties as well as their values, including the messaging that customers will hear. In the example below, the module name is "menu1" and it is the prefix for all message properties.
When modules are added or removed from a contact flow, LiveVox recommends that you build new messages on the adjusted contact flow to ensure that the list of properties available in the message reflects new or removed options.
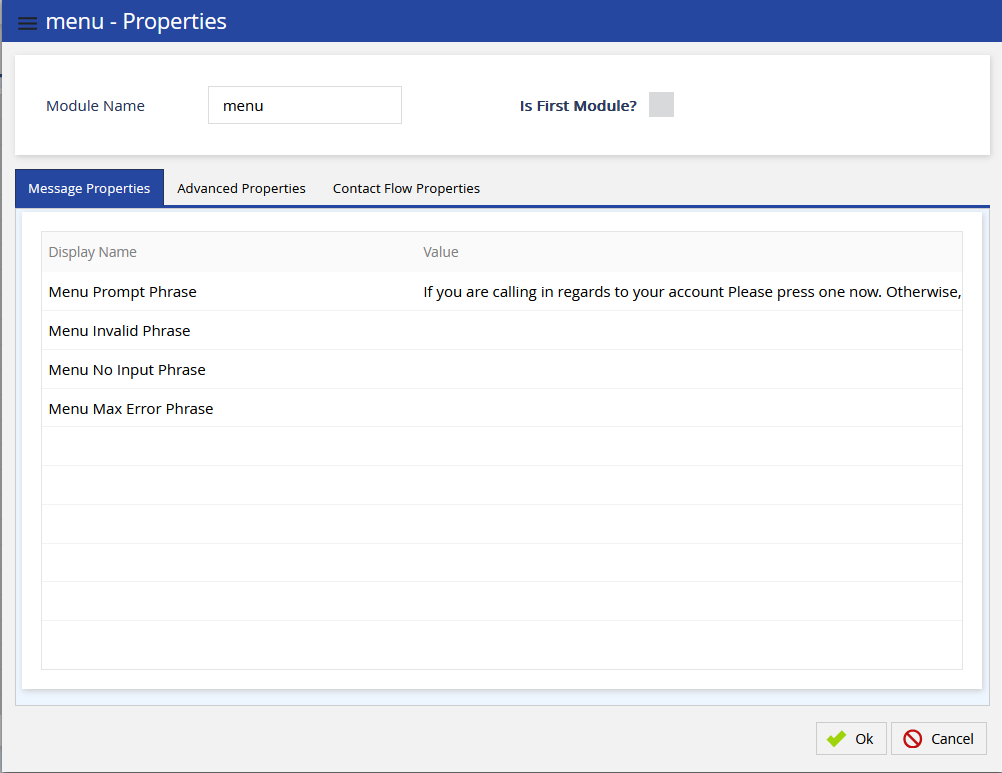
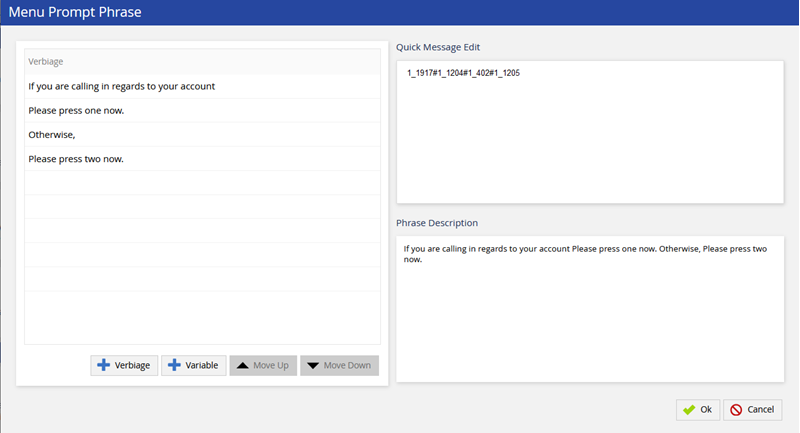
In this example, the Menu Prompt Phrase is the verbiage that will play for this module. If the caller presses a digit on their telephone keypad prior to the completion of the message with the "Bargein" value set to "Yes", then the call will move onto the next logic step in the contact flow.
The Contact Flow Properties tab displays any associated contact flow properties and values (if applicable). For instance, having "Bargein" with a value of "Yes" will allow callers to press keys to bypass the message.
- Click Ok to add the module to the Contact Flow window.
- Repeat this process to add all the necessary modules to the Contact Flow window.
Connecting Modules
After adding modules, you must select connectors that contain the logic of the flow from one module to another as well as Event and Result values specific to the modules.
Create connectors by selecting the Connector button in the Contact Flow window. Alternatively, hover over a source module until an arrow icon appears, then click and drag the dotted line to the target module.
The Connector Setup window appears.Add the following details:
Source Module: the starting point of the connector
Target Module: the ending point for the connector
Event: the type of Connector
Result: the outcome that will be used in reporting should be the last module for which the transaction was connected.

The list of event connectors available is dependent on the source module. For more detail on connectors, see Understanding Connectors.
- After all modules and connectors are set for the contact flow, click Save.
When adding connectors, the Contact Flow Engine allows you to:
- Re-position connectors to different entry/exit points of the selected module.
- Double-click on icons from the modules palette to add the module.
- Select the module and press the INSERT key on your keyboard to add the module.
- Select the module and press the DELETE key on your keyboard to delete the module.
- Use the keyboard directional arrows to move a selected module.
- Left/Right arrow – pixel by pixel move.
- Shift + left/right – step-by-step move.
- Ctrl + left/right – select next/previous module.
Deploying a Contact Flow
To enable a contact flow for use, you must deploy it. This is a workflow management step that allows you to control the visibility of a contact flow.
Click Deploy to deploy the saved contact flow into production. Any associated messages will begin using the new contact flow.
In this platform version and going forward, you will not be able to create or copy an A_MASTER contact flow or message.
Applying a Contact Flow
Once your contact flow has been Saved and Deployed, you must create a message from the new contact flow and apply it to a service. For more information, see Creating Messages.