Download PDF
Download page Installing Contact Center for Salesforce.
Installing Contact Center for Salesforce
You can download the LiveVox Contact Center for Salesforce application from the Salesforce AppExchange. For more information about installing an AppExchange solution in your Salesforce organization, see the Salesforce documentation.
If you have purchased Contact Center for Salesforce, follow the instructions in this topic to install the application. The instructions in this topic must be performed within Salesforce.
After the installation, follow the instructions in the Configuring Contact Center for Salesforce section to configure the application. The instructions in the Configuring Contact Center for Salesforce section must be performed within the LiveVox Portal.
Before you begin
- Ensure that you are using the Salesforce Lightning Experience application.
- LiveVox recommends you use Salesforce Console in Lightining Experience. If you are not using the Console application, ensure that you have disabled the Screen Pop features. For example, Create a New Record form.
- If the agent uses WebRTC audio, ensure that the agent first logs into a LiveVox service using the LiveVox agent desktop. Then, the agent must log into the same service using the Salesforce agent panel.
Configuring the Call Center
After you install the Contact Center for Salesforce application, configure the call center.
To configure the call center:
Go to Setup > Call Centers.
The LiveVox Call Center Adapter is the call center that is included in the Contact Center for Salesforce application.
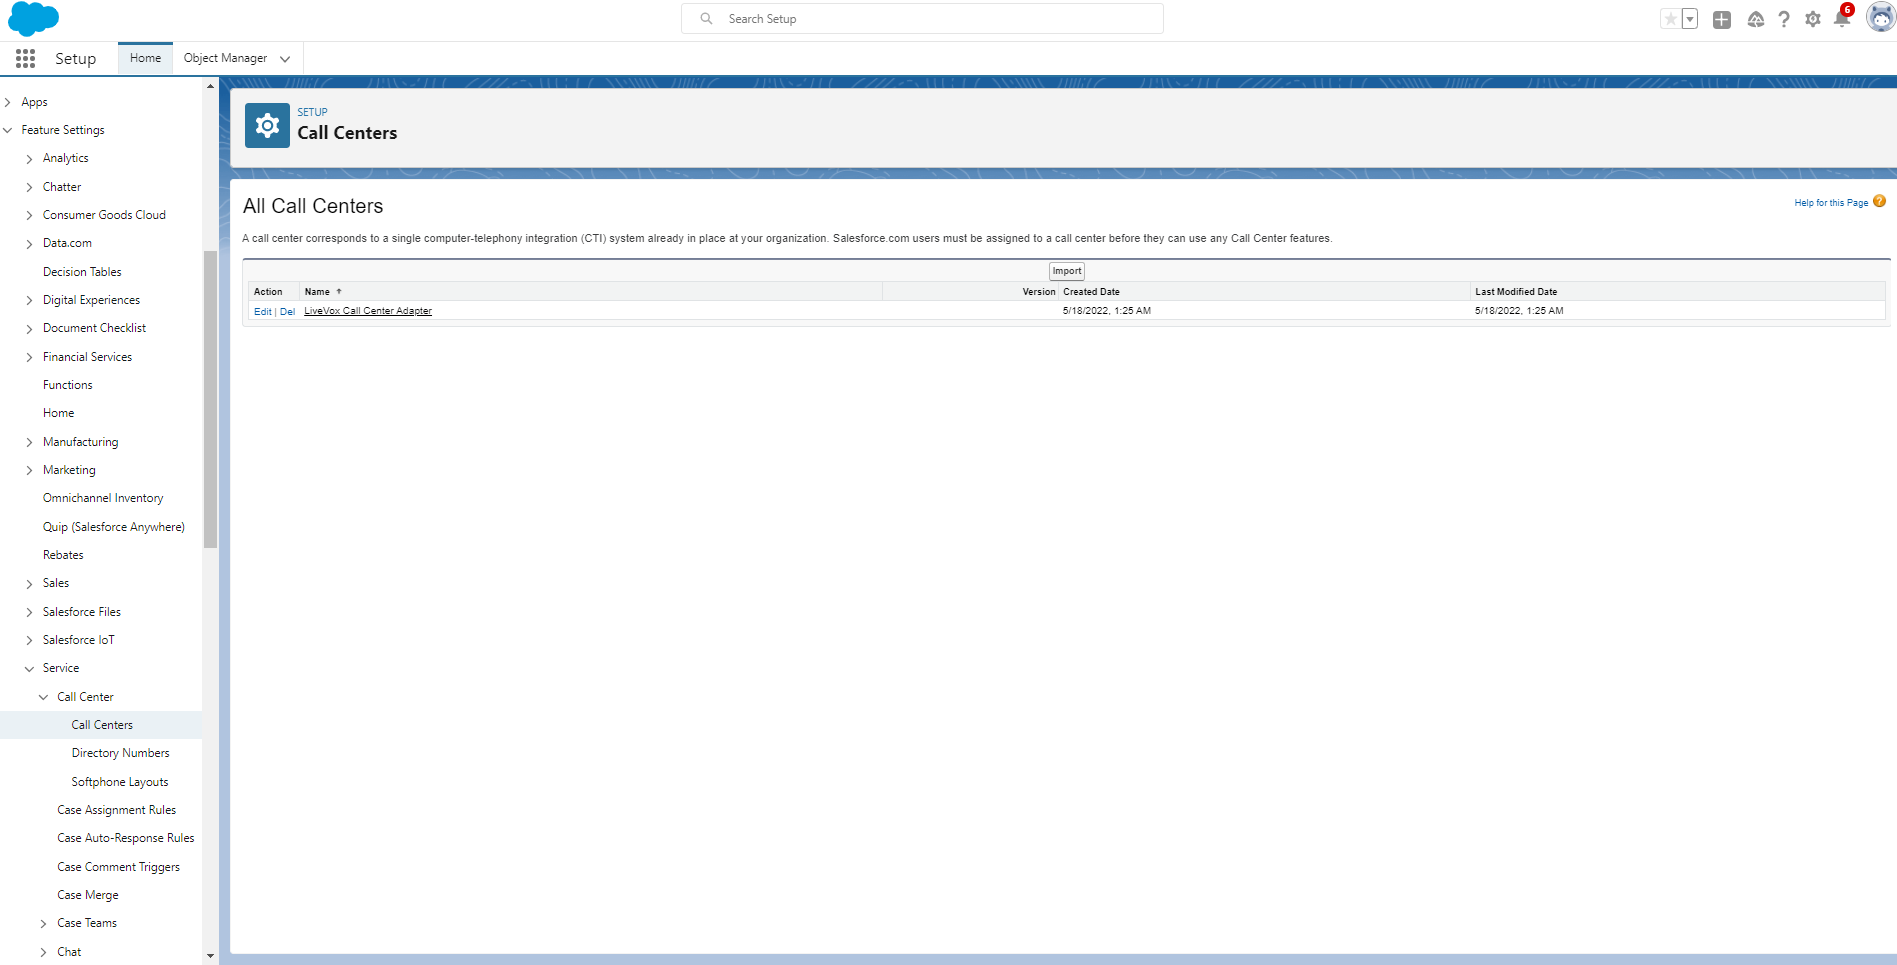
- Click the call center to open it.
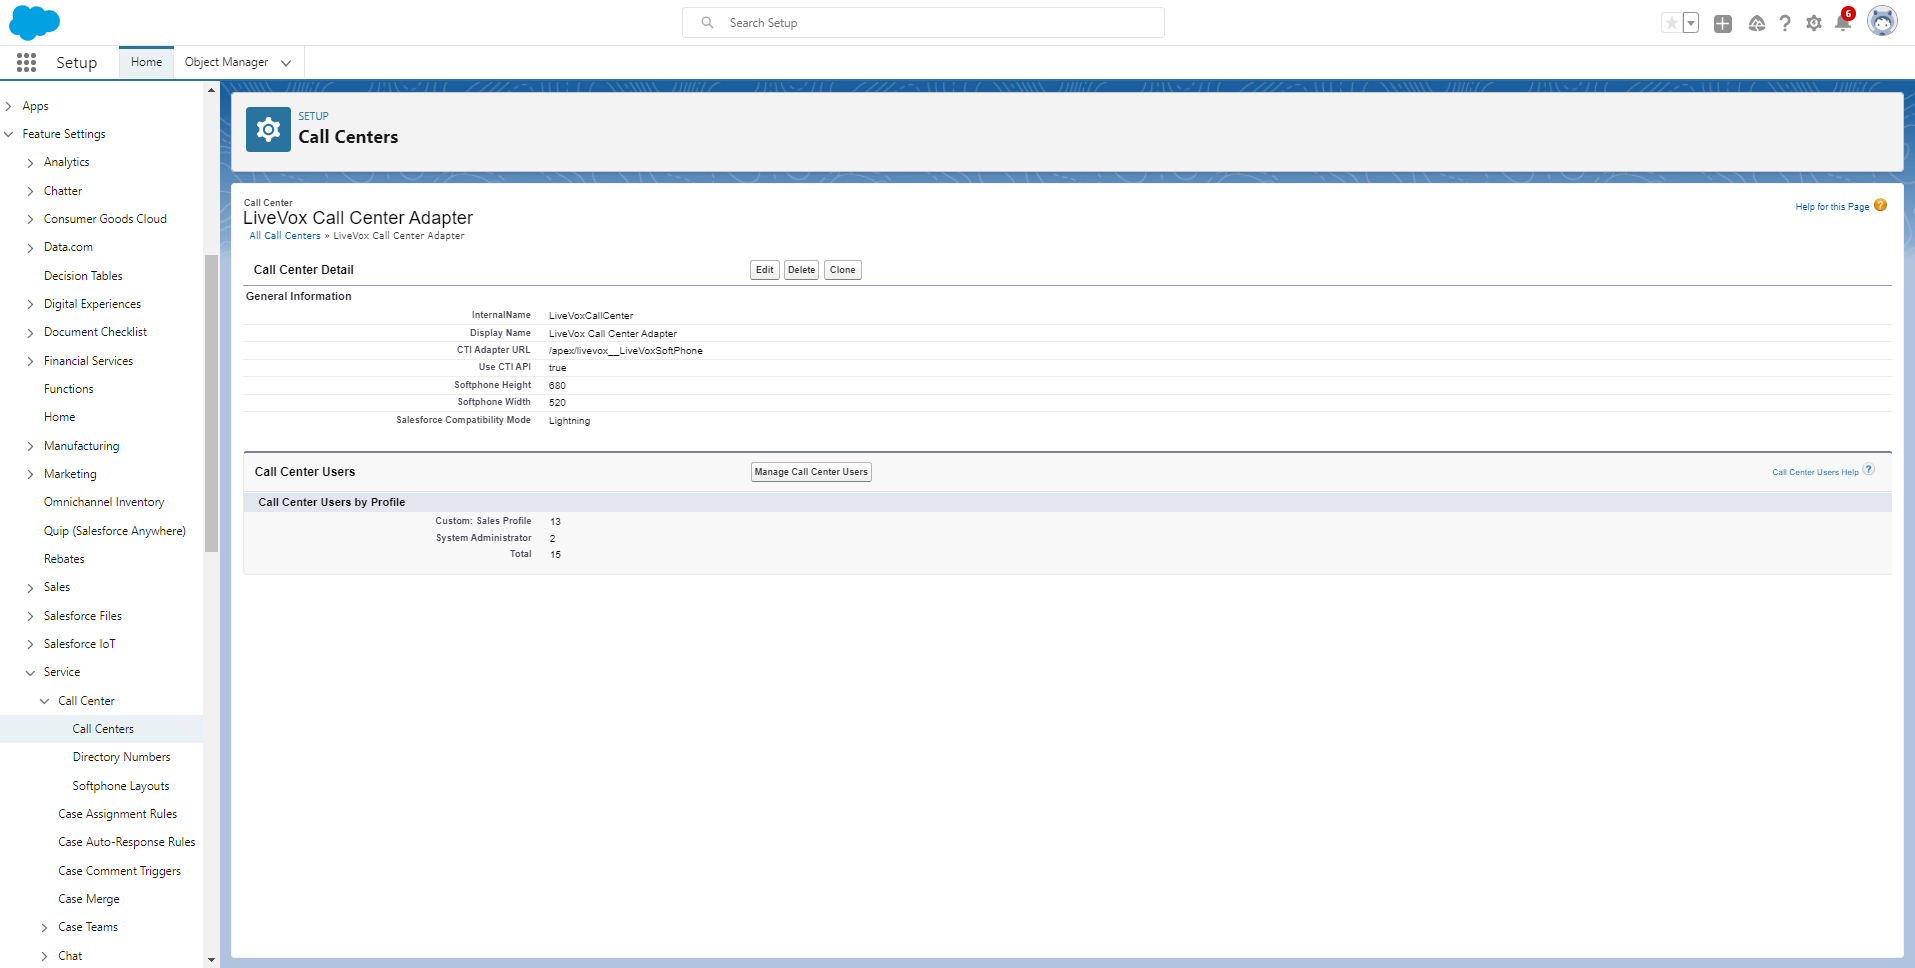
- Click Manage Call Center Users and add the desired users to the call center.
Configuring the Softphone Layout
After you install the Contact Center for Salesforce application and configure the call center, configure the softphone layout.
- Go to Setup > Softphone Layouts.
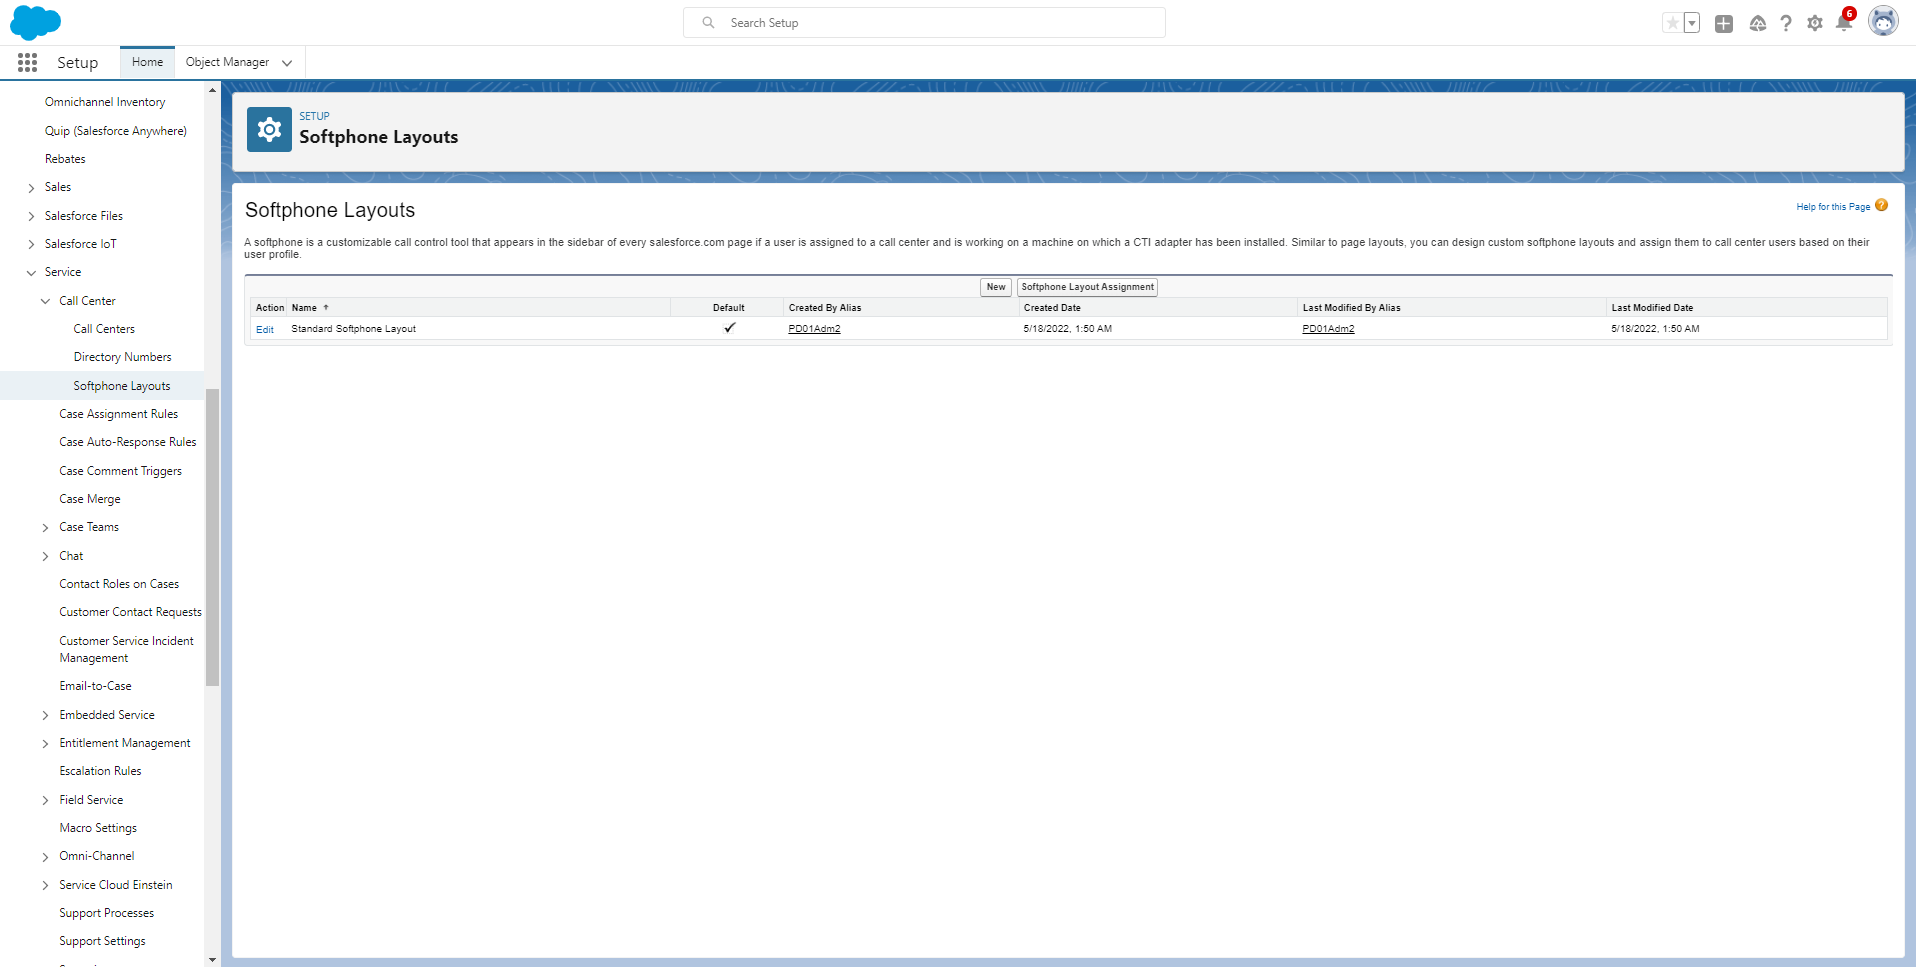
- Based on your requirements, edit the default softphone layout or create a new layout. LiveVox recommends the following configurations:
- Display the following call-related fields:
- Caller ID
- Dialed Number
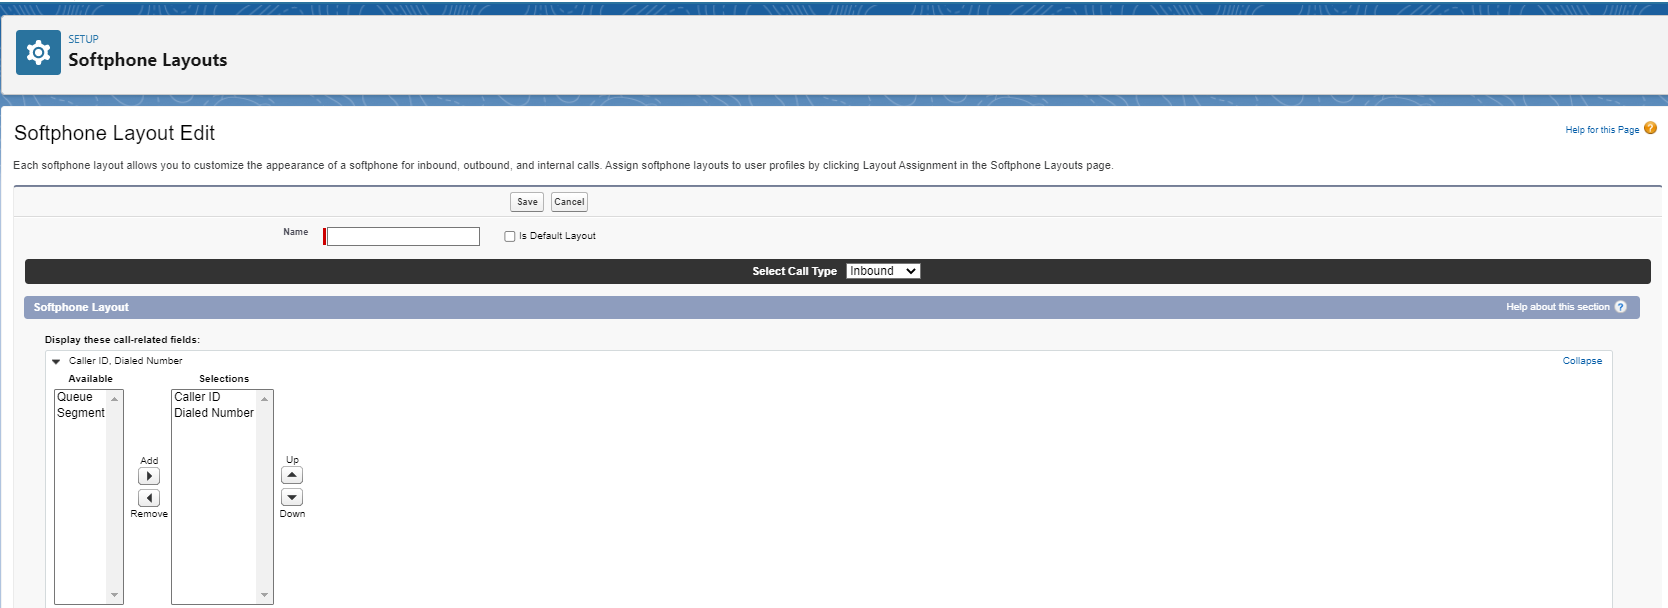
- Display these salesforce.com objects:
- Contact
- Account
- Lead
- Case
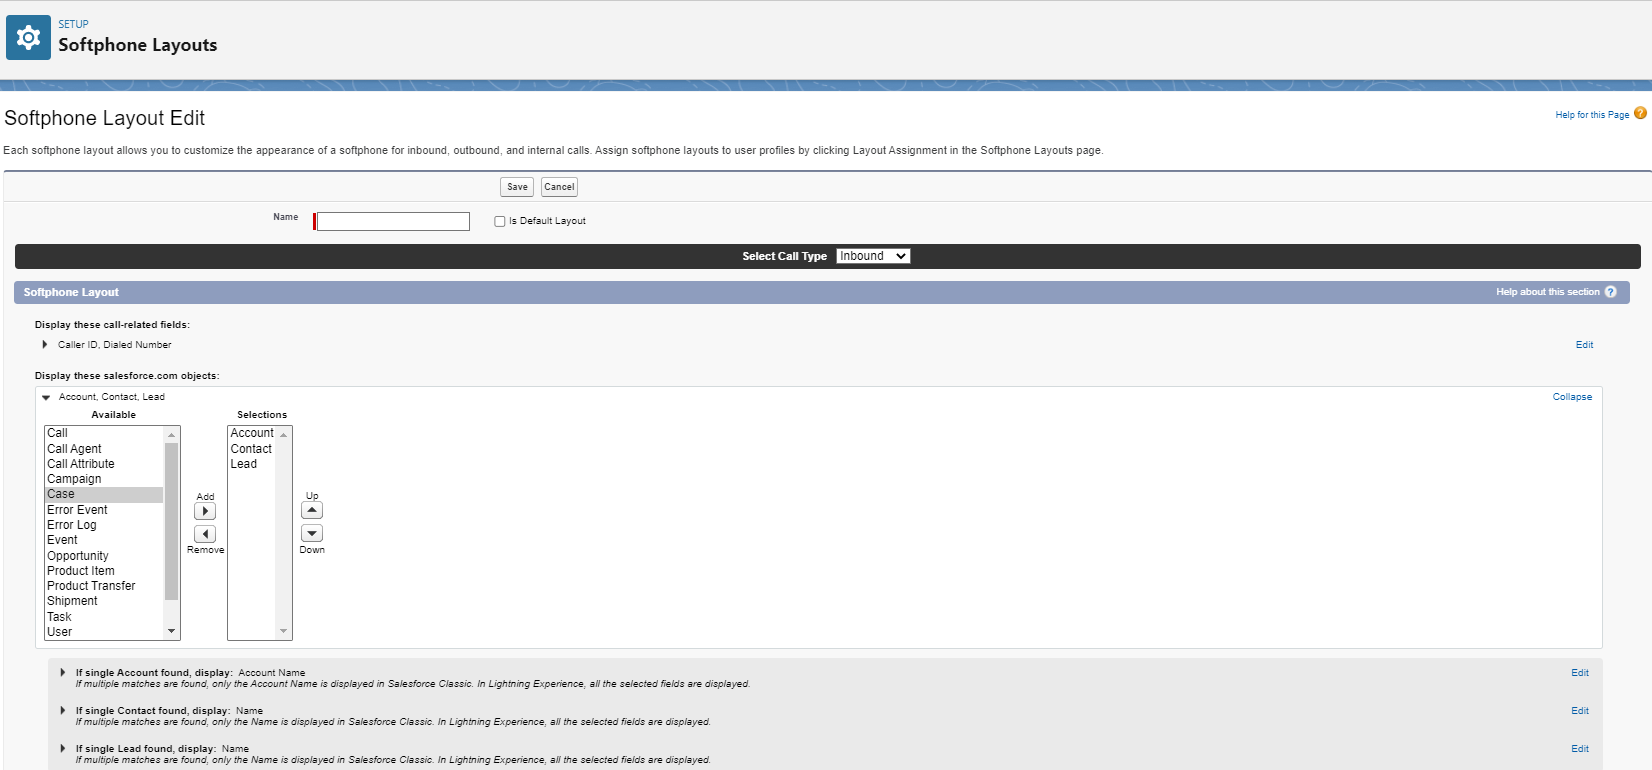
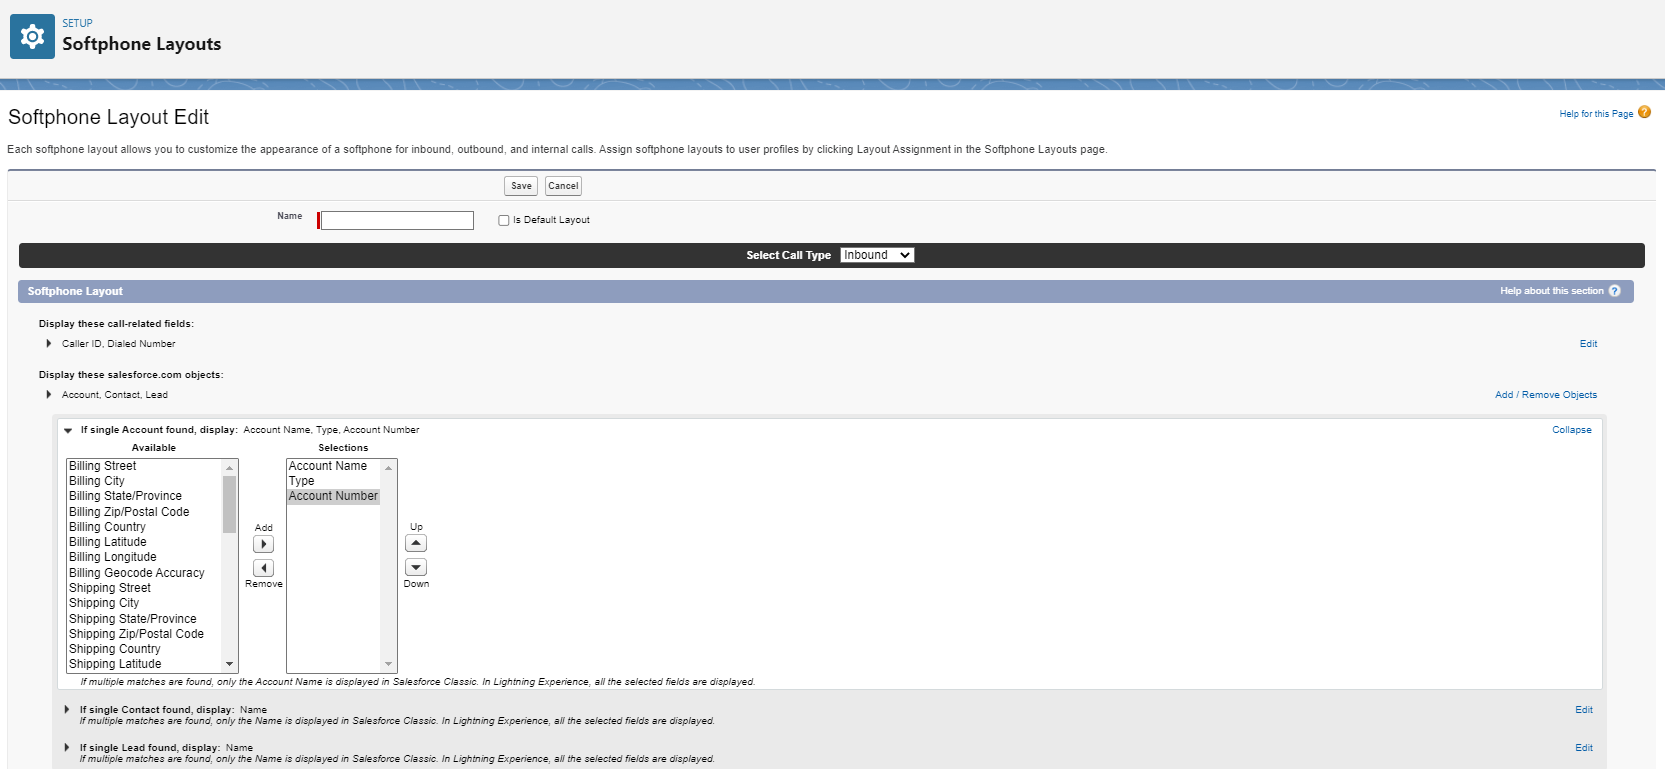
- For a single account, display:
- Account name
- Type
- Account number
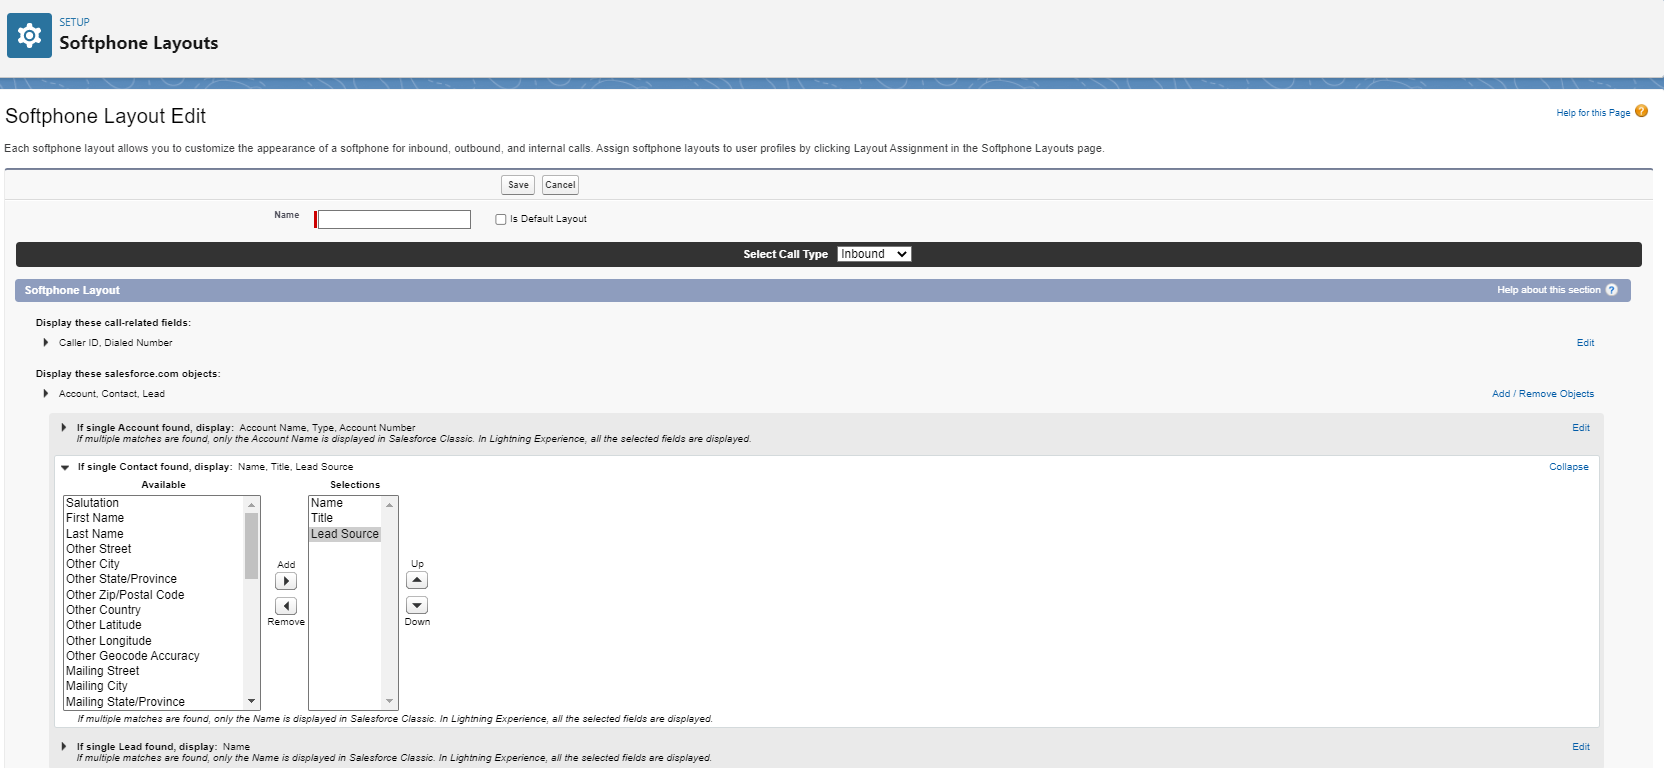
- For a single contact, display:
- Name
- Title
- Phone
- Description
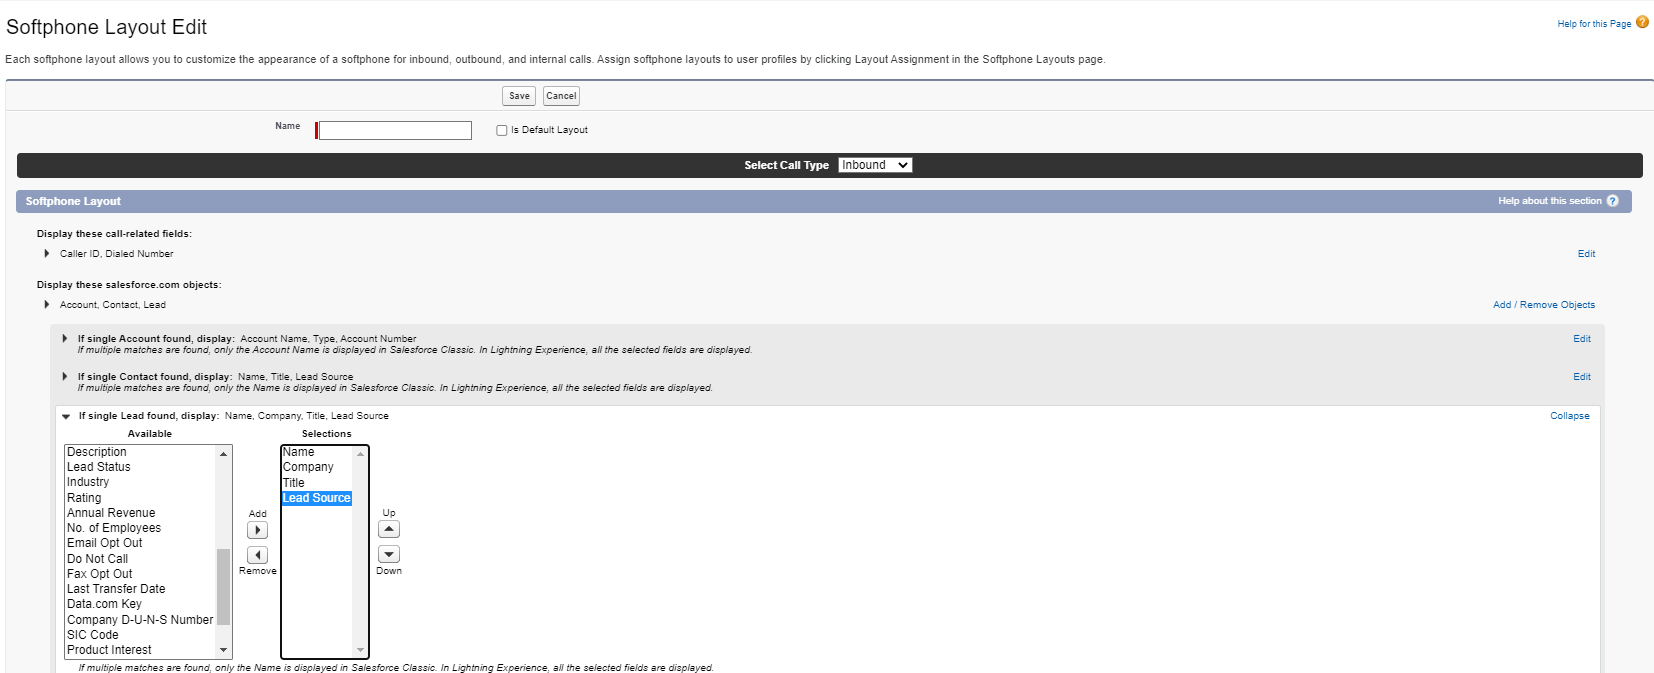
- For a single lead, display:
- Name
- Company
- Title
- Lead source
- for a single case, display:
- Case number
- Status
- Priority
- Screen pop-up opens within: Existing browser window
- No matching records: Display new contact
- Single-matching record: Display the detail page
- Multiple-matching records: Display the search page
- Display the following call-related fields:
- Assigning the softphone layout:
- Choose the profiles you want to enable and select the softphone layout configured in the previous step.
Granting User Permissions
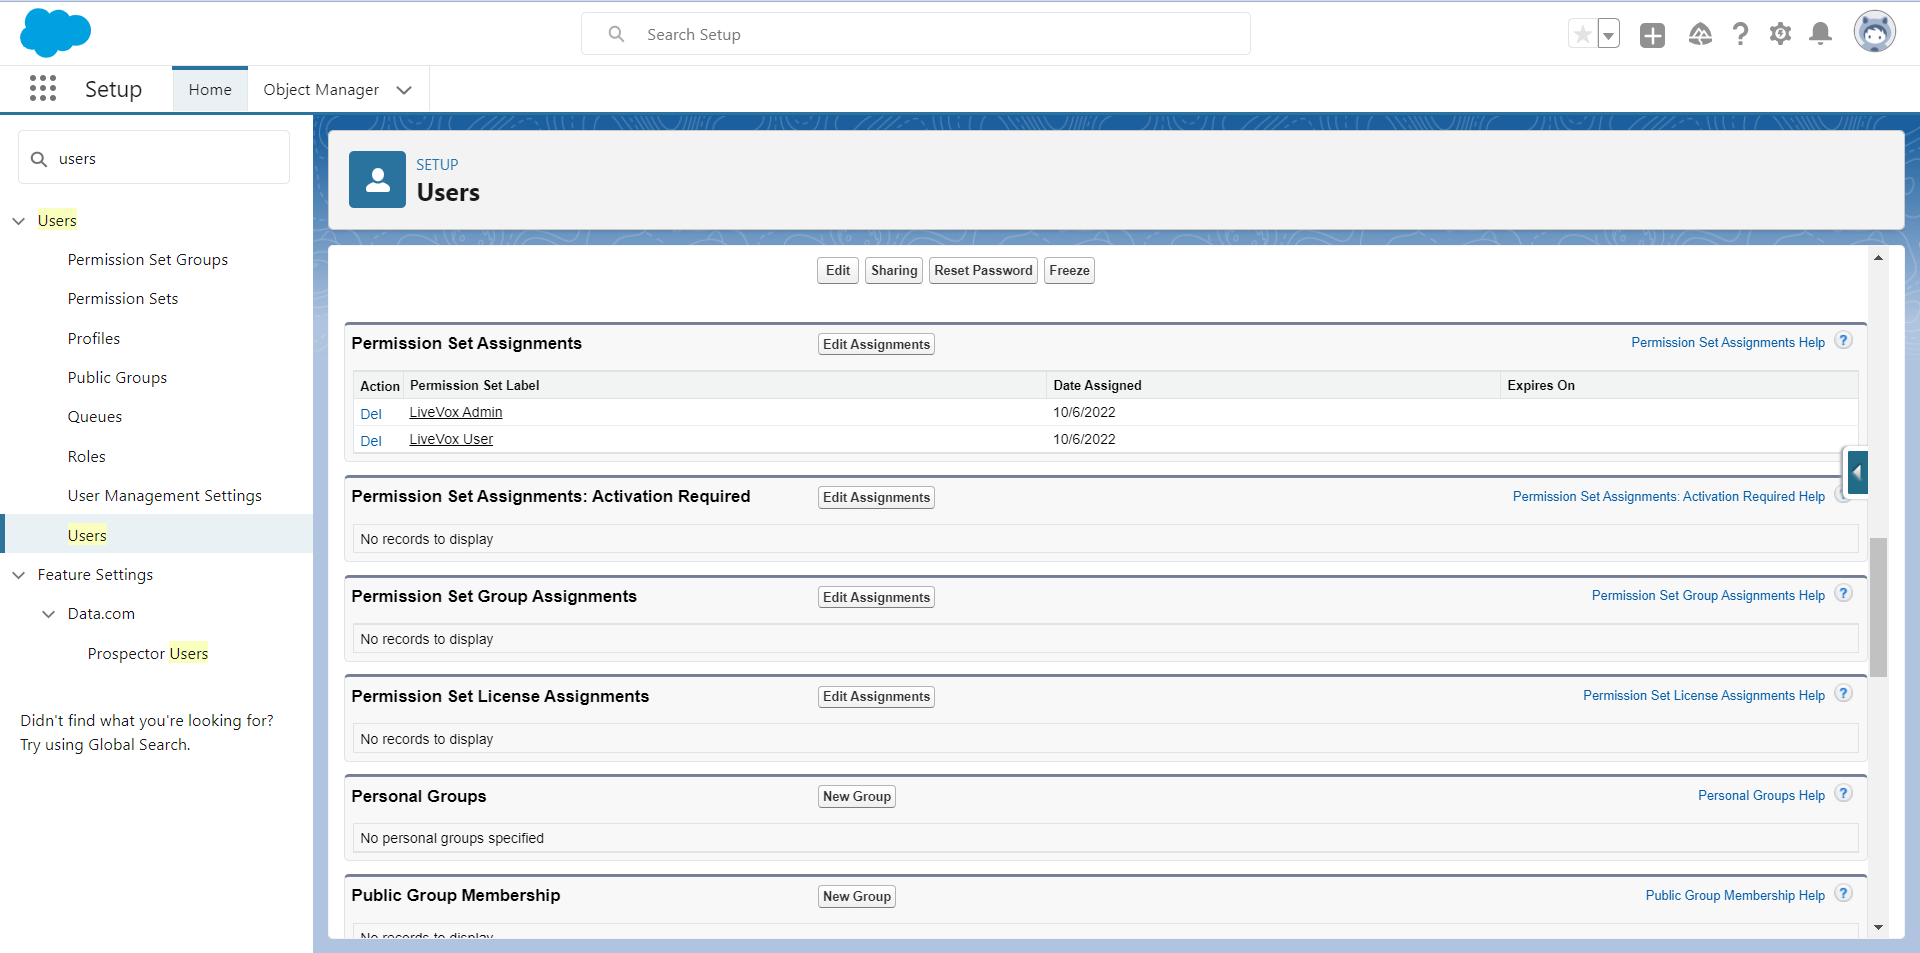
Add the required permission sets to users based on their roles.
Role | Required Permission Sets | Notes |
Agent | LiveVox User | Enables the user to dial and receive calls using the LiveVox application. |
Administrator | LiveVox User LiveVox Admin | Enables the user to administer the LiveVox application. |
To add permission sets:
- Go to Setup > Users > Permission Sets, and then add the permission sets.
Configuring the LiveVox API Connection
Configure the API to connect the application to the LiveVox Portal.
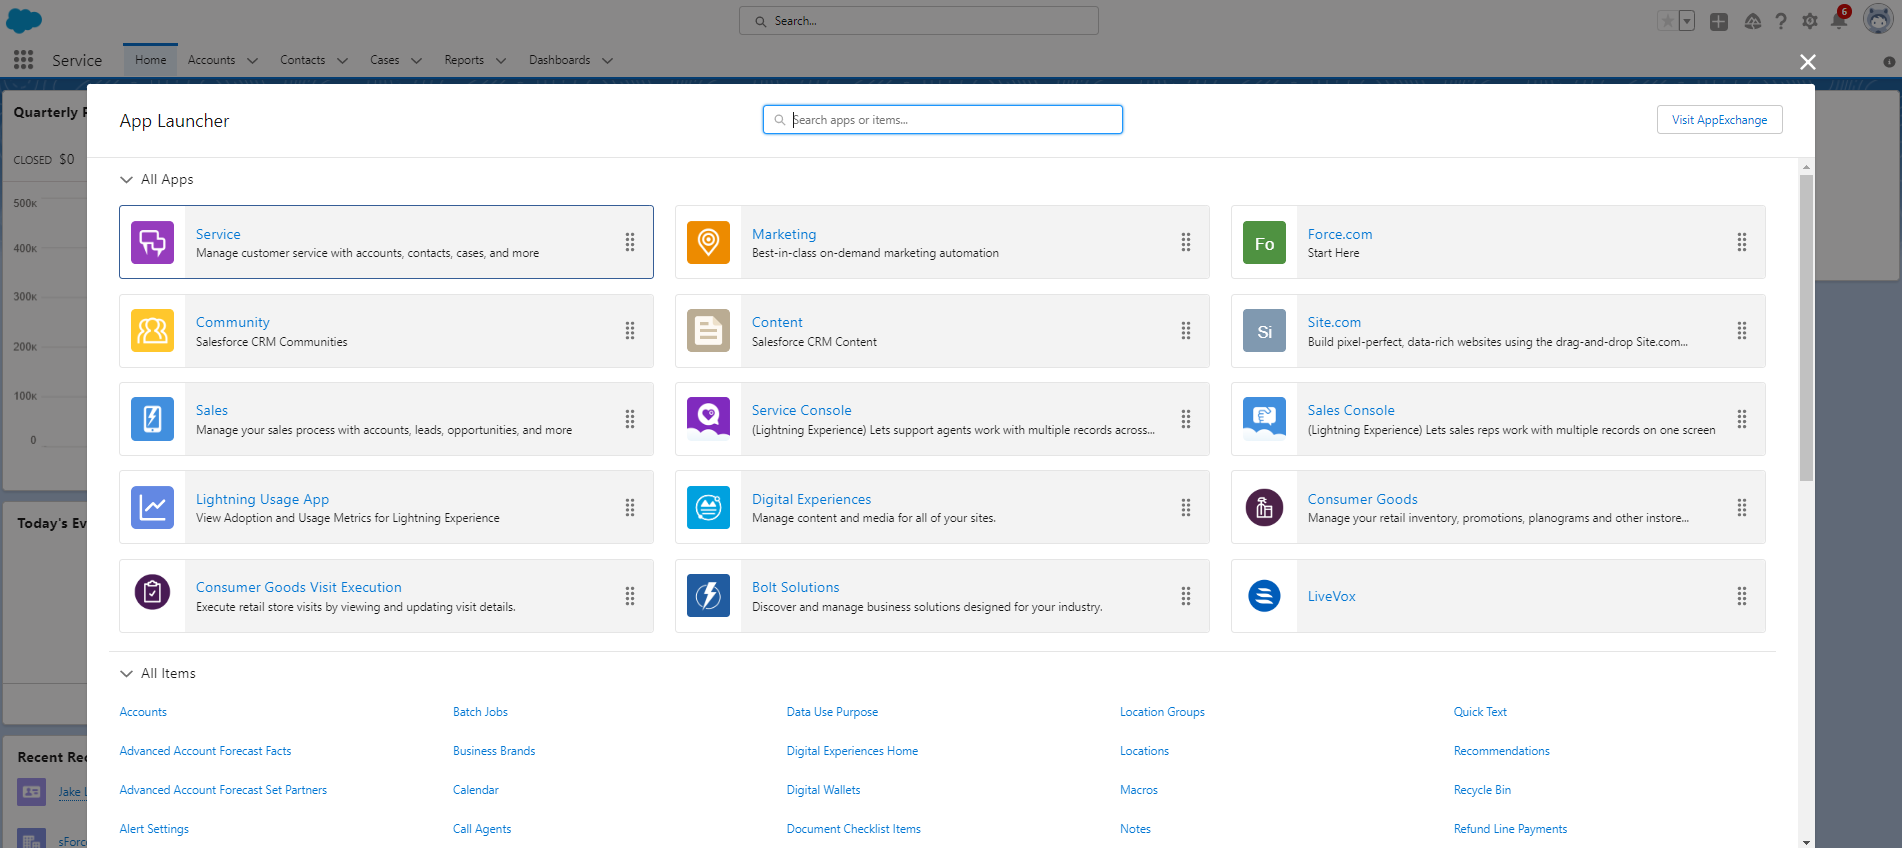
- Go to App Launcher > LiveVox Administration.
- Click Edit.
- Enter the API information:
- Client Name: The client code for the LiveVox Portal. Ensure that you are using the client code, not the client name.
- LiveVox Endpoint URL = choose one of the following based on the LiveVox portal environment.
NA3: https://api.livevox.com
NA4: https://api.na4.livevox.com
NA5: https://api.na5.livevox.com
NA6: https://api.na6.livevox.com - LiveVox Access Token: The API token for the LiveVox portal.
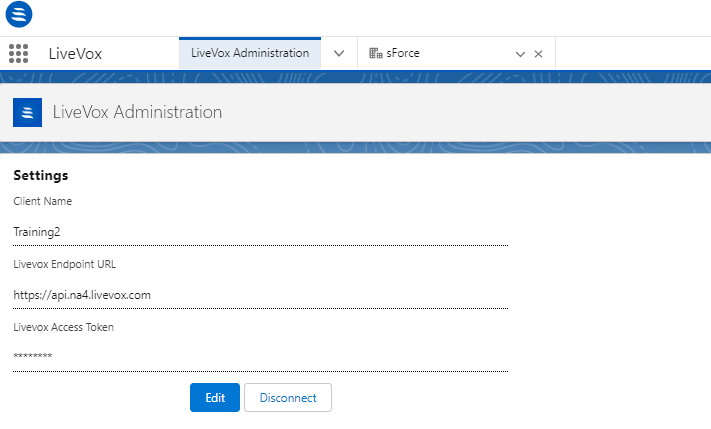
- Click Save.
A success message is displayed.
Configuring the Utility Bar
- Go to Setup.
- Using Quick Find, search for App Manager.
The list of applications that your agents use appears.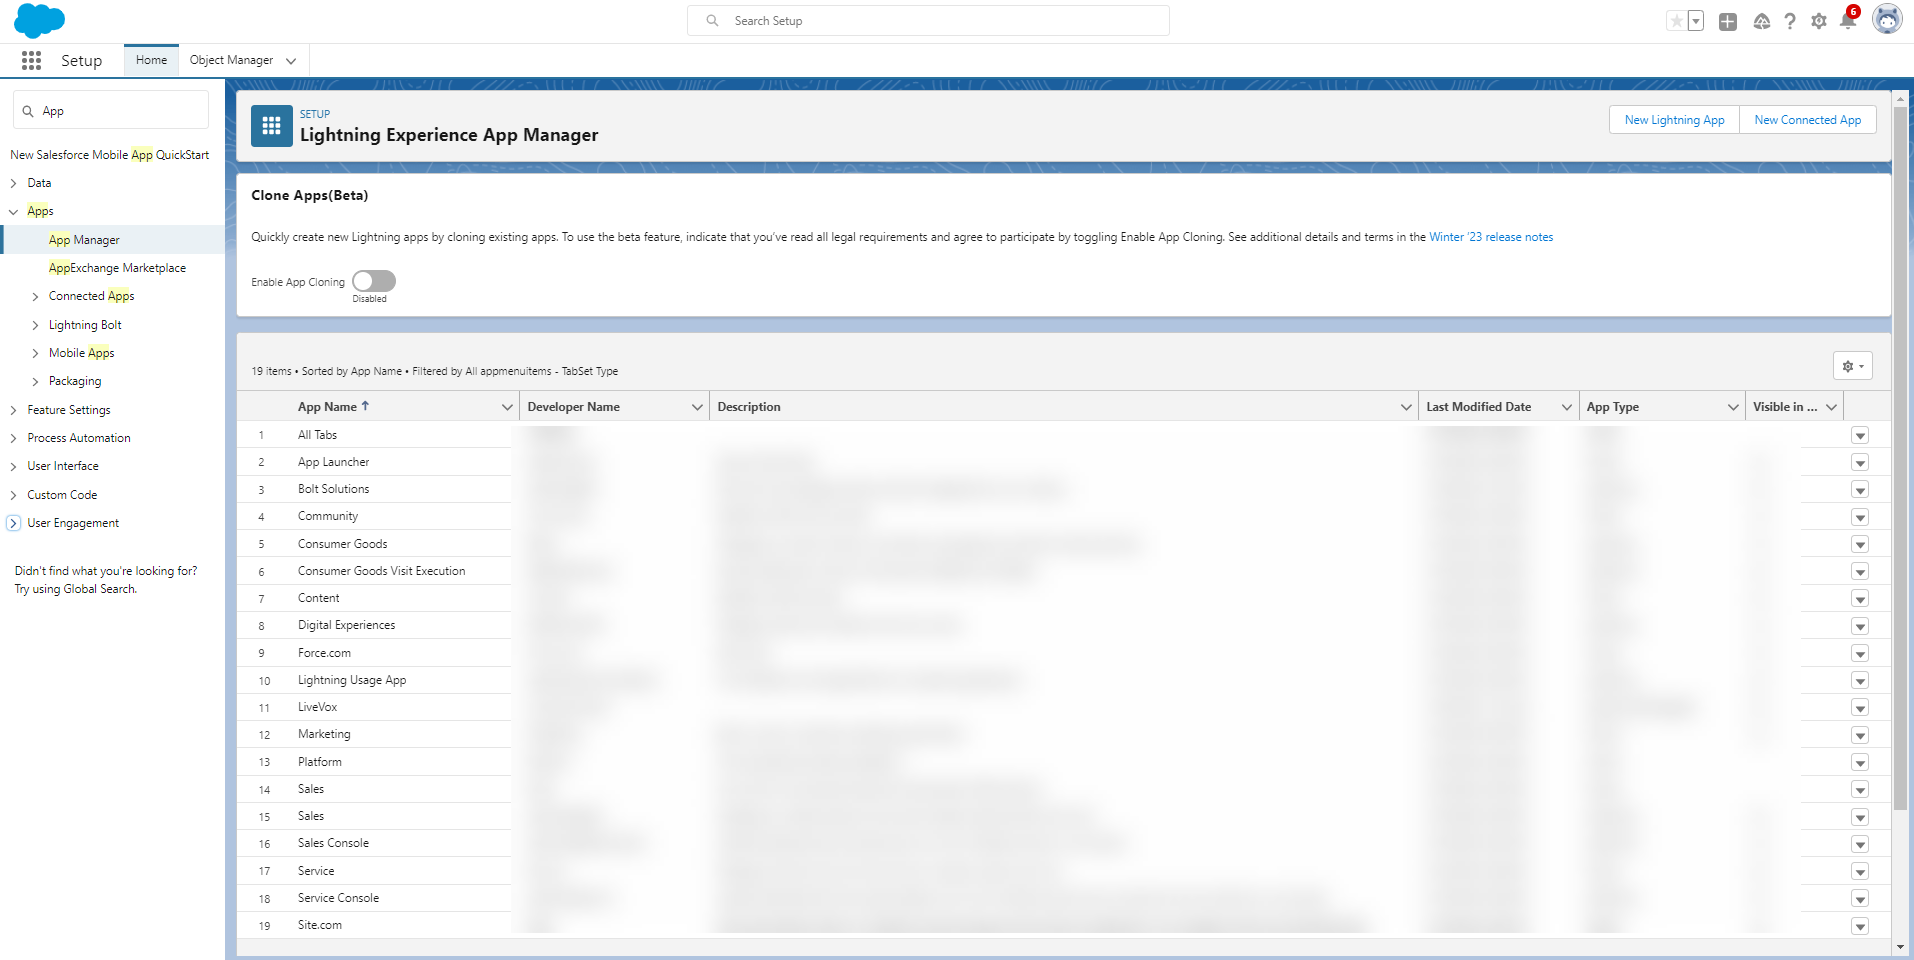
- Click the Edit button corresponding to the application that your agents use.
- Go to Utility Items (Desktop Only).
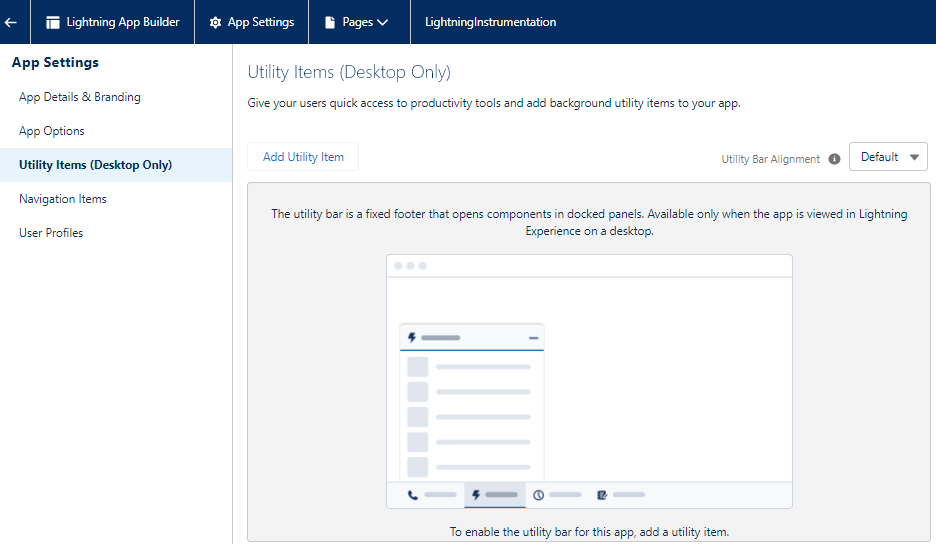
- Click Add Utility Item.
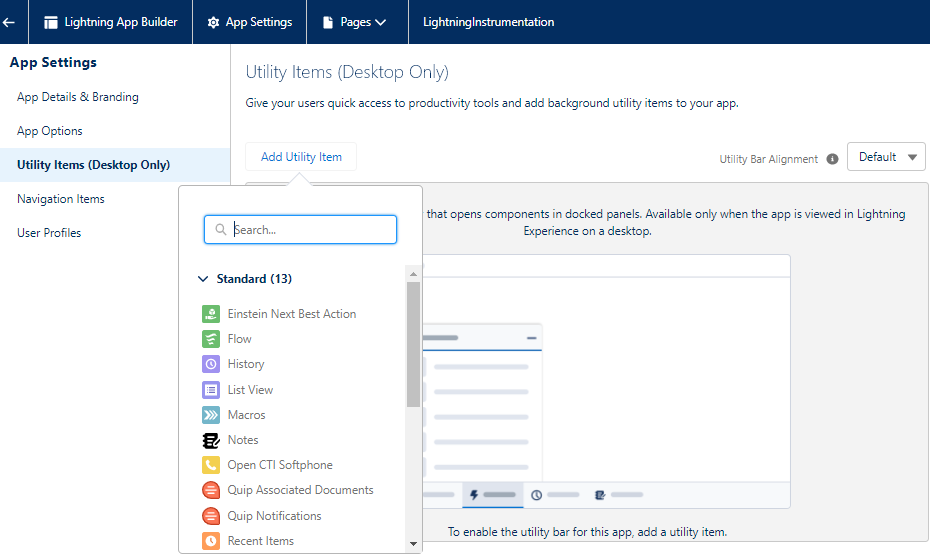
- Add Open CTI Softphone.
- Add LiveVoxPhoneToastHandler:
- Enable the Start automatically checkbox.
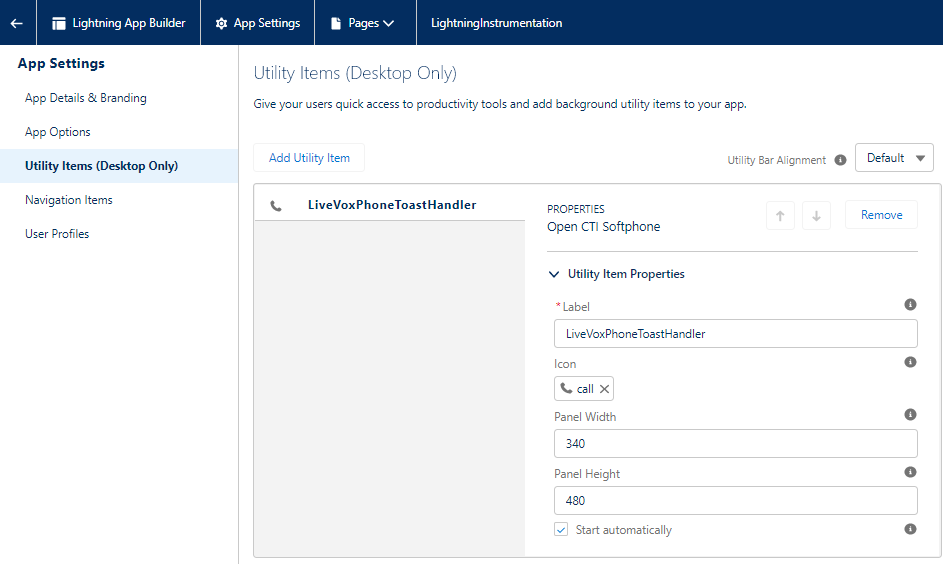
- Enable the Start automatically checkbox.
- Click Save.
Configuring Tasks (Optional)
- Assign Task Layout: Assign LiveVox Task Layout to LiveVox user profiles or add the following fields to the existing task layouts:
- Call
- Call Agent
- Recommended: Update Global Action to add LiveVox fields to Log a Call screen.
- Setup > Global Actions > Log a Call > Layout.

- Add Call and Call Agent to the layout.
- Setup > Global Actions > Log a Call > Layout.
Configuring Notes (Optional)
Confirm that Notes are enabled. To confirm:
- Setup > Notes Settings > Enable Notes.
- Click Save.
