Download PDF
Download page Home Bar and Icons.
Home Bar and Icons
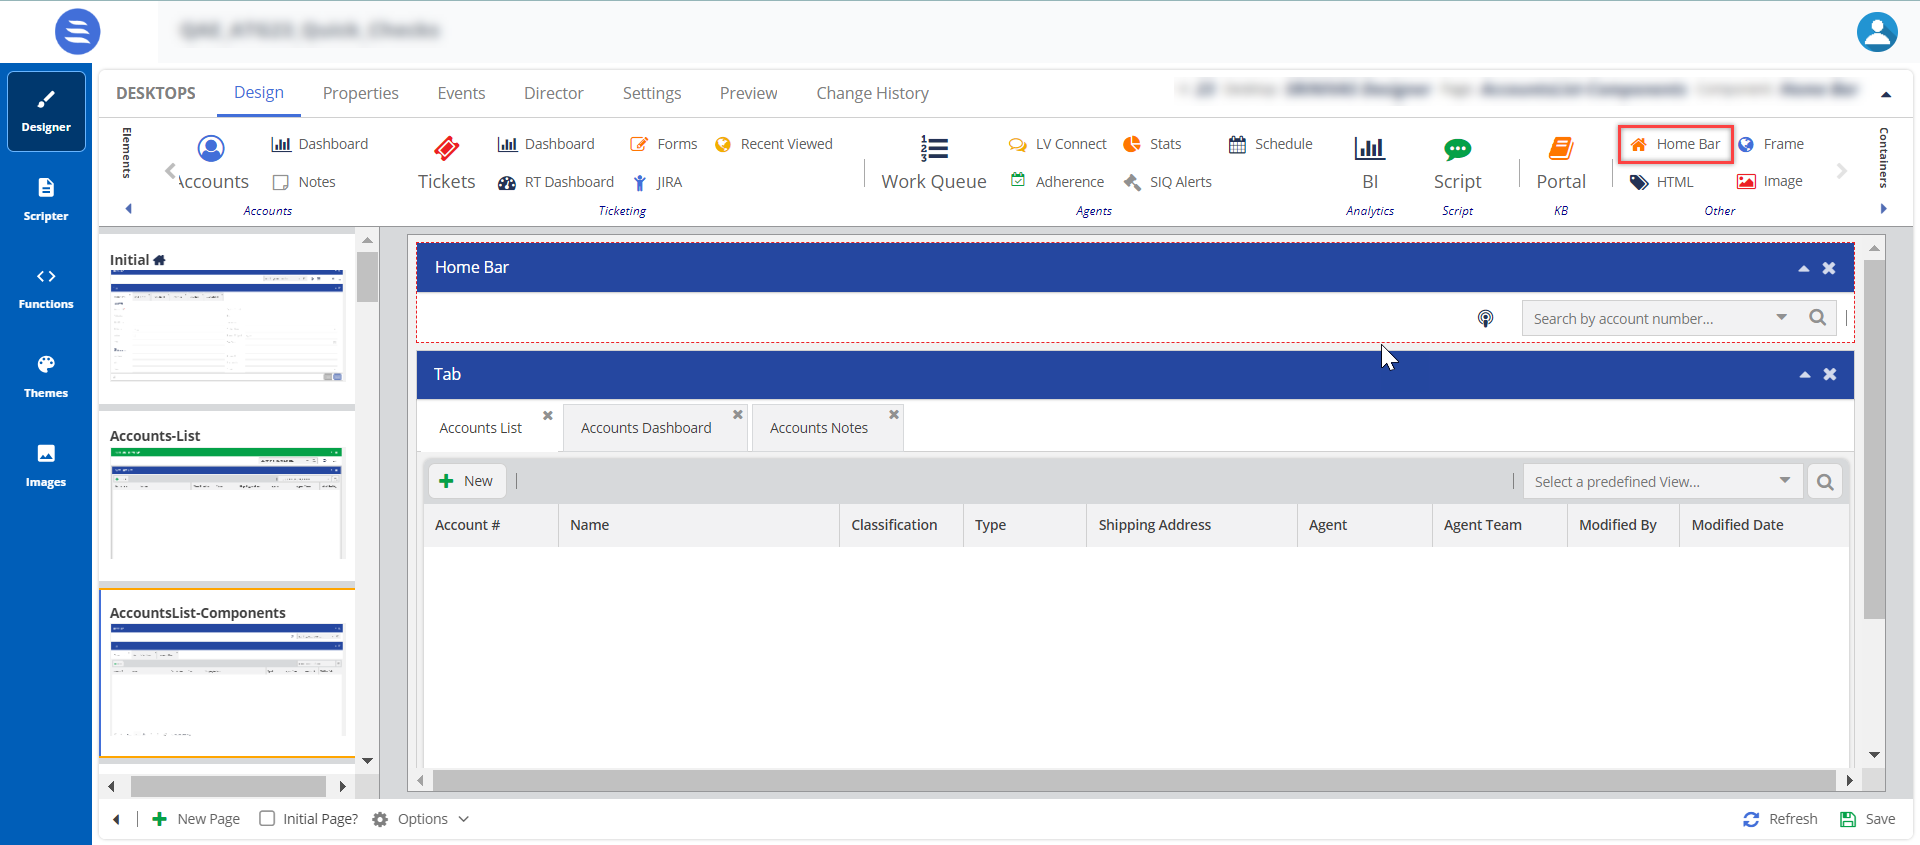
The Home Bar helps you navigate to different pages and use a few features like Agent Assist, Notes, Omni-Search, and LV Connect. You can add elements to help the agent use the desktop effectively.
![]()
The following are the field descriptions that are listed in the Home Bar based the categories as per the screenshot:
| Number | Category | Home Bar Properties | Description |
|---|---|---|---|
| Options | Notes | The agent can enable Notes and add any information that needs to be recorded or noted during the call with the customer. This option acts as a notepad for an agent. |
| Recently Viewed | Shows an agent's recently viewed contacts, tickets, or accounts. | ||
| Omni Search | Omni Search, Search By | The search functionality in the Contact Center CRM agent desktop has been enhanced to provide personalized search options. Based on the agent roles and permissions, a personalized search experience is provided to the agents so they can quickly access the data they need. You can enable the omni-search function for the agent, which means that the agent can search using a single parameter using the operators for Contacts, Accounts, and Ticketing records. |
| Screen Pop | Screen Pop | This will enable the agent to pop-up the active window during the call interaction. |
| Show on In-Call | Shows a pop-up window when an agent is on call. | ||
| LV Connect | LV Connect | LiveVox Connect (LV Connect) acts as a notification or a bulletin board channel specifically designed for the agent desktop. LV Connect displays real-time alerts, posts, and notifications to ensure that agents and managers have up-to-date information about their team and tasks. It acts as a centralized tool for the managers to post updates or reminders to their respective teams, individuals, or an entire group. For more information on adding a LV connect, see Adding LV Connect. | |
| Allow Create Posts | Allows an agent to create new posts. | ||
| Agent Assist | Agent Assist | With Agent Assist, agents can interact with customers more efficiently, provide information about existing offers, resolve customer issues quickly, and avoid errors during interactions. |
| Enable Notes | When the Enable Notes option is selected, the agent can add notes in the LV Connect window. | ||
| Enable Suggestion | When the Enable Suggested option is selected, the agent can add suggestions in the LV Connect window. | ||
| Enable Summary | When the Enable Summary option is selected, the agent can add a summary in the LV Connect window. | ||
| Enable Transcript | The agent can view the transcript of the Fresh/Spanish text. | ||
| Manual checkoff | The agent can manually check out from the LV Connect window. | ||
| Knowledge Base | Knowledge Portal Button | The agents can click the Knowledge Portal Button on the Home Bar to refer to any particular article or select the list of articles. |
You can create and design multiple pages. Ensure you add the Home Bar element on each page for better navigation.
Adding the Home Bar and Icons
To add a home bar and icons to the page:
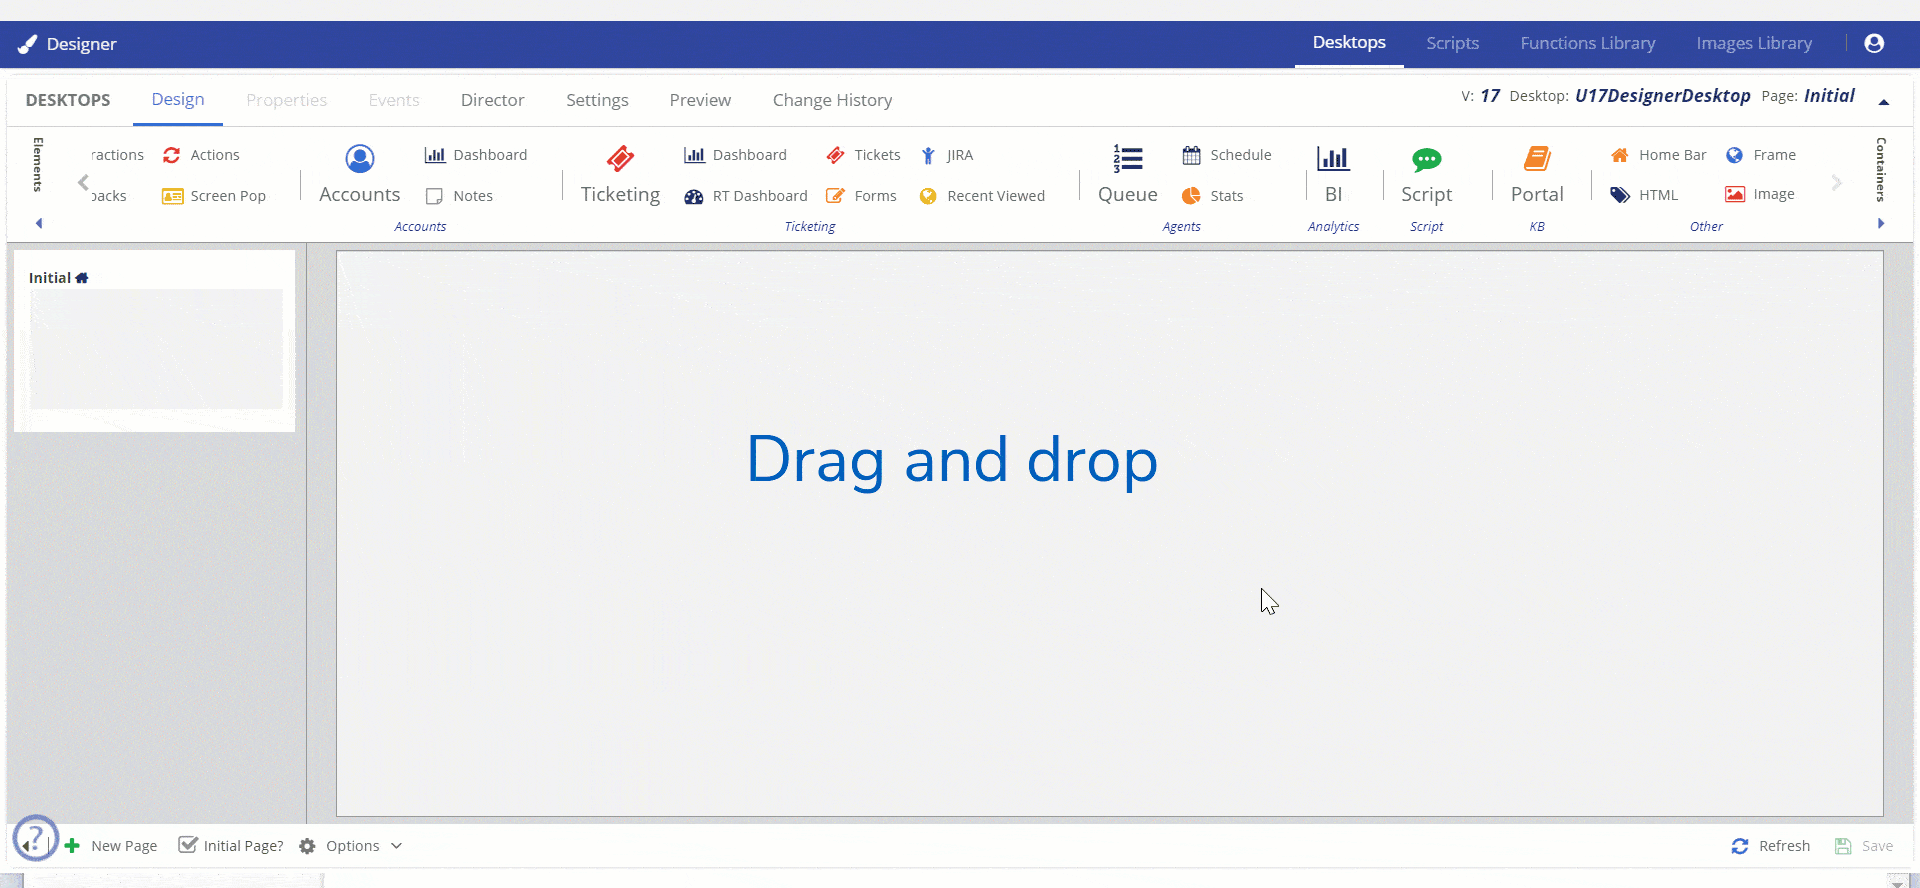
- On the page, select the Elements section.
- Drag and drop the Home Bar icon to the page.
- Hold the Home Bar and drag it to the top of the page.
- To add icons and change the properties of the Home Bar, click the Properties tab.
- Enable the highlighted elements as shown in the image.
The details will appear on your Home Bar.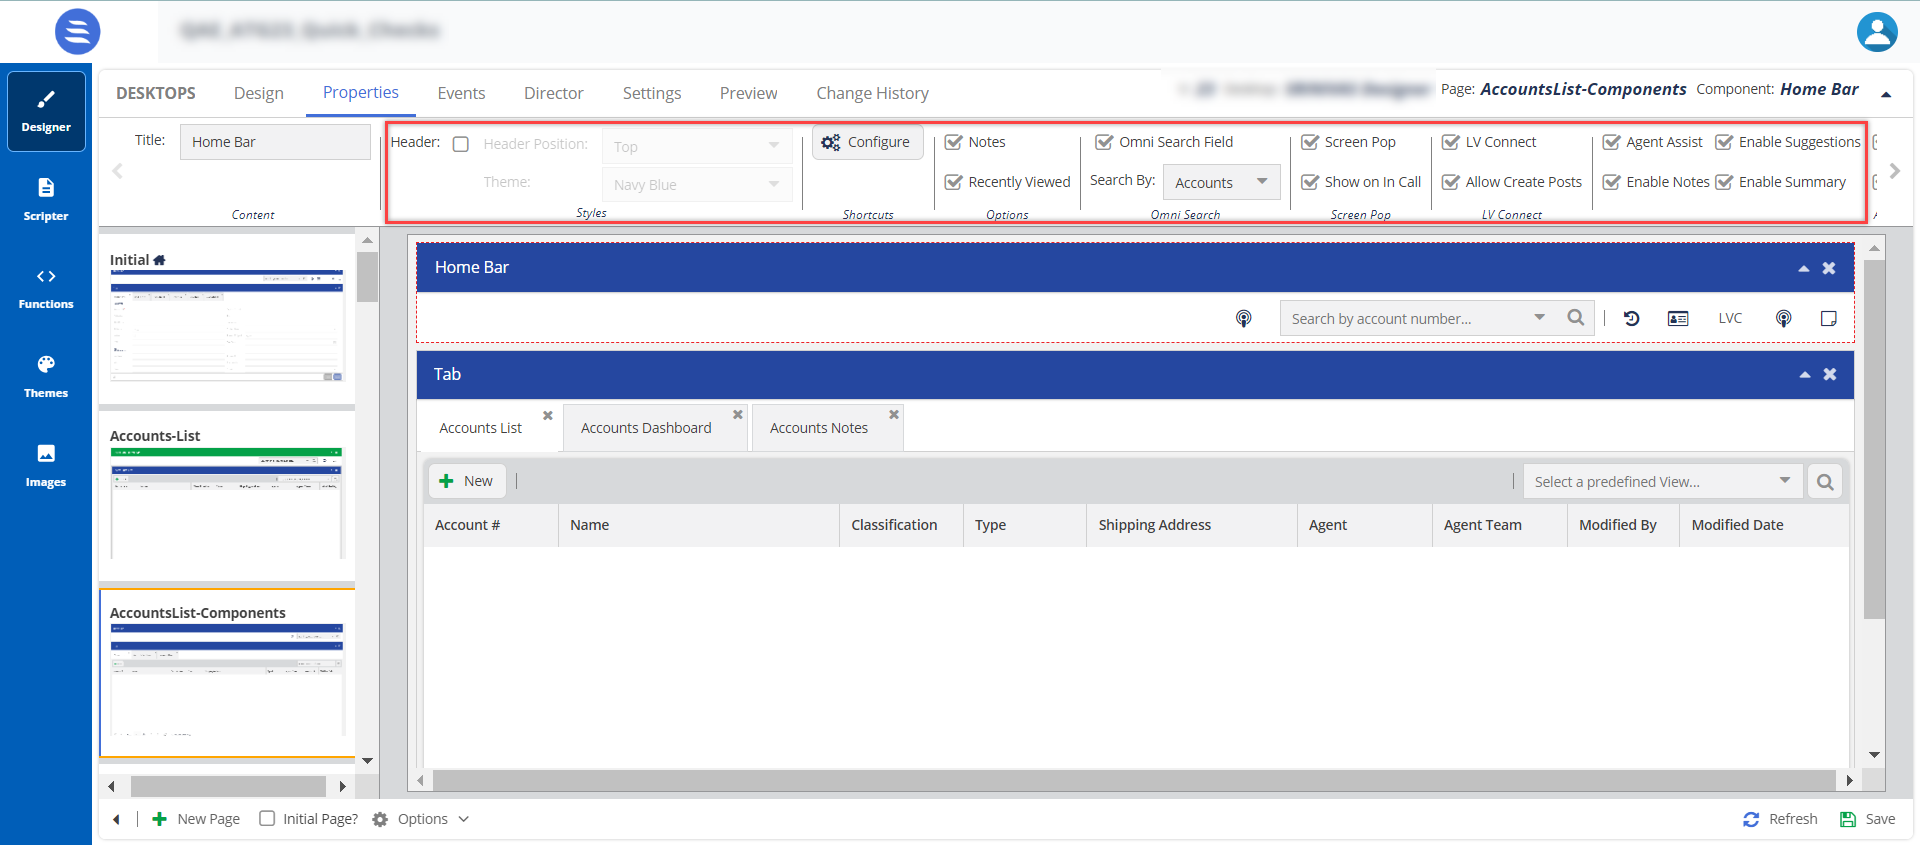
- You can add icons and configure an event, or you can add icons and trigger an API functions when you click the icon. Click the Configure button.
The Home Bar Buttons Setup window appears.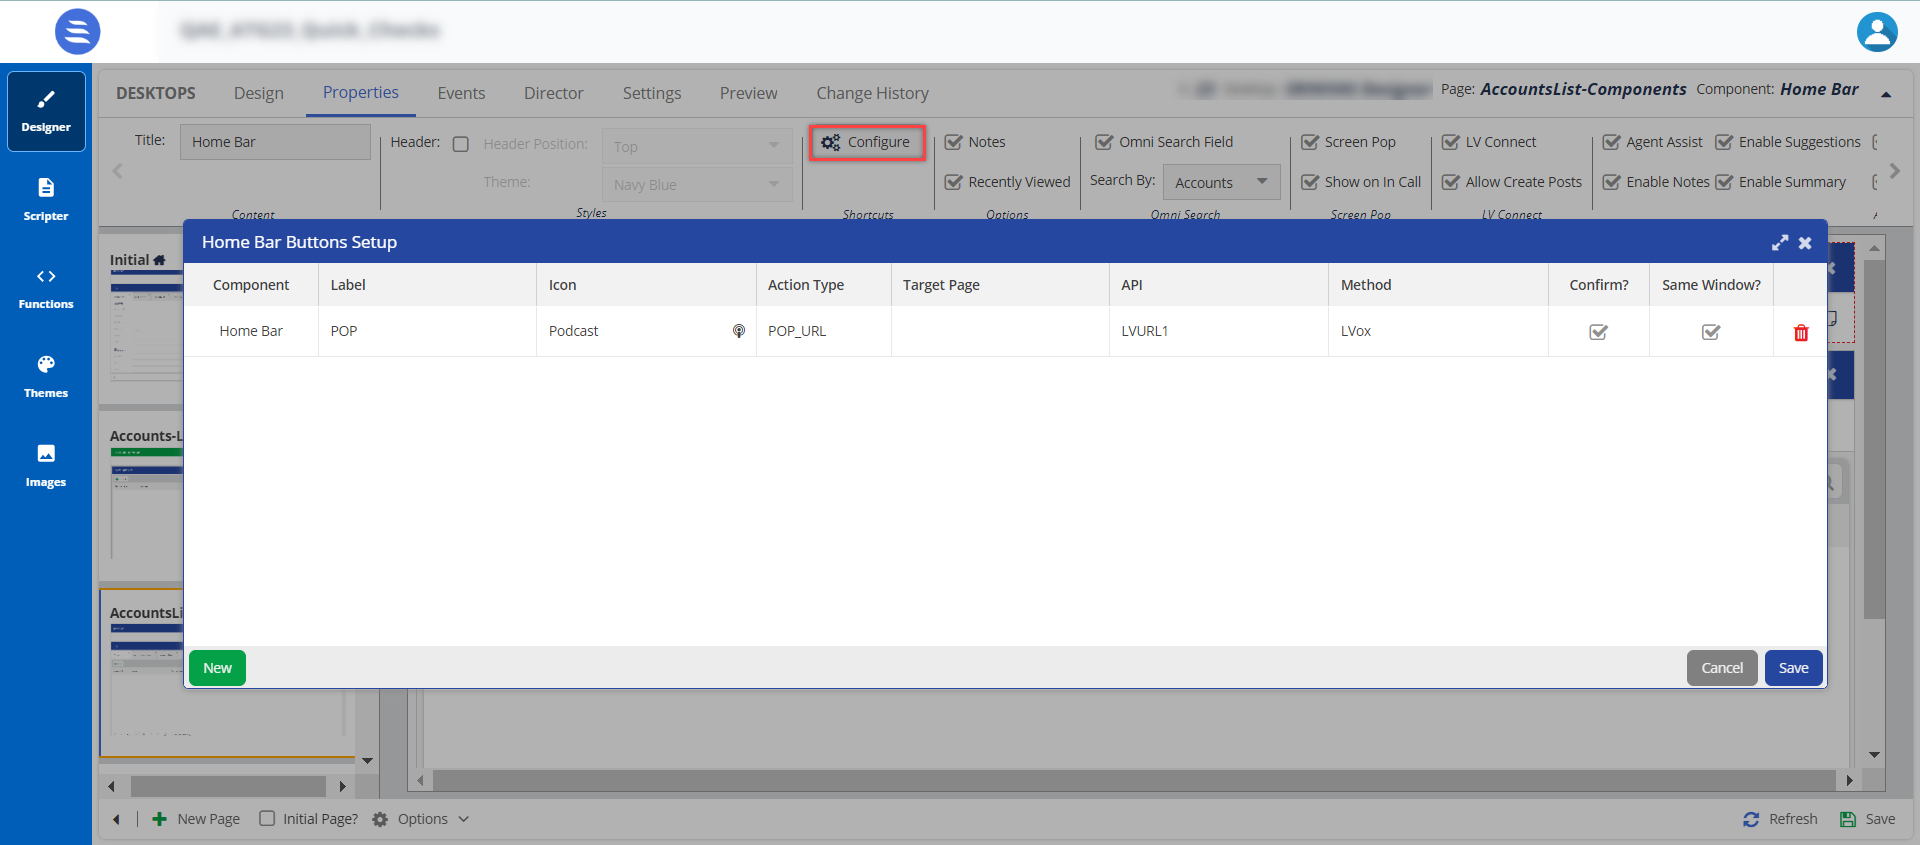
In the Home Bar Buttons Setup window, perform the following steps:

Home Bar Icons
The icons appearing on the Home bar are given below.

Adding Custom Buttons
Apart from the buttons in the Properties menu, you can add custom buttons to your home bar. In the Properties tab, click Custom Buttons.
The Home Bar Buttons Setup appears.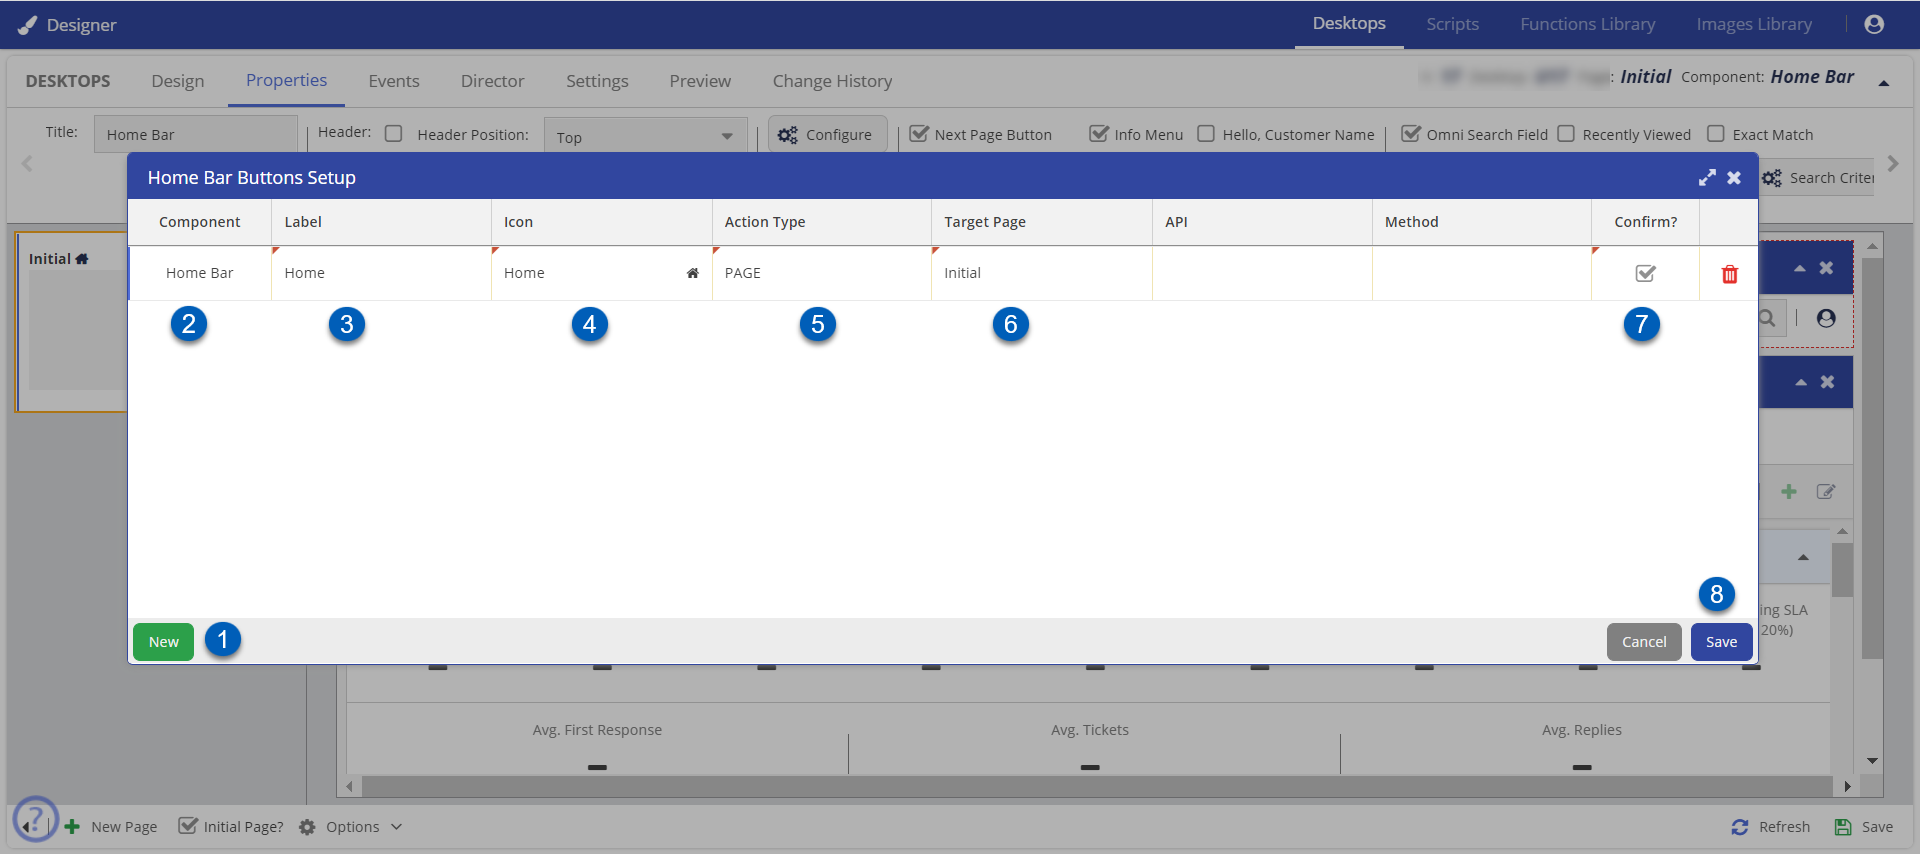
- Click New.
- By default, the Component is Home Bar.
Specify the Label as Home.
Since you want to add a Home button to the Home Bar, specify it as Home. To add any other icon, you must select the relevant name accordingly.
- Select the Home icon from the drop-down list.
Select the Action Type as Page.
The available Action Types are:
- API: This field appears when the value in the Action Type field is FUNCTION CALL or POP URL.
- Page: Displays all the created pages.
- Pop URL: Displays an external webpage on a new browser tab.
- Push URL: Displays an external webpage on an existing browser tab.
Select Initial from the drop-down list for the Target Page.
The initial page is the first or the landing page.
- Enable the Confirm? Option.
- Click Save.
Show Me How
This video shows the steps involved in transitioning between pages.