Download PDF
Download page SpeechIQ Library.
SpeechIQ Library
SpeechIQ Library is a repository of different books wherein each book itself is a collection of various available assets. LiveVox provides various books out of the box for quick and easy implementation such as Grade Templates, Interaction Intents, Keyword Lists, Scorecards, Synonyms, Tags, Redaction Settings, Word Replacement, and Client Integrations. Each book in the library can consist of any number of assets of different types.
You can use SpeechIQ Library to apply books to clients or clients can use to apply to trusted partners. The assets that are part of the book help the clients with basic information to start using the LVP (LiveVox Portal).
Accessing the SpeechIQ Library
To access the SpeechIQ Library, on the WFO tab, click SpeechIQ > Configuration > SpeechIQ Library.
The SpeechIQ Library window, displays all the available books.
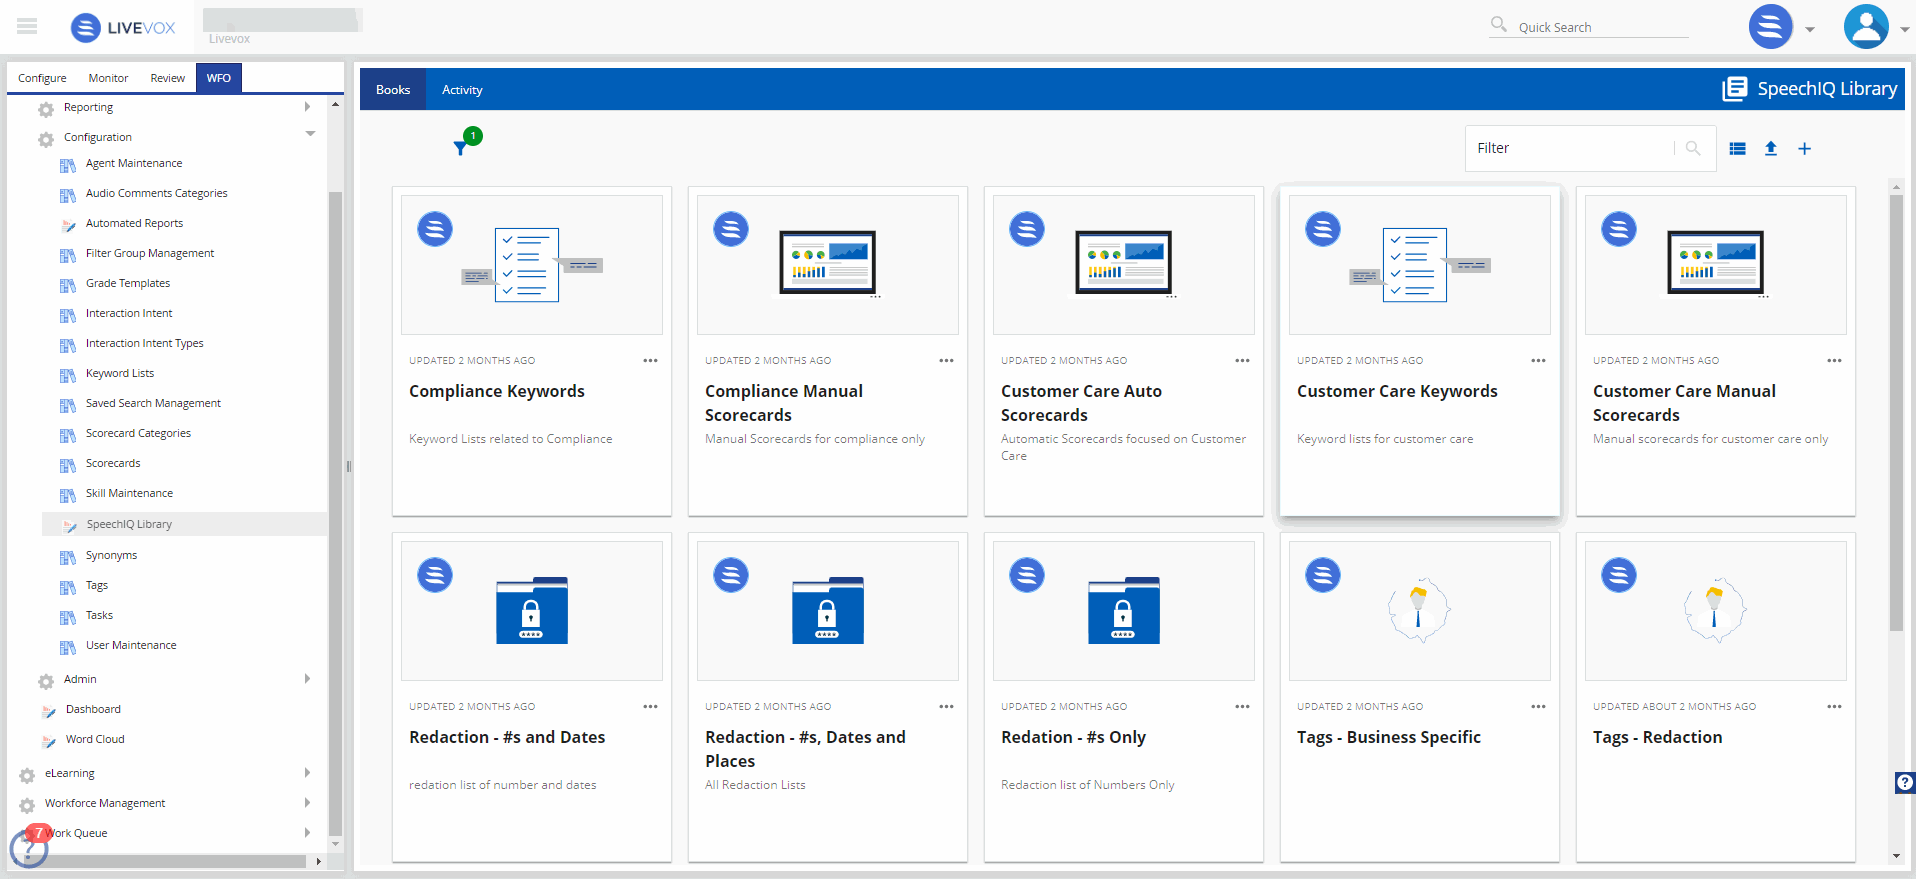
SpeechIQ Library window consists of the following two tabs:
- Books - You can see all the available books in the library in the Books tab. This tab also enables you to create new books, copy/add assets to books.
- Activity - You can see activity details such as when and who applied a book and to which client.
- Use the Filter field to narrow down your search. Type the name/part of the book name to list books matching the criteria.
- Click
 icon to narrow the search further. Click Active Only check box to list only the books marked as active. You can also use the radio button to list All books, Livevox Only books, or Client Only books.
 - Click
 icon to change to list view.
 - Click
 icon to copy assets to a trusted partner portal.
 - Click
 icon to create a new book.
Create a New Book
To create a new book:
- From the SpeechIQ Library window, click .
The Settings tab for the new book opens.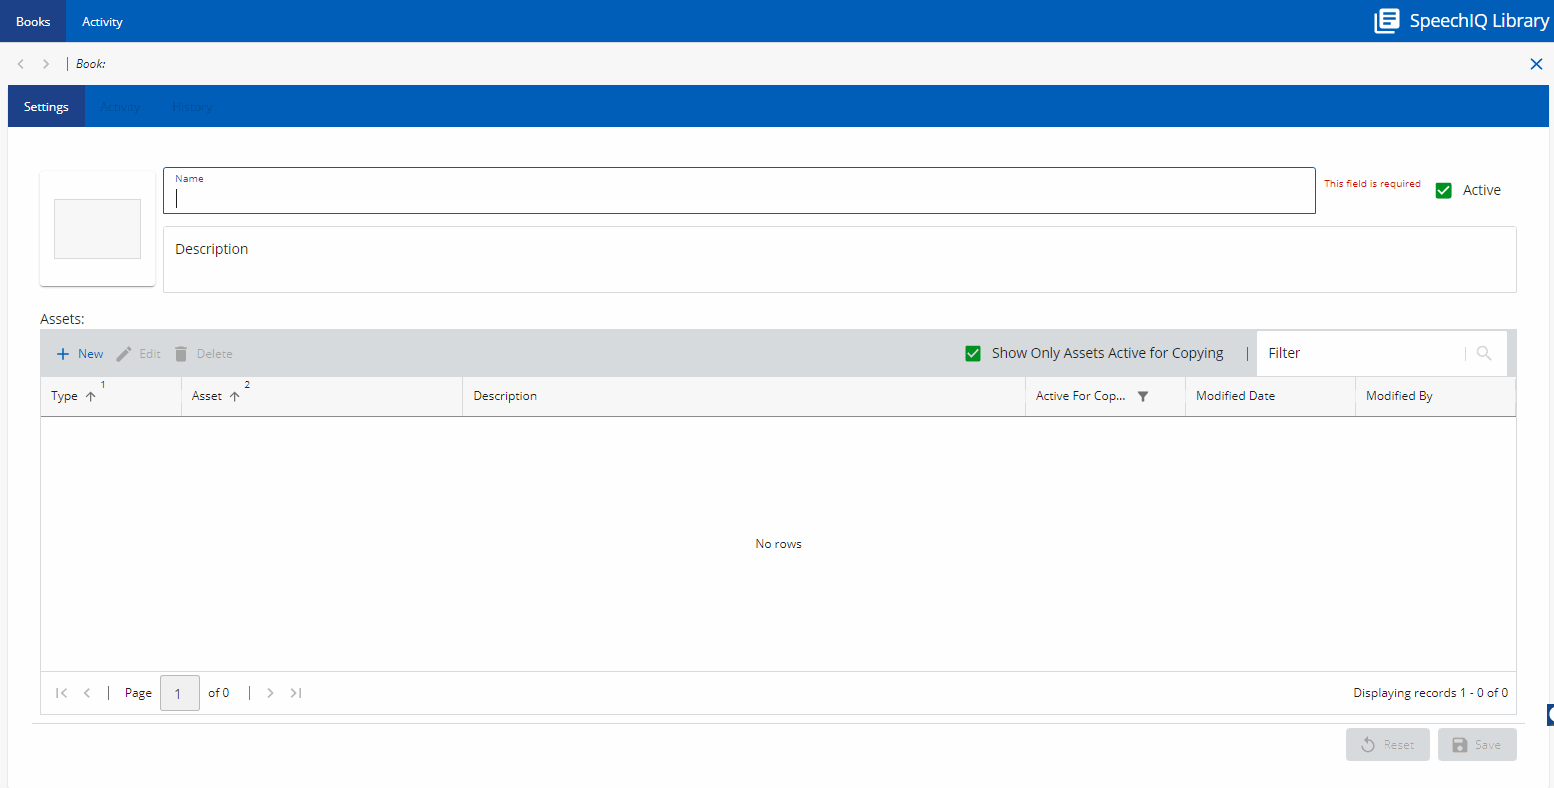
- Enter the Name and Description for the book.
- To set a cover for the book, click square box on the left of the Name field.
The Select Book Cover page is displayed.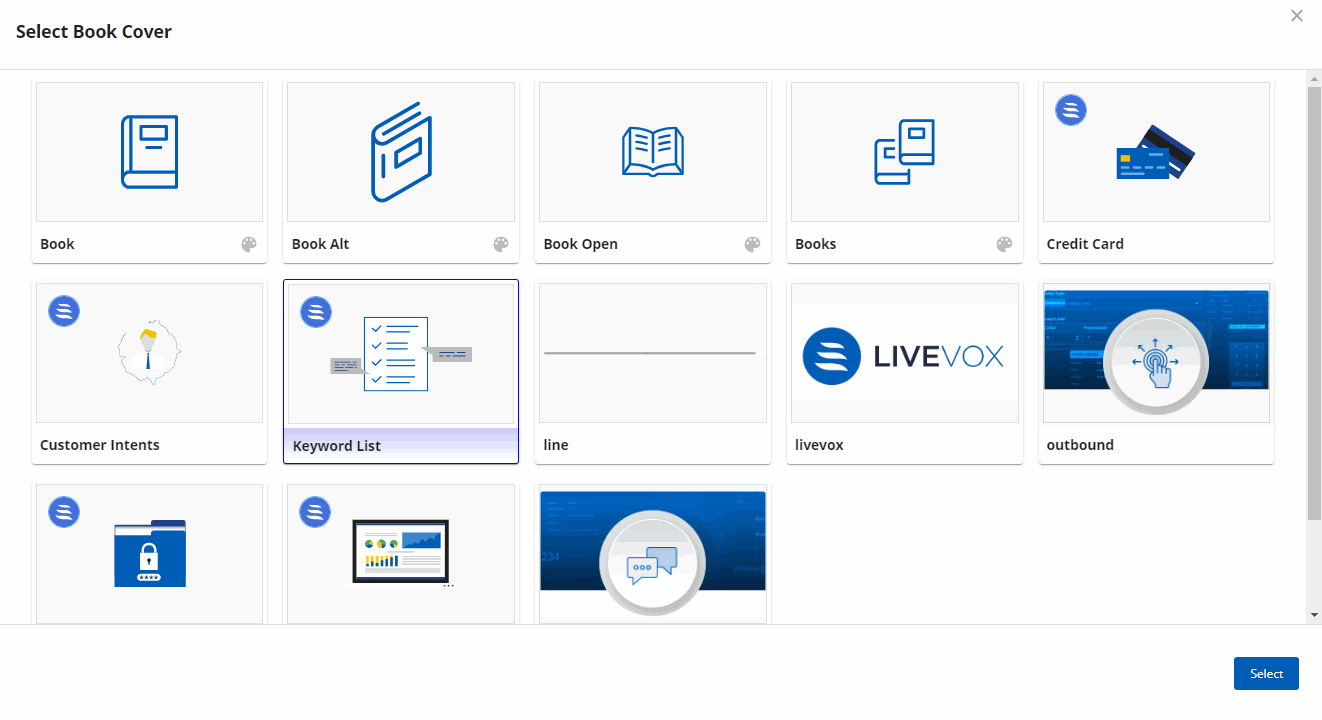
- Choose a cover for your book and click Select.
- Back in the Settings tab, select the Active check box to make the new book active.
Only active book can be applied to clients/trusted partners. - In the Assets section, click New to add new assets.
The Add Assets to Book window opens.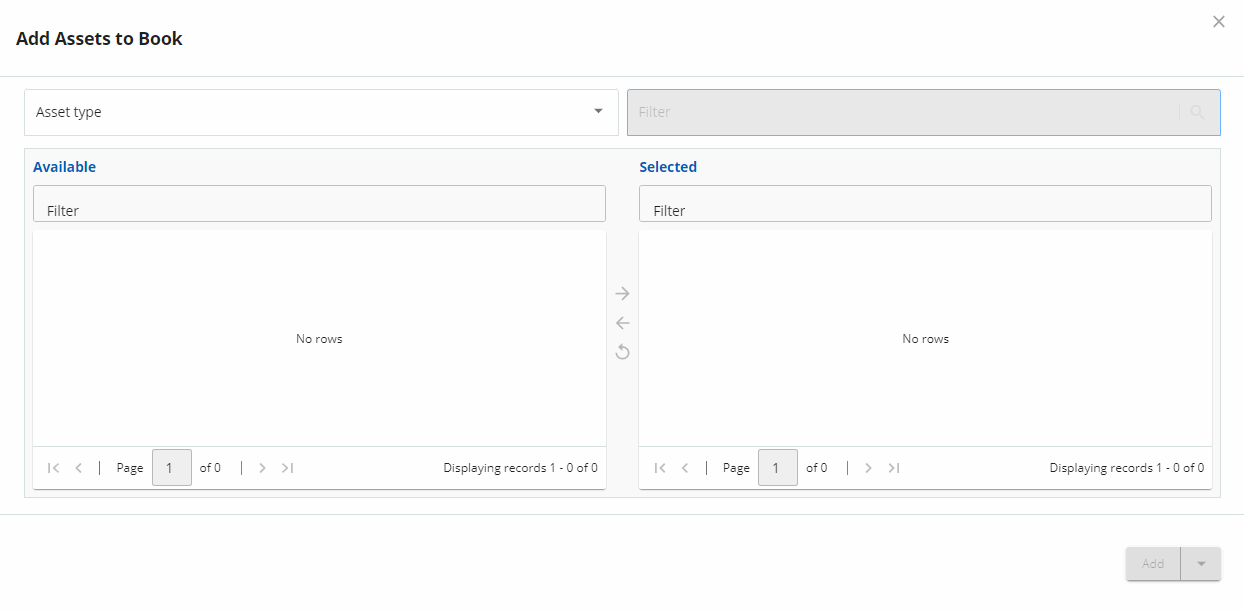
- Click the Asset type drop down and select the type of asset.
- Select the required asset(s) from the Available list and move to Selected list using the arrow key.
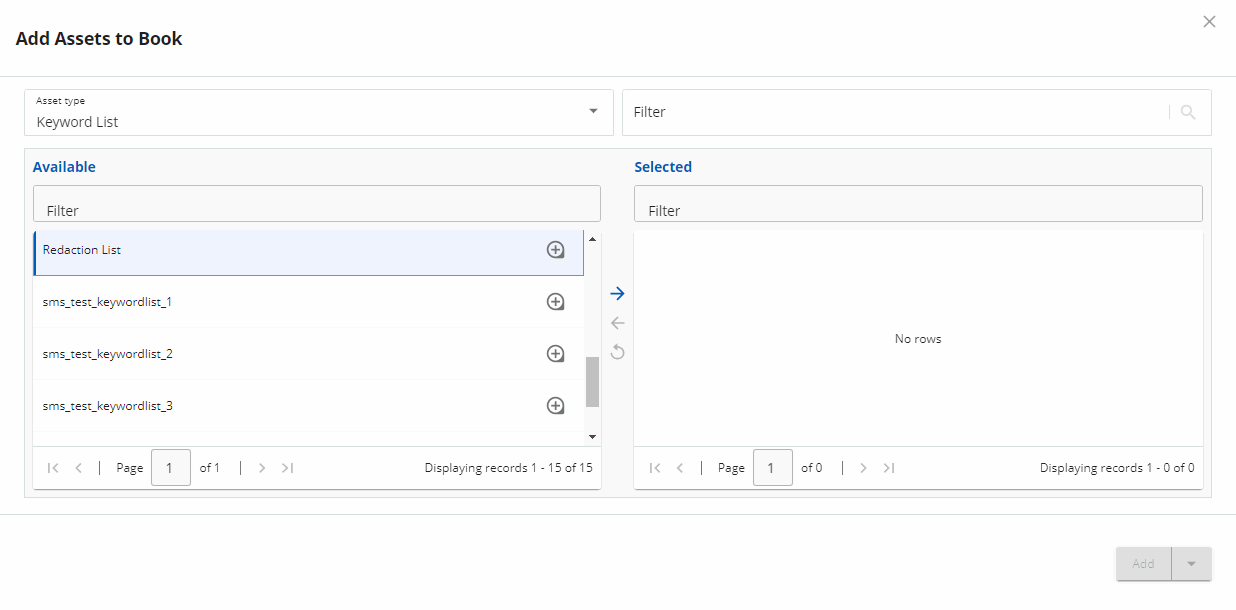
- Click Add. Repeat Step 8 to add more assets.
- To view details of the asset, click
 . The Asset Details page opens with all the details of the asset.
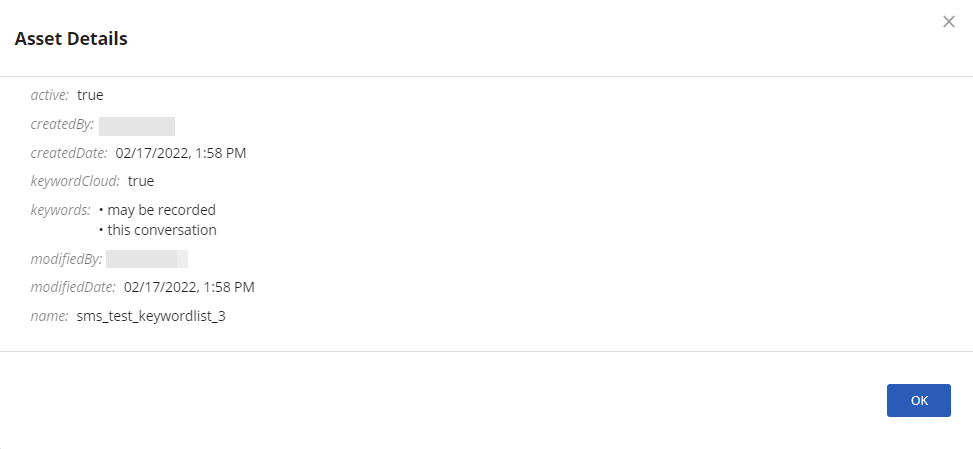
- Once done, in the Add Assets to Book window, click the arrow key next to Add button and select Add and Close.
- To edit an asset, select the asset and click Edit. You can modify the description and select Active for Copying to enable copy of this asset.
- To delete an asset, select the asset and click Delete.
Edit a Book
- On the SpeechIQ Library window, click icon to change to list view.
- In the list view, select the book you want to edit, and click Edit.

- In the Settings tab, modify the Name, Description, and any other changes as required.
In the Assets section, you can add, modify, or delete assets as necessary.

The Activity tab provides details of all the updates made to the book over a period of time. The History tab provides details of the different versions created over a period of time.
- Click Save to save the changes.
Delete a Book
- On the SpeechIQ Library window, click icon to change to list view.
- In the list view, select the book you want to edit, and click Delete.
- Select Yes to confirm.
Copy Assets
- On the SpeechIQ Library window, click icon to change to list view.
- In the list view, select the book you want to edit, and click Copy Assets.
- To copy a book(s) from one client/trusted partner to another, click the To Client tab.
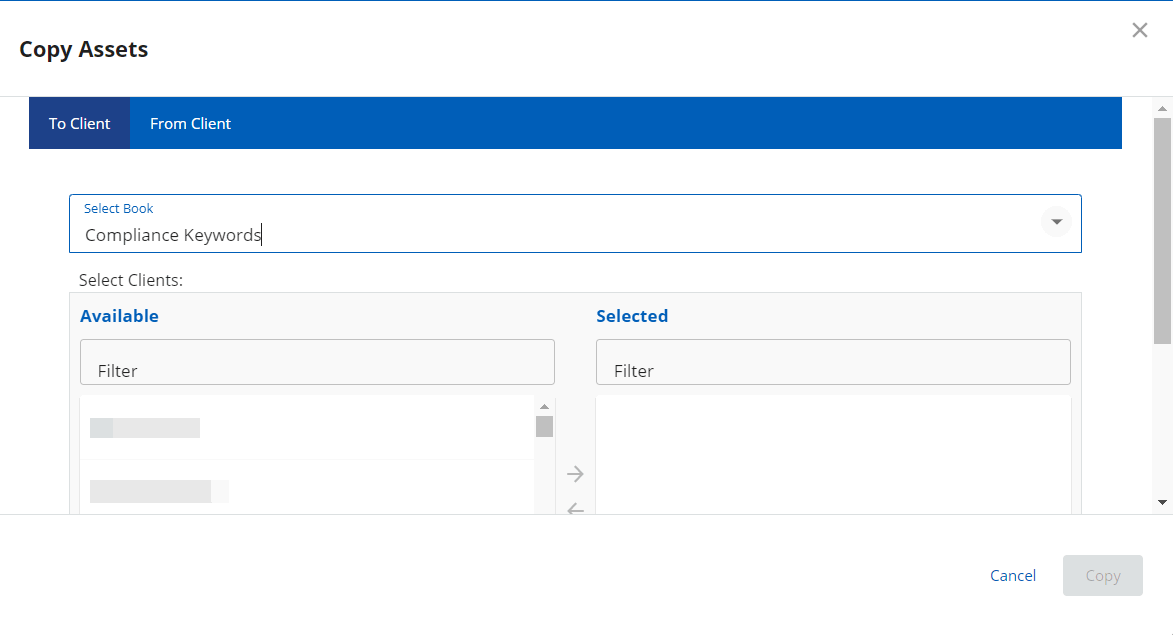
- Select the book from Select Book dropdown menu.
- Under Select Clients, choose the clients from Available list to the Selected list.
- Click Copy.
- To copy a book to a client, click the From Client tab.
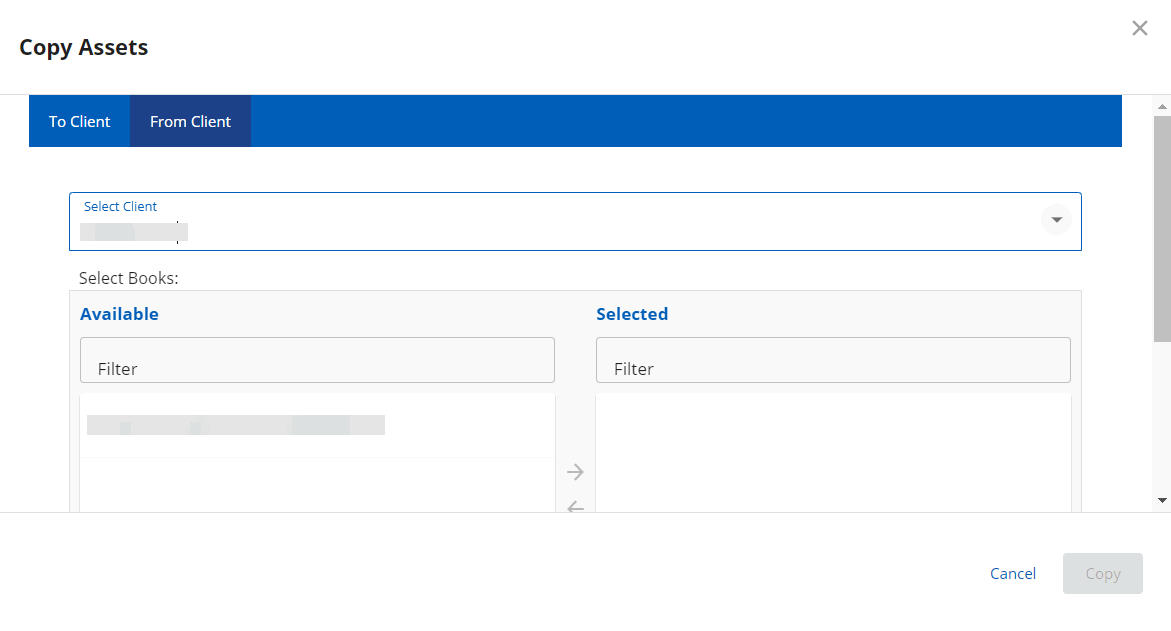
- Select a client from Select Client dropdown menu.
- Under Select Books, choose the clients from Available list to the Selected list.
- Click Copy.