Download PDF
Download page Scheduling Settings.
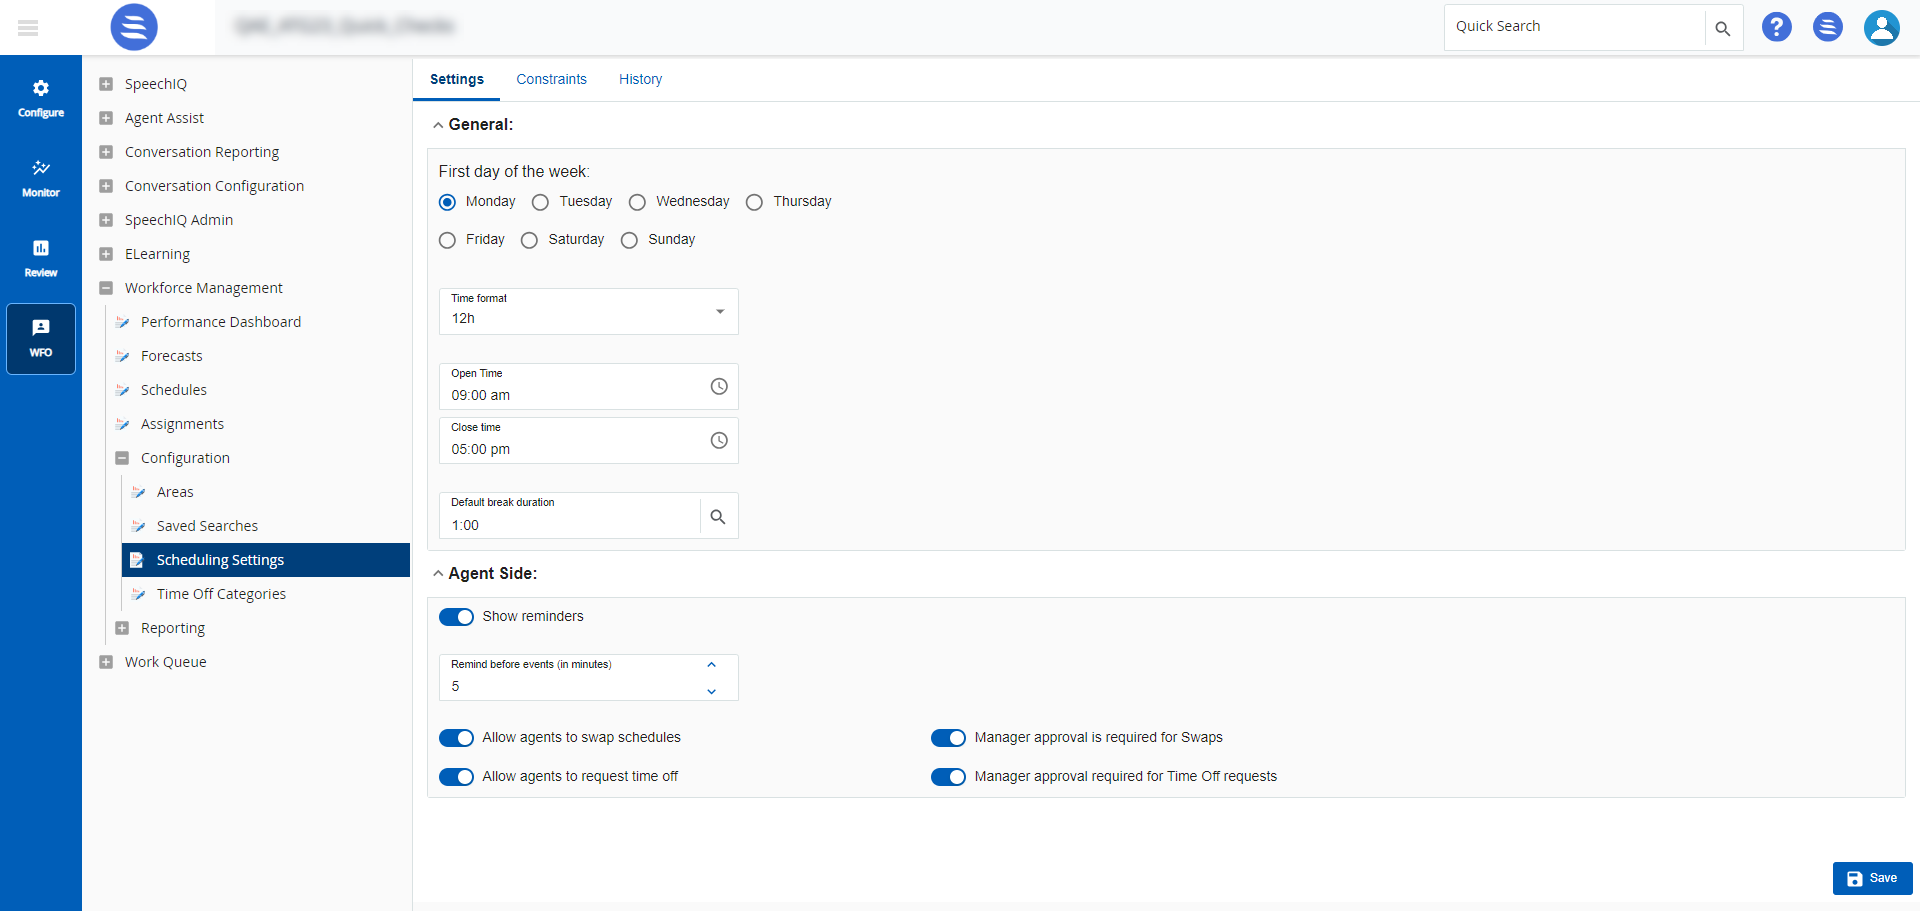
Scheduling Settings
The Scheduling Settings window allows you can define a schedule - such as the first day of the week, time format, start and end time, and the duration of the break. You can also allow schedule notifications and allow agents to swap shifts and request leaves. In addition, you can configure the approval workflows.
To define the scheduling settings, navigate to WFO > Workforce Management > Configuration > Scheduling Settings.
Configuring Settings
To configure scheduling settings:
- Navigate to WFO > Workforce Management > Configuration > Scheduling Settings.
- In the Settings tab:
Specify values in the following fields:
Field Description First day of the week This field contains the days of the week as options. Select the day when you want the work week to begin for a shift. Time format - If you want the time in the shift to appear in the 12-hour time format, select 1:00 pm.
- If you want the time in the shift to appear in the 24-hour time format, select 13:00.
Open time Select the start time of the shift. Close time Select the end time of the shift. Default break duration Select the duration of the break. Show Reminders Select this check box if you want agents to be notified when their shift begins. You can configure the time in minutes.
Allow agents to swap shifts Select this check box only if you want to enable agents to request swapping of their shifts with other agents.

The agent who receives a shift swapping request can accept or reject the request.
Require manager approval for swaps Select this check box only if you want the shift swapping requests to be sent to the shift manager for approval.
The shift manager is the user that appears in the Manager for approvals field on the Shifts tab of the Agent Scheduling window.
Allow agents to request time off Select this check box only if you want to enable agents to request leave. Require manager approval for time off requests Select this check box only if you want leave requests to be sent to the leave manager for approval.
The leave manager is the user that appears in the Manager column for the respective leave category on the Time Off Categories tab of the Agent Scheduling window.
- Click
 .
.
The general settings are configured.
- In the Constraints tab:
Specify values in the following fields:

Field Description General Agent's minimum schedule duration (in minutes) Enter the minimum schedule duration for an agent. The value automatically gets converted to hours and displayed. The minimum value for this field is 15 minutes. Agent's maximum schedule duration (in minutes) Enter the maximum schedule duration for an agent. The value automatically gets converted to hours and displayed. The minimum value for this field is 15 minutes.
Agent's minimum minutes between schedule Enter the minimum duration that you want to provide between schedules. Maximum number of hours per day for an agent Enter the maximum number of hours per day that can be assigned to an agent.
Maximum hours per week for an agent
Enter the maximum number of hours per week that can be assigned to an agent. Number of minutes after a schedule starts that the first break can be scheduled Enter the number of minutes after a schedule starts that the first break can be scheduled. The minimum value for this field is 15 minutes. Number of minutes before a schedule ends that the last break can be scheduled Enter the number of minutes after a schedule ends that the last break can be scheduled. The minimum value for this field is 15 minutes. Meal break details Is a meal break required? Use the toggle button to select if a meal break is required.
How many minutes does a person need to be scheduled for to be eligible for a break? Enter the duration for which an agent needs to be scheduled on the job to be eligible for a meal break. The value automatically gets converted to hours and displayed. What is the duration of the break? Duration of the meal break. The value automatically gets converted to hours and displayed. Is the meal break paid? Whether the meal is paid for by the company. Break details Is a break required? Select an option to provide details of the break. How many minutes does a person need to be scheduled for to be eligible for a break? Enter the duration for which an agent needs to be scheduled on the job to be eligible for a break. The value automatically gets converted to hours and displayed. What is the duration of the break? Duration of the break. The value automatically gets converted to hours and displayed. Is the break paid? Whether the break is paid for by the company. Number of minutes between meals and/or breaks Enter the gap between meals or breaks. Maximum number of employees on break at one time Select how many agents can be on a break at one time. Average agent hourly cost Cost incurred for an agent per hour (in $) - Click .
The History tab provides details of all the scheduling settings such as Name, Created By, Created Date, and Description.