Download PDF
Download page Forms.
Forms
System administrators, superusers, and managers with permissions can create a form to support different customer requests because the form contains predefined fields designed using the template from the Design tab. You can insert fields to retrieve data from accounts, contacts, and tickets. The form enables you to process issues faster and improve the customer experience. Using the forms attachments option, you can provide your customers with survey forms to collect their feedback and automatically route the tickets to the appropriate department with all the key information.
The Forms tab contains the following subtabs:
- Design: Used to design the form
- Settings: Used to create and design the appearance of the form
- Preview: Used to preview your form design
- Activity: Used to view the tickets that were created using the form
- Change History: Used to view the history of the changes made to the form and who had made the changes
Creating a Form
On the Agent Desktop, you use a form to configure the template used for a ticket. For example, you can create a survey form for your customers to collect feedback on the service call request handled by the agent.
To create and design a form:
- On the Ticketing Config screen, click the Forms tab and then click New.
The Create Form window appears.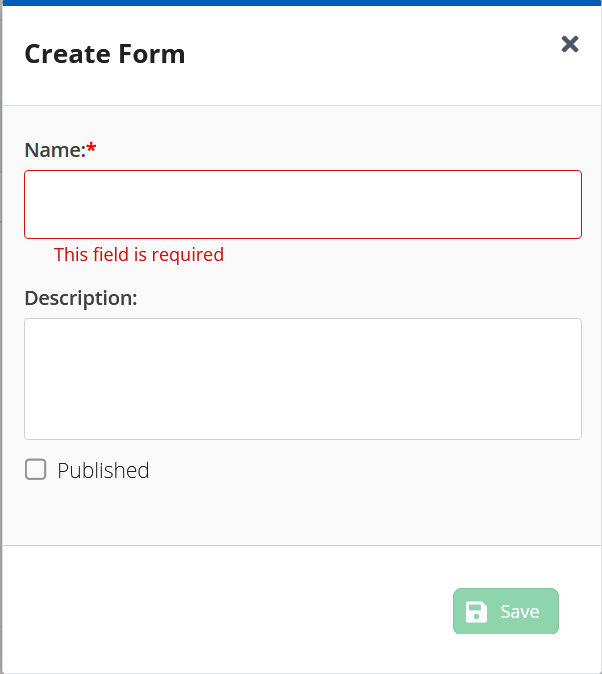
Specify the values in the following fields.
- Name: Specify the name for the form.
- Description: Specify the description for the form. This field is optional.
Published: Select this checkbox if you want the form to be automatically published when it is created.

- If you haven't selected the Publish checkbox while creating the form, you can opt to publish the form later.
- To publish the form later, on the Ticket Config > Forms window, select the checkbox next to the form, the Publish button is enabled, click Publish. The form is published and an
 icon appears in the Published column.
 - To unpublish an already published form, select the checkbox and then click the Publish button. The form is unpublished and an
 icon appears in the Published column.
Click Save.
The form is created, and the Design subtab opens.
Designing a Form
After the form appears in the Design tab. You can add fields, set styles, validate the length, and set conditions for the fields to appear in the form.
The following subtabs appear to add fields to the form:
- Display: Specify the Field Type, Label, Placeholder, and Column.
- Style: Specify the Label Color and Font Size. You can also specify whether the text should be Bold or Italic.
- Validation: Specify the Minimum Length and Maximum Length of the field. You set the condition by choosing No, Always, and On-Conditions.
- Conditional: You can define a condition for a field to be displayed and also set a rule as to when it must be displayed. Select the When the Form Field type, and also set the value in the Has the Value.
You add fields, labels, set the label position, create a placeholder for fields, and add columns to the form.
To design the form:
On the New Form window, click
 .
.
The Display subtab opens.
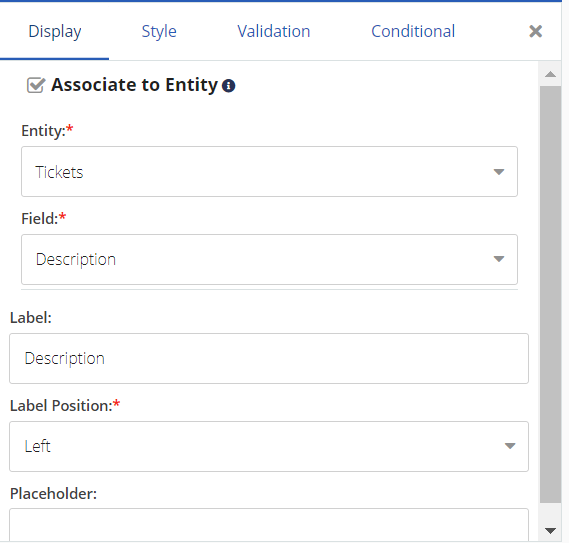
You can create either a stand-alone field or have the field to be either from Accounts, Contacts, or Tickets.
To associate an entity to a form, enable Associate to Entity.
In the Entity field, select an Entity and then select the Field for the entity from the drop-down list.
If you select Entity, you must also add a Field for the entity you have selected. For the following entities, certain fields are the mandatory fields:
- Accounts: If you select the Entity as Accounts, then you must select the Name as a mandatory field.
- Tickets: If you select the Entity as Tickets, then you must select the Subject as a mandatory field.
- If you select the Field as Billing then in the Label text-box the Billing field appears.
- In the Label field, specify a name for the form.
- In the Label Position field, select the required position from the drop-down list.
- Specify the Placeholder that needs to appear in the textbox.
- Specify the number of Columns from the drop-down list.
Click Style and complete the Label Color and Font Size fields.
If you want the font to be bold or italics, enable the appropriate checkboxes. If you do not select any of the options then the font will remain normal.
Click the Validation tab if you have any label constraints, for example, you can specify that the field is a mandatory field or if the field depends on certain conditions.
To specify the conditions for the labels, click the Conditions tab and specify the required conditions.
Click Save.
You can edit the fields, move the fields up or down, and delete the fields using the following icons:

Settings Tab
The Settings subtab enables you to specify the Messages, Theme, Layout, and Attachments for a form.
To update the settings:
- Click the Settings tab.
The Settings tab appears. Specify values in the following fields.
Field Description Messages Form Titles Specify the form title. This title is displayed on the web form when an agent creates a record on the Contact Center CRM Agent Desktop. Submit Button Specify the text for the button. Success Text This message is displayed when you create a ticket. Error Text Specify the error message. Theme Form Select the form color. Fields Select the field color. Submit Button Select the submit button color. Layout Columns Select the columns from the list. Attachments Enable Attachments If you enable this option, the attachments box appears. Max # number of Attachments Specify the number of attachments that you can attach. Required Enable this option if the attachments are mandatory. After specifying the values in the fields, click Save.
- To delete the updates to the form, click the Delete button.
- Click the Refresh button to view the updated changes to the form.
Previewing a Form
You can view the design updates to the form in the Preview tab. To test the form, specify the appropriate values in the fields.
Ensure that you saved the changes in the Design tab to get the latest updates on the form.
Activity
To view the tickets that were created using a form:
- On the Forms subtab, double-click the form for which you want to view the tickets.
The Design subtab opens. - Click the Activity subtab.
The Activity tab appears.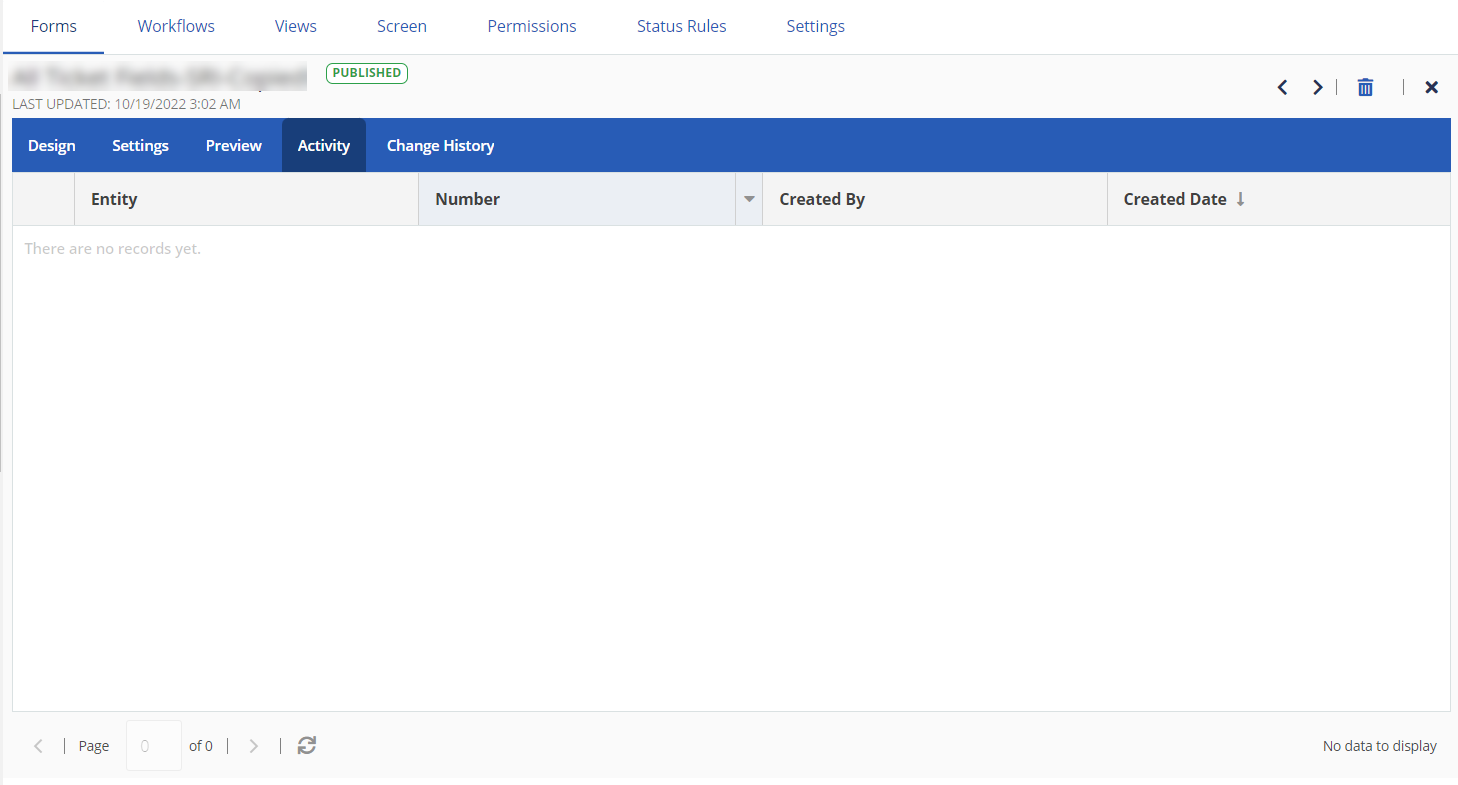
The table contains the following columns, displaying the tickets that were created using the form:- Entity: If the form is associated with an entity, then the entity appears.
- Number: The number assigned to the ticket.
- Created By: The manager who created the form.
- Created Date: The date on which the form was created.
Change History of the Form
The Change History tab contains a table with the history of all changes made to the form. The table contains the following columns.
Column | Description |
|---|---|
| Changed By | Name of the user who modified the form |
| Changed On | Date and time when the user modified the form, represented in Eastern Time |
| Short Description | A short description of the modification done to the form. |
Managing a Ticketing Form
You modify, copy, or delete a form using the Ticket Config window.
To modify a form:
- On the LiveVox portal (LVP), on the Configuration tab, click Ticketing > Tickets Config.
The Tickets Config window appears.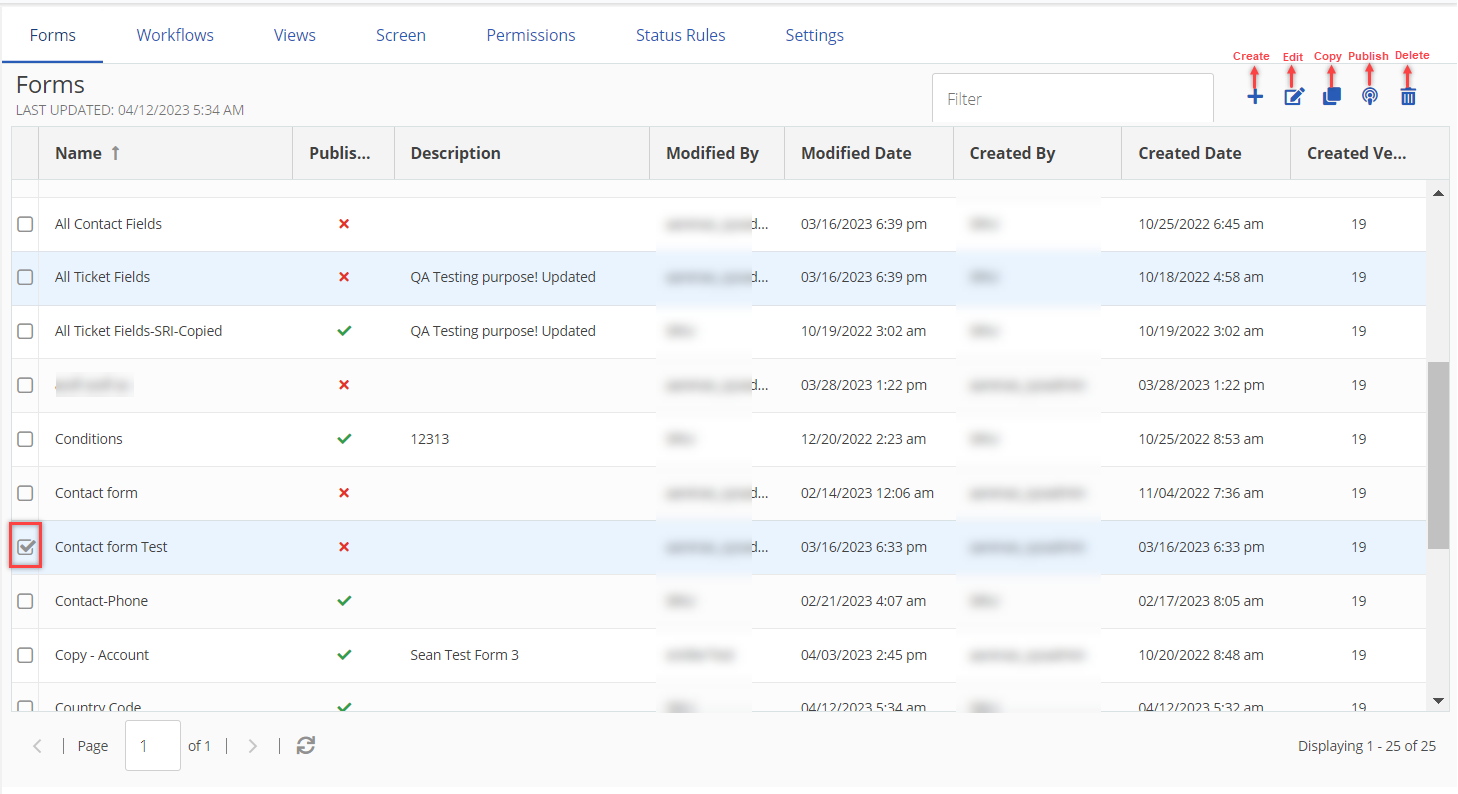
- Select the checkbox next to the ticket that you want to manage.
- To modify the main properties of a form (that is, name, description, or publish option):
- On the Tickets Config window, click Edit.
The Edit window appears. - As required, modify the values in the Name and Description fields, and select or clear or select the Published checkbox.
- Click Save.
The main properties of the form are modified.
- On the Tickets Config window, click Edit.
- To copy the form:
- On the Tickets Config window, click Copy.
The Copy window appears. - As required, modify the values in the Name and Description fields, and then click Save.
A copy of the form is created, and it appears in the table on the Tickets Config window.
- On the Tickets Config window, click Copy.
- To delete the form:
- On the Tickets Config window, click Delete.
The Confirm window appears. - Click Yes.
The form is deleted, and it does not appear in the table on the Tickets Config window.
- On the Tickets Config window, click Delete.
Publishing and Unpublishing a Form
The form is available on the Agent Desktop only if it is published.
To publish a form:
- On the LiveVox portal (LVP), on the Configuration tab, click Ticketing > Tickets Config.
The Tickets Config window appears. Select the checkbox next to the form that you want to publish, and then click Publish.
- On the Tickets Config window, in the row displaying the form, a
 (checkmark) appears in the Published column, indicating that the form is published.
 - To unpublish an already published form, select the form and then click Publish. The checkmark() is removed and your form is removed from the published list.
- On the Tickets Config window, in the row displaying the form, a