
This document provides an overview of new features and enhancements to existing features of the LiveVox User Portal in the LiveVox U12 release.
New Features in LiveVox User Portal U12
This section describes the new features in the LiveVox U12 release.
Agent Schedule Adherence Dashboard
Agent Schedule Adherence dashboard displays the scheduling adherence and conformance data for a single day and multiple days. A single day data is further divided into summary and hourly. You can use this dashboard to ensure that the contact center agents are working efficiently within their set schedules.
The dashboard displays three tabs: Multi-Day, Single Day Hourly, and Single Day Summary. All the three tabs display the following information in common:
- Adherence %: The amount of time an agent worked and how that time aligns with the scheduled time. The time worked includes call time, after call wrap, and scheduled activities such as meetings and training. It is the most important metric and can have a greater negative impact to contact centers. The percentage is calculated as follows:
Adherence % = (Minutes in adherence / Total scheduled minutes) x 100 - Occupancy %: The amount of time an agent spends on call handling activities in the ready state from the available time. The percentage is calculated as follows:
Occupancy % = (Time in ready state / Total available time) x 100 - Utilization %: The amount of time an agent spends on call handling activities in the ready state from the scheduled time. The percentage is calculated as follows:
Utilization % = (Time in ready state / Total scheduled time) x 100 - Conformance %: The amount of total working time from the scheduled time. The percentage is calculated as follows:
Conformance % = (Working minutes / Scheduled minutes) x 100
In addition, each of the tabs displays the following additional agent statistics:
- Multi-Day
- Scheduled Time: Total scheduled work time
- Actual Time: Total time an agent logs onto a desktop and performs work
- Active Time: Wait time + On-call time + Wrap-up time, expressed as HH:MM:SS (Hours:Minutes:Seconds)
Time in Adherence: Total time of agent adherence to the scheduled time
- Single Day Hourly: Displays a graphical representation of scheduled and actual time with different colors for each of the following statistics:
- Scheduled Active
- Scheduled Break
- Actual Active
- Actual Break
- Out of Adherence
- Single Day Summary
- Scheduled time
- Actual time
- Duration
- Scheduled Activity
- Actual Activity
- Description
Agent Schedule Forecast History Report
The Agent Schedule Forecast History report enables you to generate historical call volume data of the previous agent resources. You can use this report as a reference to determine the number of agents required for future shifts.
The report displays the following information:
- Agents Logged In: Total unique agent IDs across the report range
- Active Time: Wait time + On-call time + Wrap-up time, expressed as HH:MM:SS (Hours:Minutes:Seconds)
- Wait Time: Wait time for all agents, expressed as HH:MM:SS
- Talk Time: Total talk time for all agents, expressed as HH:MM:SS
- Wrap Time: Total wrap-up time for all agents, expressed as HH:MM:SS
- Non-Active Time: Logged on but not ready + Pause time expressed, as HH:MM:SS
- Contacts Offered: Count of inbound contacts + Count of outbound contacts
- Successful OP Transfers: Count of OP Transfers across the report range
- Avg Abandon Rate: Average number of abandon calls per hour across the report range
- Occupancy %: (Total active time in minutes / (Total non-active time in minutes + Total active time in minutes)) * 100
- Service Level %: (Successful OP transfers / Contacts offered) * 100
Export Format Editor
The new Export Format editor enables you to define CSV export formats using which you can include certain data. These formats can be used from different editors to export data. Currently, LiveVox supports these formats from the Agent editor.
Adjusting an in-use format (by automated jobs or a person) now affects the appearance of the CSV file. For testing this before implementing, make a copy, and test it on the new format.
To access the Export Format editor, navigate to Configure > Input / Output > Export Format. You are presented with the Export Format editor.

Creating a New Export Format
- Click the Add New Format button from the bottom menu.
- Select the required editor from the Editor drop-down menu. Currently, you have only Agent editor as an option.
- Each format is represented by a unique Format Id once it is created.
- Enter the Name of the format. This Name is used to refer to the export format throughout the configuration manager.
- Enter the Description to provide additional information about the export format.
- Select the desired field delimiter from the Delimiter drop-down menu.
- Select the line break style from the Line Break drop-down menu.
- Select the Sort By Field option from drop-down menu. This defines how the results should be arranged in the export file.
- Select the Sort Order option from the drop-down menu to set the results in ascending or descending order.
- Select the Add Quotes To option from the drop-down menu. This option allows you to specify if no fields, all fields, or only those containing the delimiter should be placed in quotes.
- Select the Print Header checkbox if you want to include a header row in the export file.
- Add the mapping to the format.
- Click the Save Format button to create a new export format.
Viewing an Export Format
- Select the required editor from the Editor drop-down menu. Currently, you have only Agent editor as an option.
- Select the required format from the Format drop-down menu. You are presented with all the details about format and mapped fields in the format.

- Format Details
- Format Id: Unique export format ID
- Name: Name of the export format
- Description: Description of the export format
- Delimiter: The delimiter for export format
- Line Break: The line break style
- Sort By Field: This field defines how the results should be arranged in the export file.
- Sort Order: Set the sort results in Ascending or Descending.
- Add Quotes To: Specify which fields should be placed in quotes
- Print Header: Indicates whether a header row is included in the export file.
- Column Mapping Details
- ID: Mapping ID
- Field: The mapped field which represents a column in your export file
- Header: The cosmetic name assigned to the Mapping's column
- Date Format: The date format applied to a field if any
- Number Format: The number format applied to a field
- Time Zone: The time zone which applies on date or time fields
- Fixed Width Size: The fixed width size of field if any
- Padding Chars: The number of padding characters if Fixed Width Size is configured
- Alignment: The alignment style of the column in export file
- Order: Displays the number which specifies the order of the column in export file.
- Format Details
Deleting an Export Format
- Select the required editor from the Editor drop-down menu. Currently, you have only Agent editor as an option.
- Select the required format from the Format drop-down menu.
- Click the Delete Format button. You are presented with the confirmation pop-up.

- Click the Yes button to confirm deleting of the format.
Add Mapping
- Click the Add Mapping button from the bottom menu. This will open the Add Mapping screen.

- Specify all the mapping details. The following options define a mapping:
- Editor: Select the required editor from the Editor drop-down menu. Currently, you have only Agent editor as an option.
- Format: Displays the name of export format in which you are mapping the field as a column
- Field: Select the required field from the drop-down list. This selected field is going to be a column in your export file.
- Header: Displays text as active agent.
- Date Format: Select the date format option depending on the field your are adding. For example, if a date or time DB field is mapped, selecting a date format from Date Format drop-down list is required.
- Time Zone: Selecting a time zone from the drop-down list is optional.
- Number Format: Select the number format option depending on the field your are adding. For Example, if a phone DB field is mapped, the number format from Number Format drop-down must be set.
- Fixed Width Size: If the column is fixed width instead of delimited the following fields are required:
- Fixed Width Size
- Padding Chars
- Alignment
- Click Ok to add mapping.
Update Mapping
To update a mapping:
- Select the required editor from the Editor drop-down menu. Currently, you have only Agent editor as an option.
- Select the required format from the Format drop-down menu.
- Double-click on the mapped row which you want to update and it opens the Mapping Details screen.

- Update all required fields. For detailed information on mapping fields, please refer Add Mapping section.
- Click Ok to update mapping.
- Click the Save Format button to update the export format.
Delete Mapping
To delete a mapping:
- Select the required editor from the Editor drop-down menu. Currently, you have only Agent editor as an option.
- Select the required format from the Format drop-down menu.
- Select the mapped field row which you want to delete from the export format.

- Click the Save Format button to update the export format.
IB SMS Routing for New Non OB Triggered SMS Response
This version introduces the ability to select a default IB SMS service for IB SMS that doesn’t correlate to an OB SMS campaign.
The Inbound SMS Code option is added in service editor which allows you to insert the given short or long code on a service level defining the default IB SMS service for that code.
Inbound Phone Volume Report
New Inbound Phone Volume Report is available as part of LiveVox Inbound Reports. This report allows the user to view the aggregated report by phone numbers for inbound calls.
This report may only be generated with a start and end time frame no greater than 31 days. LiveVox may provide results for additional time frames upon request. Data can be generated from up to 90 days prior. By default, all times are in EST.
Search Criteria
The Inbound Phone Volume Report is available under the Review tab and supports multi-search for the following search parameters: No fields are required for a basic search.

- Date Range – Enables you to type in dates in the format of MM/DD/YYYY or choose dates using the calendar button. Clicking on the calendar button opens the Date Picker interface.
- Under the Range tab, you can select the date range.
- Under the MultiSelect tab, you can select multiple sequential or non-sequential dates.
- Call Center – Select a call center with a drop-down menu.
- Multiple Call Center Selection – Clicking on the link next to the Call Center drop-down menu opens the multiple call center selection screen.
- Click a call center row from the Available column to move it to the Assigned column.
- Click the Assign All button to add all the available call centers to the Assigned column.
- Click a call center row from the Assigned column to remove the assigned call center. It will be moved to the Available column.
- Click the Remove All button to remove all the assigned call centers. They will be moved to the Available column
- Multiple Call Center Selection – Clicking on the link next to the Call Center drop-down menu opens the multiple call center selection screen.
- Service – The Service drop-down lists only inbound and blended services. You can select a required service from the Service drop-down menu. If a particular call center is selected prior to selecting a service, services(Inbound and Blended) only available for that particular call center will appear.
- Multiple Service Selection – Clicking on the link next to the S ervice drop-down menu will open the multiple service selection screen:
- Click a service row from the Available column to move it to the Assigned column.
- Click the Assign All button to add all available services to the Assigned column.
- Click a service row from the Assigned column to remove it from the assigned services. It will be moved to the Available column.
- Click the Remove All button to remove all the assigned services. They will be moved to the Available column.
- Multiple Service Selection – Clicking on the link next to the S ervice drop-down menu will open the multiple service selection screen:
- Service Group - Service Group is the system that defines which outbound services agents should be logged into to receive the calls from inbound services as well as outbound blending. Adding the ability to group the reports’ metrics based on the service group allows better visibility into the agents’ efficiency across all services (including inbound) they may have been working.
- The Service Group selection appears in the search criteria only if there are existing Service Groups. Otherwise, the option is hidden.
- Caller Id Pkg – Allows you to select the required Caller ID (CID) package from the drop-down menu. If a specific CID package is selected, the generated report shows data only for phone numbers in the CID package.
- From Phone - Allows you to specify inbound phone numbers. You can specify up to 10 inbound phone numbers separated by a comma.
- SL Target (%) - When selecting an SL (Service Level) target percentage, all Service Levels below this target will be shown in red.
- The Inbound Phone Volume Report includes the Service Level metric. Service Level is critical for managing inbound traffic. It is defined as the percentage of inbound calls that are answered or abandoned within a defined time threshold. A customizable Service Level target threshold is supported at both the client and service levels. Each service has a single SL target and service level overrides the client level.
- The default value for SERVICELEVEL_SECONDS is set to 20 for all clients.
Generate Report and Results
After choosing the search parameters, generate the report by clicking the Generate Report button to the right of the search options. The report generates the following data:

- Date: Date of the call
- Phone: Inbound phone number
- Total Calls: Total number of connected calls
- Offered: Total attempted transfers to agents
- Handled: Total calls successfully transferred to an agent
- Abandoned: Total calls that failed to transfer (Operator Transfers - Successful Operator Transfers)
- Abandon Rate: (Failed Operator Transfers / Operator Transfers)*100
- Service Level: (calls answered within service level + calls abandoned within service level) / calls offered [default]
- If the desired SL is specified in the Search criteria, any results that do not meet or exceed the SL are indicated in red.
- Avg. Speed of Answer (ASA): Hold Duration / Operator Transfers
- Avg. Abandon Time: Avg Hold Duration for Failed Operator Transfers (Hold Duration for Abandon Calls / Failed Operator Transfers)
- Total Talk Time: Total time agent was incall
- Total Hold Time: Total Sum of agent hold duration
- Total Wrapup Time: Total time agent was in the wrapup
- Total Handle Time: Total Talk Time + Total Hold Time + Total Wrap Time
- Average Talk Time: Total Talk Time / Successful Operator Transfers
- Average Hold Time: Total Hold Time / Handled
- Average Wrapup Time: Total Wrap Time / Successful Operator Transfers
- Average Handle Time: (Total Talk Time + Total Hold Time + Total Wrapup Time) / Handled
- Grand Total: This row (at the bottom of the screen) which displays the grand total of each column except Date and Phone columns.
- Total Records: Displays the total number of generated records for the specific search. Use Previous and Next buttons to navigate through records.
To export the report, click the Export button (next to the Generate Report button) and select the required option of file type. The available options are: PDF, Excel, CSV.
To print the report, click the Print button (next to the Export button). The generated report opens in another tab. Select the details for printing the report and click the Print button.
Input Filter to Import Accounts and Tickets
You can now create input filters for accounts and tickets to enable you to import data from your account or ticket applications to the respective applications of the LiveVox platform through the job in the job scheduler. To facilitate this feature, when you now attempt to create an input filter, in the Input window, in the Target drop-down list box, the Account and Ticketing options appear.
The Input window appears when you click the Input Filter option in the Input / Output section of the Configure tab.
Knowledge Base (KB) Portal
You can now enable your agents to efficiently assist your customers and the customers to assist themselves by providing them with the Knowledge Base (KB) portal. The KB portal, which is an online library of information about your product and services, is introduced to provide a centralized database for collecting, organizing, retrieving, and sharing information. The portal stores information in the form of articles, which can be either files or web-crawled content (that is, content from integrated websites).
To facilitate this new feature, the Knowledge Base section is added to the Configure tab.
The Knowledge Base (KB) feature is currently in the Beta phase of development.
- The KB portal is available on the following platforms:
- LiveVox Portal (LVP), for administrative users
- Designer Desktop, for designers
- Agent Desktop, for agents
- Web Widget, for consumers
You can access the KB portal in the following languages:
- English
- French
- Spanish
Leave Requests by Agents
Agents can now request leave on the Agent Desktop. To facilitate this feature, the following changes are made:
- On the Agent Scheduling screen, on the General subtab of the Settings tab, the following checkboxes are added:
- Allow agents to request time off
- Require manager approval for time off requests
- On the Work Queue Settings tab of the WFO Config screen, the Time Off Request task subtype is added for the Scheduling task type.
- If your approval is required for the request, the related task appears on the QM Work Queue screen.
- The Agent Scheduling screen appears when you click the Agent Scheduling option either in the Agents section of the Configure tab or in the WFM section of the WFO tab.
- The WFO Config screen appears when you click the WFO Config option in the E-Learning section of the WFO tab.
- The QM Work Queue screen appears when you click the Work Queue option in the Quality Monitoring section of the WFO tab.
Lookup Module
The phone lookup and account lookup modules are now replaced with a new lookup module that supports multiple channels such as inbound SMS, inbound email, and inbound Chat. The salient features of the lookup module are:
- Supports multiple channels such as inbound SMS, inbound email, and inbound chat to associate interactions with the relevant contact record
- Allows you to add modules to CallFlows and define variables to associate interactions with the Contact Manager
- Enables you to define variables that the consumers can use against Contact Manager to identify and validate their identity
- Populates the relevant fields for a Contact record based on the match in Contact Manager
- Enables Contact Manager to associate contact numbers matched from multiple channels to ACD and Designer
The lookup module uses the following properties to perform the lookup.
| Property | Description |
|---|---|
| Lookup Phrase | The message played on initiating the lookup. |
Variable Used for Lookup | The input variable used for the lookup. The lookup module matches this value with the lookup key. |
| Lookup Source – Service or Contacts | The lookup source is either SERVICE or CONTACTS. |
| Key to Lookup | The lookup key for the SERVICE is PHONE or ACCOUNT, and for the CONTACT is all system fields and 100 custom fields. |
| Lookup List | The lookup list for the SERVICE is service IDs, and for the CONTACT is contact group IDs. |
After the lookup is complete, any of the following events occur.
| Event Name | Description |
|---|---|
| Success | The lookup returns one successfully matched account. |
| No Match | The lookup returns no matched account. |
| Multiple Match | The lookup returns more than one matched account. |
Schedule Callbacks Element
Users can configure new schedule Callbacks element through the Contacts group of Designer Desktop. This enables agent to view any assigned Schedule Callbacks associated with a Contact.
Scorecard History
You can now view the following details about a scorecard:
- Date and time when the scorecard was created or updated
- Name of the user who created or updated the scorecard
- Former and updated values of fields in the scorecard
To facilitate this feature, on the Design-Scorecards tab of the Assessor screen, the History tab has been added.
SMS Profile
To better meet your business goals, you can now configure the contact window based on compliance policies for SMS services (in addition to voice services). To facilitate this new feature, the following changes are made:
- The SMS tab is added to the Profile screen. You can use this tab to add policies to a profile to determine whether you can send SMS messages to your customers or to determine on which day of the week and during which period you can send SMS messages to them.
- The SMS Compliance Enabled checkbox is added on the ACD Settings tab of the Services screen. This checkbox, which is selected by default, indicates if the SMS messages sent by agents must comply with the policies in the profile assigned to the service. If you retain the status, SMS messages sent by agents consider the profile policies. If you clear the checkbox, agents can send SMS messages regardless of the profile policies.
- The Outbound Compliance Enabled checkbox on the ACD Settings tab of the Services screen is renamed Voice Compliance Enabled.
- If a policy does not exist for a country, state, or area code, the accounts associated with the region can be contacted at any time.
- If the Contact Timing strategy (that is, Follow the Sun workflow) is enabled for a service associated with an outbound SMS campaign, the campaign adheres to the strategy.
SMS Campaigns adhere to the ZIP code–area code mismatch logic.
According to this logic, if the geographical location indicated by the ZIP code associated with an account and the geographical location indicated by the area code associated with the same account are different, the contact window for the account is based on the value in the Zip Area Mismatch field on the Settings tab of the service. If the value in this field is Dial-Time or Dial-Time Optimized, the contact window for the account is between 11:00 Eastern Time and 21:00 local time. If the value in the field is Dial-Time Overlay, the contact window for the account is between 08:00 local time and 21:00 local time of the safest time zone between the mismatched time zones. For example, if the mismatched time zones are Atlantic Time and Pacific Time, the Pacific Time is considered as the safest time zone.
- SMS messages sent by agents ignore the ZIP code–area code mismatch logic.
- Policies are considered when scheduling calls (including callbacks) or messages.
- Policies do not apply to automated responses from call flows.
Ticket Forms
You can now create forms for tickets that can be accessed by agents through U-CRM and your customers through the LiveVox Web Widget. This feature is designed to encourage the customers who visit the client websites to submit support tickets and feedback that automatically creates a ticket for agents.
To facilitate this feature, on the Ticketing Config screen, the Forms tab is added. The tab contains the following subtabs:
- FORMS: To create a form
- Design: To customize each field (including its attributes and style); specify the validation needed to submit the ticket; add labels or URLs; select a standard or custom ticket field; and add a placeholder for additional instructions
- Activity: To view the tickets that were created using the form; monitor the related activities; and filter the tickets for a specific period
- Change History: To view the history of the form
In addition, on the Design tab of the Designer screen, in the Ticketing group, the Forms element is added.
Ticket Views
You can now create predefined filters for tickets for yourself, agents, or agent teams to easily find, monitor, and work on tickets without the need for a manual search.
To facilitate this feature, on the Ticketing Config screen, the Views tab is added. The tab contains the following subtabs:
- VIEWS: To create a view
- Design: To specify the filter criteria based on the standard ticket fields; specify the columns for the view; and control access to the view.
- Preview: To view the preview of the view
- Change History: To view the history of the view
The view appears in the Select a predefined search drop-down list box on the Tickets tab of the Ticketing window and on the Agent Desktop.
Ticket Workflows
You can now configure automatic workflows for a ticket based on certain conditions when the ticket is created or updated, or when a nightly run is initiated. The workflows help you ensure that the tickets undergo a standard process that reduces manual work, saves time, and minimizes errors. In addition, they ensure that all the tickets are handled consistently and in a timely manner.
As part of this feature, you can trigger the following actions:
- Send an email
- Create a work queue task
- Update a field in a ticket
- Call an API function
- Stop the workflow
To facilitate this feature, on the Ticketing Config screen, the Workflows tab is added. The tab contains the following subtabs:
- Workflows: To create a workflow
- Design: To design the workflow
- Activity: To view the tickets to which the workflow was applied; monitor the related activities; and filter the tickets for a specific period
- History: To view the history of the workflow
Trusted Partners Model
A Trusted Partners is a model to manage the relationship between LiveVox clients. This functionality can be used by OCA (Outsource Collection Agency) clients as well as clients with multiple portals utilizing PDAS. A Partner is a LiveVox client that needs to have access rights to another LiveVox client to audit or measure their work. Partners can be added across environments. The Trusted Partners tab under Client editor allows to view which clients and user access levels within those clients may act as a partner for them.
The Trusted Partners tab is available in the Client editor only if the Trusted Partners add-on product is enabled.
Once the partner is added on request, user gets the widget for the partnered client. The user needs to approve the partnered client by clicking on the Approve button. To view the Approve button in the widget, hover the mouse on the widget.
Clicking on the ![]() icon displays the details of the third-party company or another LiveVox portal that is set up for you.
icon displays the details of the third-party company or another LiveVox portal that is set up for you.
If you want to remove the partner, hover the mouse on the widget and click the Revoke button.
You can also undo the revoke action by clicking on the Undo button.
Web Widget
You can now provide your customers with a single support system through the LiveVox Web Widget, which supports the following channels:
- Chat
- Knowledge Base (KB)
- Ticket
Through the Web Widget, your customers can chat with an agent, access your KB articles, and submit a ticket.
To facilitate this new feature, the Web Widget section is added to the Configure tab.
Enhancements in LiveVox User Portal U12
This section describes enhancements to existing features in the LiveVox U12 release.
Account Settings
You can now configure the bulk account loading process. To facilitate this enhancement, the Default tab of the Accounts Config screen is renamed Settings , and the General section is added to the tab. This section contains the following checkbox: If loading accounts in bulk into LiveVox and the Account already exists in LiveVox do you want to overwrite it?
Addition of Scheduled Callback Fields
The Report Writer now contains new fields relating to Schedule Callback transactions to include them in configured Call Detail Reports. The availability of this data now ensures clients have scheduled callback data for reporting and audit purposes.
To view the scheduled callback fields
- Navigate to Configure > Input / Output > Report Writer.
- Click General tab.
- Click Add Mapping.
The Add Mapping popup window appears. - Select Schedule Callback from the Table drop-down list.
- Click Field drop-down list.

The Field drop-down list displays all the schedule callback fields.
Additional LV-standard Call Flows for SMS
The following options of the Service editor are renamed:
- SMS Optin Message to SMS Opt-In Message
- Email Optin Message to Email Opt-In Message
Previously, fields were available as shown below:
With this version, fileds are available as shown below:
Previously, users were provided with only SMS Blast as LV standard Call Flow.
With this version, the SMS Opt-In Message drop-down menu provides two more LV-standard call flows and available options are:
- SMS Blast
- SMS UAD Opt-In
- SMS UAD Widget
Also, the above standard call flows are available as standard templates when making a SMS campaign from Campaigns editor or Contact manager.
ADN Version Upgrade
The Agent Desktop Native (ADN) application now upgraded to the 7.2.0 version.
Agent Export Step Enhancement in Jobs Editor
You can use the below-listed options for the Agent Export step. You can view these options from Jobs editor.
- Include Services (include services)
- Export Format (agent export format)
Agent Scheduling
To enhance usability, the Agent Scheduling option now also appears in the WFM section of the WFO tab.
Assessor
Review Tab
The Review tab of the Assessor window is now modified as follows:
- The Export button moved to top-left.
- The toolbar at the bottom removed.
- Filter and Calls titles are removed.
- Advanced Search button (
 ) is provided to filter the criteria.
- Updated field group name from Consumer to Contact.
Score Tab
The Score tab of the Assessor window is now modified as follows:
- The columns appear in the following order:
- Agent
- Date
- Duration
- Type
- Interaction
- Score
- Account
- Disposition Code
- Service
- Call Center
- Campaign
- Original Account
- Call Session Id
- The Filter and Summary section titles are removed.
- An advanced search icon () appears to filter the criteria. In the window that appears when you click the icon:
- The Scored Only checkbox appears.
- The field group name is changed from Consumer to Contact.
- The title of the Create Task pop-up window is changed to Create Coaching Task for Undefined.
- When you create a coaching task and any e-learning content, the notification messages that appear are Coaching Task Created and eLearning Content Created, respectively.
- When you click Show Screen or Show Comments, the screen or the comments appear on the left-hand side of the window, beneath the audio bar.
Changes to Copy to Clipboard Field
You can now select standard Contact Manager fields and Call Flow variables in the Copy to Clipboard configuration field on the ScreenPop tab of Agent Desktop.
To copy a Contact Manager or Call Flow field to clipboard
- Navigate to Configure > Agents > Agent Desktop.
- Click ScreenPop tab.
- Click More Options (...) icon.
- Select Contact or CallFlow in the Source drop-down list.

- Select the required field in the Key drop-down list.
- Click OK.
This completes copying a Contact Manager or Call Flow field to clipboard
Also, a new button has been added to clear the selection.
Campaign Level Metrics Available via API
Campaign statistics were previously available as an aggregate of campaigns within a Service. This enhancement allows for current day campaign-level statistics for the individual campaigns within a service. Data available to be retrieved via API at the Service ID and/or Campaign ID level include:
- Uploaded
- Loaded
- Completed
- Remaining
- Timezone data
This is only for active campaigns (i.e. playing, paused, loaded, built).
Dialing Records with NULL Account
Agents can now dial (Manual and Scheduled Call Backs) records with a 'NULL' account and Contact Management setting enabled. This enhancement checks only for Account Number Required setting at the desktop level and Phone DND entries. If the agent attempts to dial a DND number, an appropriate message is displayed.

Contact Export Jobs
A new field 'Export Path : sftp://' has been added for the Contact Export jobs. This field allows users to configure the custom export directory on the SFTP server to store all the exported files. The default value is / ftpOut.
To configure the custom export directory
- Navigate to Configure > Contacts > Import/Export Jobs.
- Click Add.
The Jobs window appears. - Select Job Type as Contact Export.
- Enter the custom export directory path in the Export Path : sftp:// field.

This completes configuration of custom export directory path.
Contact Import Jobs
The Contact Manager import jobs now include the following enhancements:
- The job import process now runs in the background, and the Contact Manager updates the status and processing time after it is complete. This enhancement eliminates the failure of jobs after 30 minutes due to timeout.

- The success and error messages are now detailed to provide more information to the clients.
The File Name field has been renamed as File Name Pattern to enable users to specify the name pattern for the contact import files. For example, if the file name pattern is *filename*, the application picks up all the files with filename text for the import job.
This enhancement minimizes the number of jobs required for imports into Contact Manager when the files are using the same format but different file naming conventions.
To configure the file name pattern- Navigate to Configure > Contacts > Import/Export Jobs.
- Click Add.
The Jobs window appears. - Select Job Type as Contact Import.
- Enter the name pattern in the File Name Pattern field.

This completes configuration of file name pattern.
Do Not Contact Options for SMS and Email Channels
You can now use the following Do Not Contact options for SMS and Email channels from the Contact manager:
SMS Channel
- Do Not Contact
- Do Not Contact Today
- Account+Phone Do Not Contact
- Account+Phone Do Not Contact Today
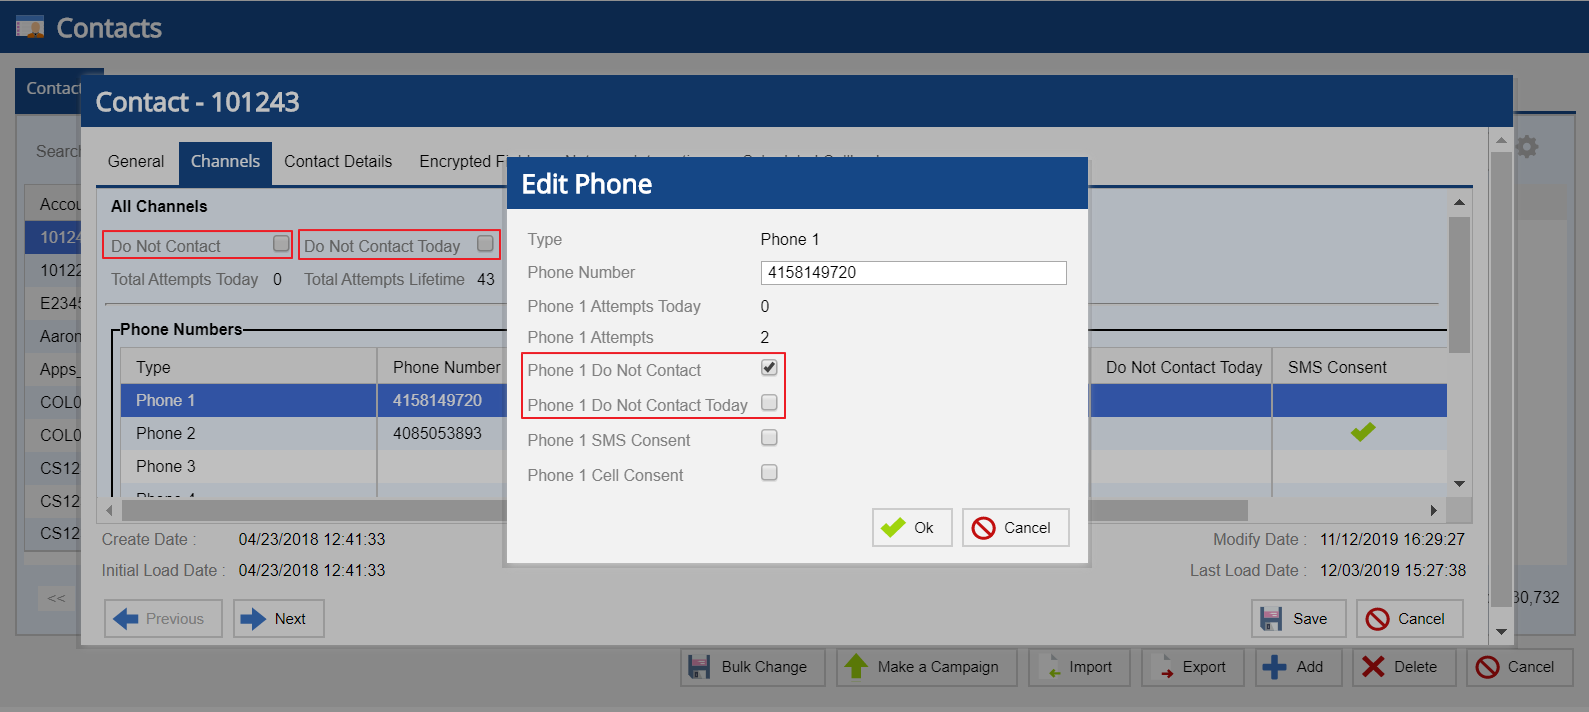
Email Channel
- Do Not Contact
- Do Not Contact Today
Email Interaction
You can now view and download email attachments when viewing an email interaction on the Thread tab of the Email Thread or Email Detail window in the Contact Manager.
In addition, you can download email attachments in the Account Lookup Report window and the Phone Lookup Report window. To facilitate this enhancement, the Attachments column is added to the tables in the two windows. If an email interaction contains attachments, this column contains ![]() to enable you to download the attachments.
to enable you to download the attachments.
Enhanced Email Outcome Priorities
Outbound email outcome priorities are updated so that an email with 'Deferred' outcome can eventually result as 'Delivered' outcome.
Enhanced Screen Recording Storage
In the earlier versions of LiveVox, the screen recordings were stored on disk. Now, clients can opt to store screen recording objects in a public cloud (AWS S3). With this, screen recordings can be stored and retrieved in highly scalable, reliable, and fast. It provides inexpensive data storage infrastructure. Also, this feature provides easy Integration with other cloud services like Encryption, Transcription, Auto deletion, etc.
To verify the enabled Enhanced Call Recording Storage option for the portal, navigate to Configure > Client / Service > Client > Billing > General.
Enhanced Scorecard Details of Assessor - Review Tab
Export from the Review tab includes more details of scorecards(Pass/Fail) along with Acknowledgement and Arbitration details.
Enhancement to Work Queue Settings
The Work Queue Settings has been enhanced to provide Auto Approve and Auto Reject options for the Scheduling task type.
To enable Auto Approve/Auto Reject
- Go to WFO > E-Learning > WFO Config > Work Queue Settings.
- Click
on the right corner of the Scheduling task type.
The Task Settings dialog box appears.
- Enable Auto Approve or Auto Reject as required:
- Auto Approve: Indicates that the tasks must be automatically approved.
- Auto Reject: Indicates that the tasks must be automatically rejected.
- Set the number of days before which the tasks must be automatically approved or rejected in the Days before Due Date field.
- Click OK to save the changes.
Export Search Results from Assessor - Score Tab
You can export the searched list in a CSV file by clicking on the Export button at upper left-hand side corner.

Knowledge Base (KB) Portal Mapping on Designer Desktop
To provide your agents access to Knowledge Base, the following changes are made to the Desktops tab on the Designer Desktop:
- On the Design subtab, the KB group containing the Portal element is added to the desktop toolbar. This displays the portal as a separate section on the Agent Desktop.
- On the Properties subtab for the Home Bar element, the Knowledge Portal Button checkbox is added. This displays the portal as an icon on the Agent Desktop.
The Knowledge Base (KB) feature is currently in the Beta phase of development.
Home Bar Enhancements
You are now able to configure the Home bar icons and the name displayed on the tool tip of the icon for Designer agent desktop. To configure, click the Configure option under the Properties tab of the required desktop. You can select from over 30 different icons to display for your Agent. You can also define what page each icon invokes under the Target Page column.
New option the Search By option is available to configure search options for your agents. Available options are : All Accounts, Notes, Contacts, and Tickets.

Increased Agent Desktop Widget Data Size
The Agent Desktop widget data size is now increased to accommodate more characters in the input text to avoid errors when saving the Agent Desktop configuration.
Increased SMS Throughput
You can now send 1000 messages/second for in a single SMS instance. If the SMS volume need is more, you can add multiple SMS gateways to scale up.
Contact your account manager to add multiple SMS gateways.
LiveVox Portal Billing Tab Changes
The Billing tab under Client editor has the following changes:
- Added a new Channels section with the following options:
- Voice Channel
- SMS Channel
- Email Channel
- Chat Channel
- Renamed the Ticketing section to Customer Care.
- Moved the Transcribe option to the Speech section. The Quality Assurance section is now removed because it is redundant.
- Moved the E-Learning option to the WFO section and the Chat option to the Channels section. The Agents section is now removed because it is redundant.
- Moved the Advanced Agent Scheduling option to the WFO section.
LiveVox Portal Navigational Changes
LiveVox portal has the following navigational changes:
- Consolidated Call Centers, Service Groups, and Agents sub-tabs on the Monitor tab to a drop-down menu. The drop-down menu displays Call Centers as the default value.
- Moved Accounts and Ticketing dashboards from the Configure tab to the Monitor tab.
- Renamed Dialing Config in the Configure tab to Voice.
- Added new sections in the Configure tab for Email, SMS, Web Widget, and Knowledge Base.
- Added Agent Schedule Adherence and Agent Schedule Forecast History options under WFM of the WFO tab.
Real-Time Campaign Statistics for Append Records
Now additional real-time campaign statistics are updated to reflect appended campaign records within the Voice portal to include the following within Campaign Monitor panels:
- Completed
- Remaining
- %Completed
- Total
- % Done
- Uploaded
- Loaded
Restriction to Password Reuse
A new field 'Passwords Reuse Restriction Count' has been added under the Security tab of the Client Editor. It specifies the number of previous passwords that the user or agent cannot reuse when resetting the password. The minimum value for this field is 4 and the maximum value is 25.
To configure password reuse restriction count
- Navigate to Configure > Services > Client > Security.
- Specify the value in Password Reuse Restriction Count.

- Click Save.
This completes configuring the password reuse restriction count.
Scoring Method
When creating a scorecard, you can now specify the method of scoring. To facilitate this enhancement, the Scoring Method field is added to Settings subtab of the Design-Scorecards tab. This field contains the following options:
- Basic: This option, which is selected by default for a new scorecard, indicates that the scorecard does not support a weighted score.
- Weighted: This option is selected by default for an existing scorecard. Select this option if you want the scorecard to support a weighted score.
The Design-Scorecards tab appears in the Assessor window.
Screen and Call Recording Playback Enhancement
You can now playback Screen and Call recordings with synchronized audio and video.
Segmentation Preview Enhancement
The LiveVox Portal users can now modify a Segmentation template for Contact Manager and preview the changes immediately. Previously, any changes to the existing Segmentation template would not reflect in the Preview option until the following day.
This enhancement simplifies the workflow experience for users as it does not require recreating or copying segmentation templates to visualize the changes.
Support for Email, SMS, Voice Import DNC Jobs
You can configure Email, SMS, and Voice DNC FTP jobs through the DNC editor. New Jobs tab allows you to create a maximum of 5 jobs each of all DNC types. It automates DNC import process. The importing files need to be placed in path: Client Name -Coll/dnc/dncImport.
- Contact your Account Manager or Client Services to create required FTP folders for your site. For importing a file, see Uploading Files Using the FTP Browser section of Administrative User Guide.
- The Jobs tab only appears if the DNC type is set to Dial-time Phone DNC.
The Jobs tab in DNC editor is as below:

Adding DNC Job
To add the DNC Job:
- Click Add button. You are presented with Job pop-up.

- Under the General tab, select Enabled option to activate the job.
- Select the Header in file? checkbox if DNC file contains header row.
- Select the DNC type under which you want to add the job entry. The available options are: Voice, Email, SMS.
- Enter the File Name Pattern. File Name Pattern supports prefix (e.g. abc%), postfix (e.g. %abc), and infix (e.g. %abc%).
- Enter valid email addresses in Email List field. It sends email to email addresses once the job is activated.
- Click Ok button.
- click the Save button.
Updating DNC Job
To update the DNC job:
- Double-click the job row which you want to update.

- Modify all the required field. For information about fields , please refer the Adding DNC Job section.
- Click the Save button.
Deleting DNC Job
To delete the DNC job:
- Select the required job by clicking on the row.

- Click the Delete button, you will see the job row in red color.
- Click the Save button.
Viewing Job History
History tab (available when adding or updating the DNC job) allows you to track DNC job and its status (Success or Failure).
Third Party Audio in U-QM Tool
Non-LiveVox audio can be ingested into the system enabling adoption of U-QM in mixed environments. This provides the ability for clients to centralize their QM process.
Call recording audio file is required for each record in the CVS meta data file. Audio files must be a web supported audio type for the browser(s) the client will be using for Assessor. i.e. MP3, MP4, Mpeg, webM, etc.
Once third party call recordings are uploaded, users can filter the non-Livevox call recordings under the Score tab of the Assessor editor.

Ticket Dashboard
To improve usability, the Tickets Dashboard option is now moved from the Ticketing Config screen of the Configure tab to the Ticketing section of the Monitor tab.
Ticket Forms Mapping on Designer Desktop
To enable a ticket form on the Agent Desktop, the Forms element is added to the desktop toolbar in the Ticketing group.
The Ticketing group appears on the Design subtab of the Desktops tab on the Designer Desktop.
Ticket Settings
- You can now associate a priority with an icon. To facilitate this enhancement, on the Settings tab of the Ticketing Config screen, in the Priorities section, the Icon column is added.
- You can now configure the bulk ticket loading process. To facilitate this enhancement, the Default tab of the Ticketing Config screen is renamed Settings, and the General section is added to the tab. This section contains the following checkbox: If loading tickets in bulk into LiveVox and the Ticket already exists in LiveVox do you want to overwrite it?
- You can now classify ticket labels. To facilitate this enhancement, the Components section is added to the Settings tab of the Ticketing Config screen.
Ticket Screen
You can now delete a ticket type on the Screen tab of the Ticketing Config screen. To facilitate this enhancement, ![]() is added next to each ticket type in the Ticket Types subsection of the tab.
is added next to each ticket type in the Ticket Types subsection of the tab.
Updates to Consent Module
The SMS consent module now contains the following two new properties:
- Keywords to opt in the Service (comma separated): This property contains the keywords to opt-in the service. The default values are START, BEGIN, CONFIRM, SUBSCRIBE, and CONTINUE.
- Keywords to opt out the Service (comma separated): This property contains the keywords to opt-out of the service. The default values are CANCEL, UNSUBSCRIBE, and STOP.
The consent module also allows adding up to 20 additional keywords in both opt-in and opt-out properties. The additional keywords must be alphanumeric without any space and unique.
Assessor
Review Tab
The Review tab of the Assessor window is now modified as follows:
- The Export button moved to top-left.
- The toolbar at the bottom removed.
- Filter and Summary titles are removed.
- Advanced Search button ( ) is provided to filter the criteria.
- Updated field group name from Consumer to Contact.
Score Tab
The Score tab of the Assessor window is now modified as follows:
- The columns appear in the following order:
- Agent
- Date
- Duration
- Type
- Interaction
- Score
- Account
- Disposition Code
- Service
- Call Center
- Campaign
- Original Account
- Call Session Id
- The Filter and Summary section titles are removed.
- An advanced search icon () appears to filter the criteria. In the window that appears when you click the icon:
- The Scored Only checkbox appears.
- The field group name is changed from Consumer to Contact.
- The title of the Create Task pop-up window is changed to Create Coaching Task for Undefined.
- When you create a coaching task and any e-learning content, the notification messages that appear are Coaching Task Created and eLearning Content Created, respectively.
- When you click Show Screen or Show Comments, the screen or the comments appear on the left-hand side of the window, beneath the audio bar.