Download PDF
Download page Managing an Input Filter.
Managing an Input Filter
You can create, modify, copy, and delete an input filter.
Creating an Input Filter
To create an input filter:
On the Configure tab of the LiveVox Portal (LVP), click Input / Output > Input Filter.
The Input window appears.- On the General tab, click Add Filter.
The Add Filter window appears. Specify values in the fields as described in the following table.
Field Description Target(s) Select one of the following options:
- Transaction: Used for creating a field-mapping template for importing campaigns to LVP.
- Contact: Used for creating a field-mapping template for importing contacts to LVP (into Contact Manager).
- Account: Used for creating a field-mapping template for importing accounts to LVP.
- Ticketing: Used for creating a field-mapping template for importing tickets to LVP.
- SMS DNC: Used for creating a field-mapping template for importing the SMS Do-Not-Contact (DNC) list of phone numbers to LVP.
- Phone DNC: Used for creating a field-mapping template for importing the DNC list of phone numbers to LVP.
- Email DNC: Used for creating a field-mapping template for importing the email DNC list of email addresses to LiveVox.
Name Specify a name for identifying the filter throughout LVP.
Click OK.
The tabs and fields specific for the new filter appear in the Input window.On the General tab, specify values in the fields.
For information about the fields, see Input Filter Fields (the General section).
In the Mapping section, click Add Mapping.
The Add Mapping window appears.Specify values in the fields.
For information about the fields, see Input Filter Fields (the Mapping section).
Click OK.
Perform Steps 6 through 8 for each field in the file.
The mapping appears in the Mapping section.
Optional: To have a specific field value in the file replaced with a different value during the import, see the Substituting a Value section.
- In the Input window, click Save Filter.
The input filter is created, and a value appears in the Filter ID field.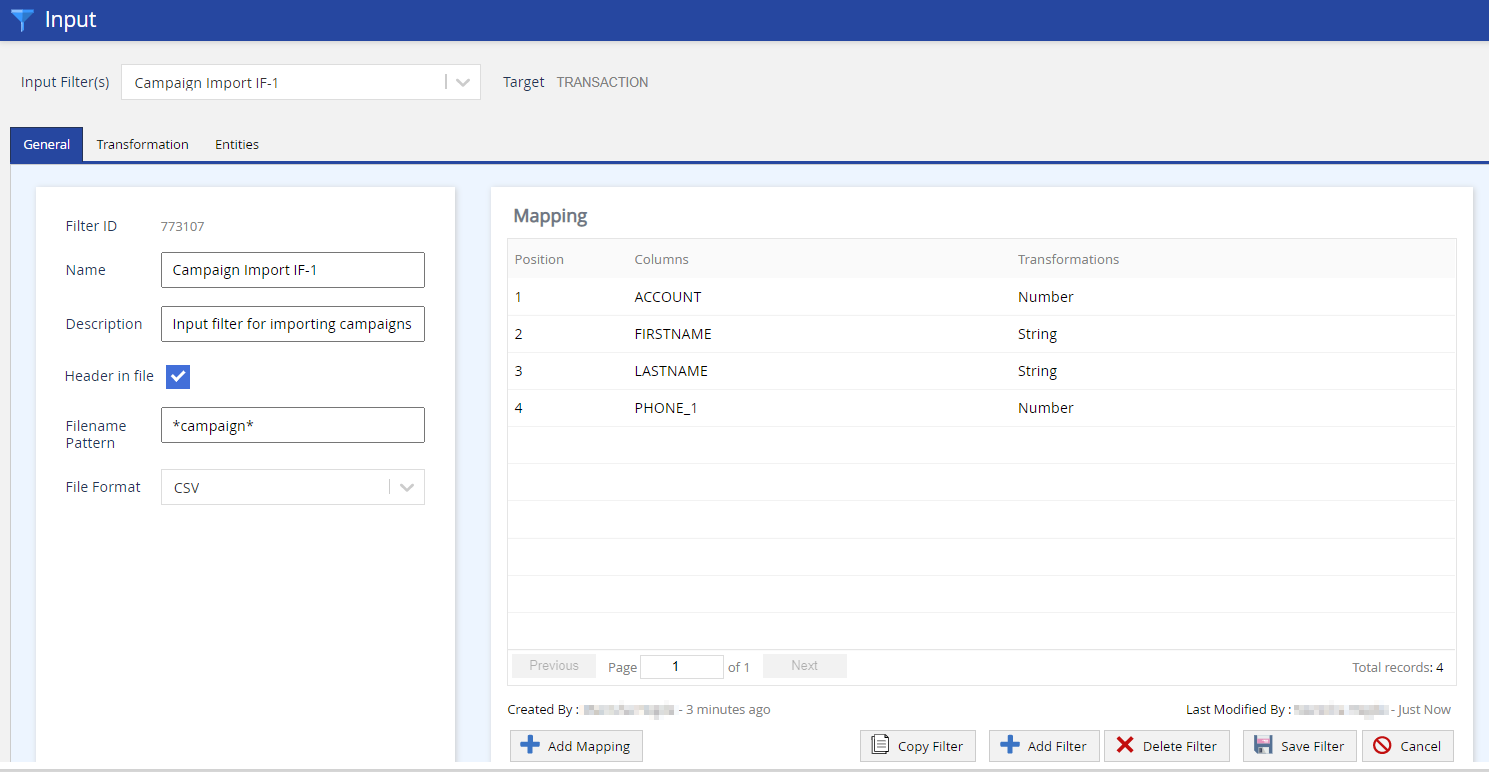
- If the target of the filter is Contact, the input filter appears as an option in the File Format field in the Import Contacts window when importing contacts. For more information, see Exporting Contacts.
- Before you use an input filter for Automatic Call Distributor (ACD), ensure that transformation is applied to the filter. For assistance regarding source columns and data types, contact the LiveVox Customer Care Team.
Substituting a Value
You can have a specific value in a field in the input file replaced with a different value when the file is imported to LVP. The Substitute Value column that appears in the Mapping section on the General tab in the Input window facilitates this. This column appears only if the value in the Target field of the input filter is Account, Contact, or Ticketing.
You cannot replace the value in the Account field.
To substitute a field value in the file:
On the General tab, in the Mapping section, in the Substitute Value cell of the row displaying the field, click the pencil icon
 .
.
The Substitute Value window appears.Click Add.
The Substitute Value pop-up window appears.Enter values in the following fields:
Value: The field value that you want to be replaced.
Substitute Value: The new value (substitute) for the field.
Suppose that for the Agent Team field, in the Substitute Value pop-up window, the value entered in the Value field is X and that in the Substitute Value field is Y. If the file contains the X value in the Agent Team field, when the file is imported to LVP, X is replaced with Y.
Click OK.
In the Substitute Value window, you can:
- Add a maximum of 50 substitute values (for each mapping).
- Modify a substitute value by double-clicking the row displaying the value.
- Delete a substitute value by hovering over the row displaying the value and then clicking the close icon
 .
.
Optional: To define the priority of substitution, select the row displaying the value, and then click Move Up or Move Down.
You might want to define the priority of substitution if the values that you have added for substitution are similar.

Click OK.
In the Mapping section, A green checkmark appears next to the pencil icon in the Substitute Value cell of the row displaying the field whose value you substituted.
- Click Save Filter.
Your changes are saved in the input filter.
Modifying an Input Filter
To modify an input filter or its mapping:
To modify the input filter, on the General tab, modify the values in the fields.
For information about the fields, see Input Filter Fields (the General section).
To modify the mapping:
In the Mapping section, double-click the row displaying the mapping.
The Edit Mapping window appears.Modify the values in the fields.
For information about the fields, see Input Filter Fields (the Mapping section).
Click OK.
- In the Input window, click Save Filter.
The input filter is modified.
Copying an Input Filter
To copy an input filter:
- Access the input filter.
- On the General tab, click Copy Filter.
The Copy Filter window appears. - In the New Input Filter Name field, enter a name for identifying the new input filter, and then click Copy.
The input filter is copied, and the new filter appears in the Input window.
Deleting an Input Filter
To delete an input filter:
- Access the input filter.
- On the General tab, click Delete Filter.
The Delete Filter window appears. - Click OK.
Deleting a Mapping
To delete a mapping from an input filter:
- Access the input filter.
- On the General tab, in the Mapping section, hover over the row displaying the mapping, and then click the close icon
 .
. - Click Save Filter.
The mapping is deleted from the input filter.