You can use the Tickets tab to create and modify tickets; assign tickets to agents, agent teams, or other managers; modify multiple tickets at once; and assign tickets to a different account, as needed.
To access the Tickets tab, go to Config > Ticketing > Tickets, and then click the Tickets tab.
Creating Tickets and Associating Tickets to Accounts or Contacts
To create a ticket:
- Go to Config > Ticketing > Tickets.
The Ticketing screen appears. - On the Tickets menu, click New Ticket.
The New Ticket dialog box appears. - Associate the ticket to any contacts and/or accounts by selecting Contact and/or Account from the drop-down menu. You can create a Contact or Account by clicking the plus sign if Contact or Account is not added earlier.
- Add Description, the brief information for the Ticket.
- Fill in the necessary information in the General Info section:
- Contact Name
- Type of Ticket
- Label of Ticket
- Status of Ticket
- Priority of Ticket
- Assignment of ticket (Agent or Agent Team)
- Original Number
- Original ID
- Channel
- Click Save.
- Fields marked with an asterisk (*) are required.
- Fields displayed on each ticket type can be configured through Tickets Config. See Managing Ticketing Configurations section for details on field configurations.
|
|
Modifying Tickets in Bulk
You can update the tickets in bulk, to update:
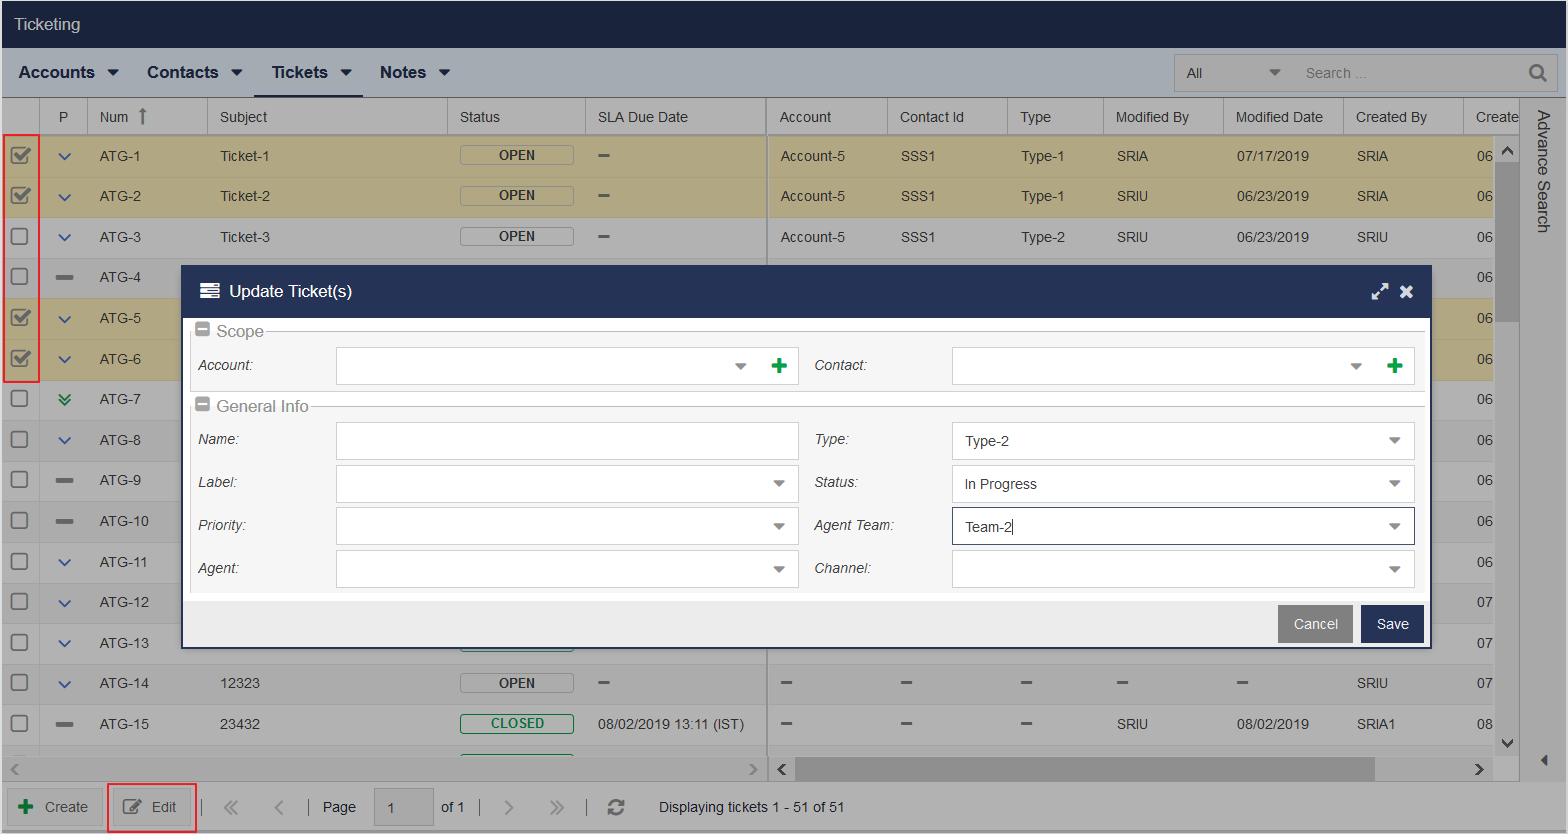
- Select the checkbox next to the ticket you want to update, in the Tickets List view.
- Click Edit at the bottom Left to update the selected list of tickets. You can update the following Ticket fields in bulk:
- Accounts
- Contacts
- Name
- Type of Tickets
- Label
- Status of Tickets
- Priority of Tickets
- Reassign ticket from one Agent to another Agent, Agent to Agent Team, Agent Team to Agent
- Channel
- Click the Save button to save the changes.
|
Deleting a Ticket
You can delete one ticket at a time. To delete a Ticket:
- Double-click a Ticket to open the ticket.
- Select More at the top right corner.
- Select Delete.