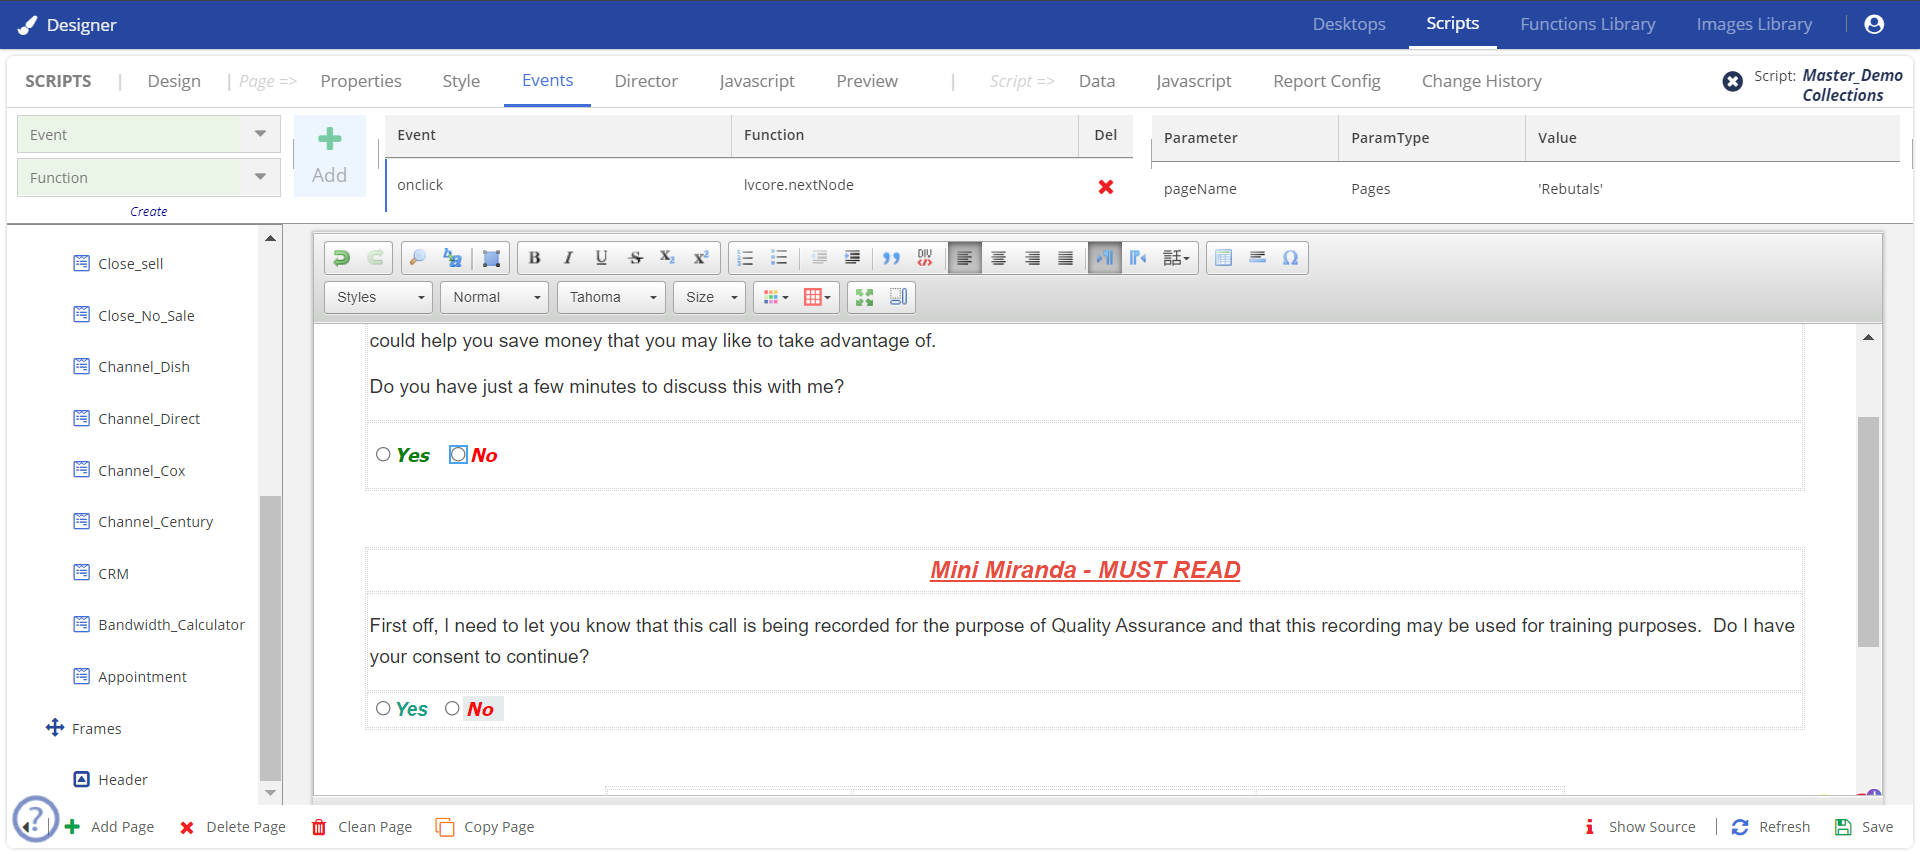
After adding the controls in the design area, you can set the properties for the controls/elements. For example, setting the properties for the following Data elements.
The fields that you created on the Data page appear in the Properties tab when you select the elements/controls in the Design tab.
The starting page contains four elements/controls: Customer name (first and last name), agent name (first and last name), client ID (contact field), and radio buttons (yes or no). The controls are highlighted in the image below. 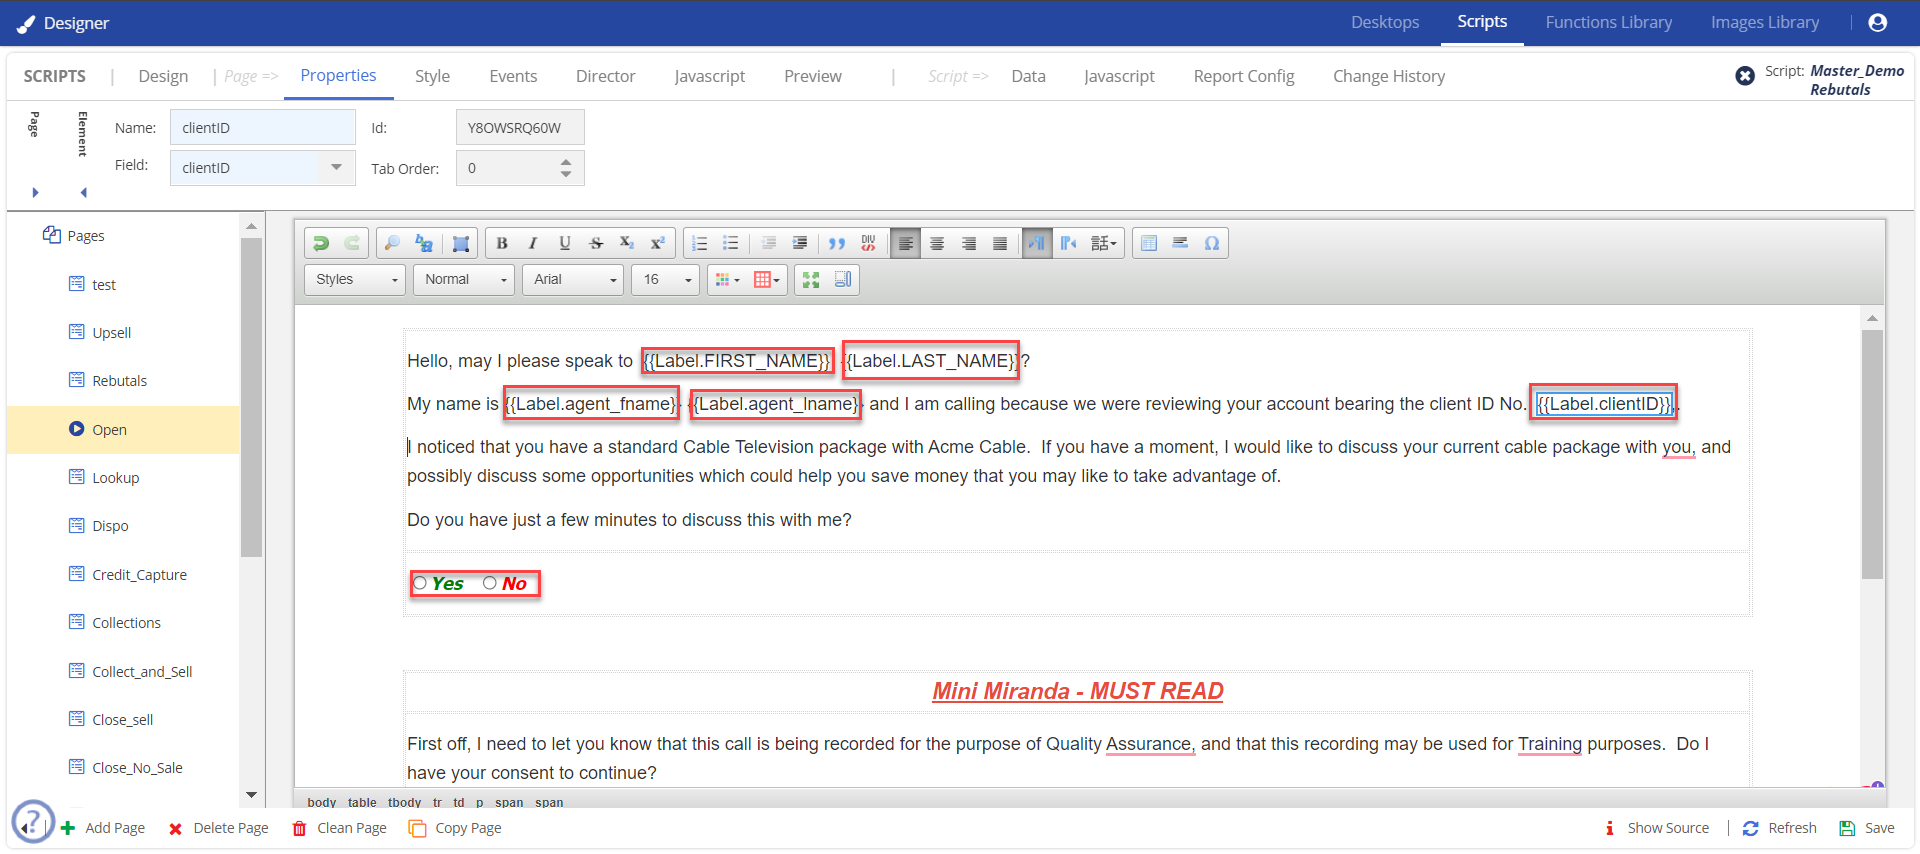
To set the properties:
From the Fields drop-down list, select FIRST_NAME.
Follow the same steps and set the LAST_NAME, agent_fname, agent_lname, and clientID elements. |
For the radio buttons, select Yes, and from the Properties tab, select the field as cust_available and value as 1. Set the same field for No and the value as 2.
As the radio button is script data, an event must be triggered when selecting this option. For detailed information on setting an event for the radio button, see Setting Events. |
Setting Events
Events are added to controls, where you want a certain condition to occur when a control is triggered. For example, the request changes must move to a different page or information when you click the control. For example, create events for the button on the starting page, that is the Yes or No buttons. The event enables you to move to the next page when you trigger these buttons.
You can manually add code to add additional functionality to the script. For more information, see Manually Adding a Code. |
The actions that are targeted when you trigger the Yes and No buttons are explained below:
| Control | Action | |
|---|---|---|
| Yes | The action shows more information on the same page.
| |
| No | The action takes you to the call closing page. |
To set the event to Yes :
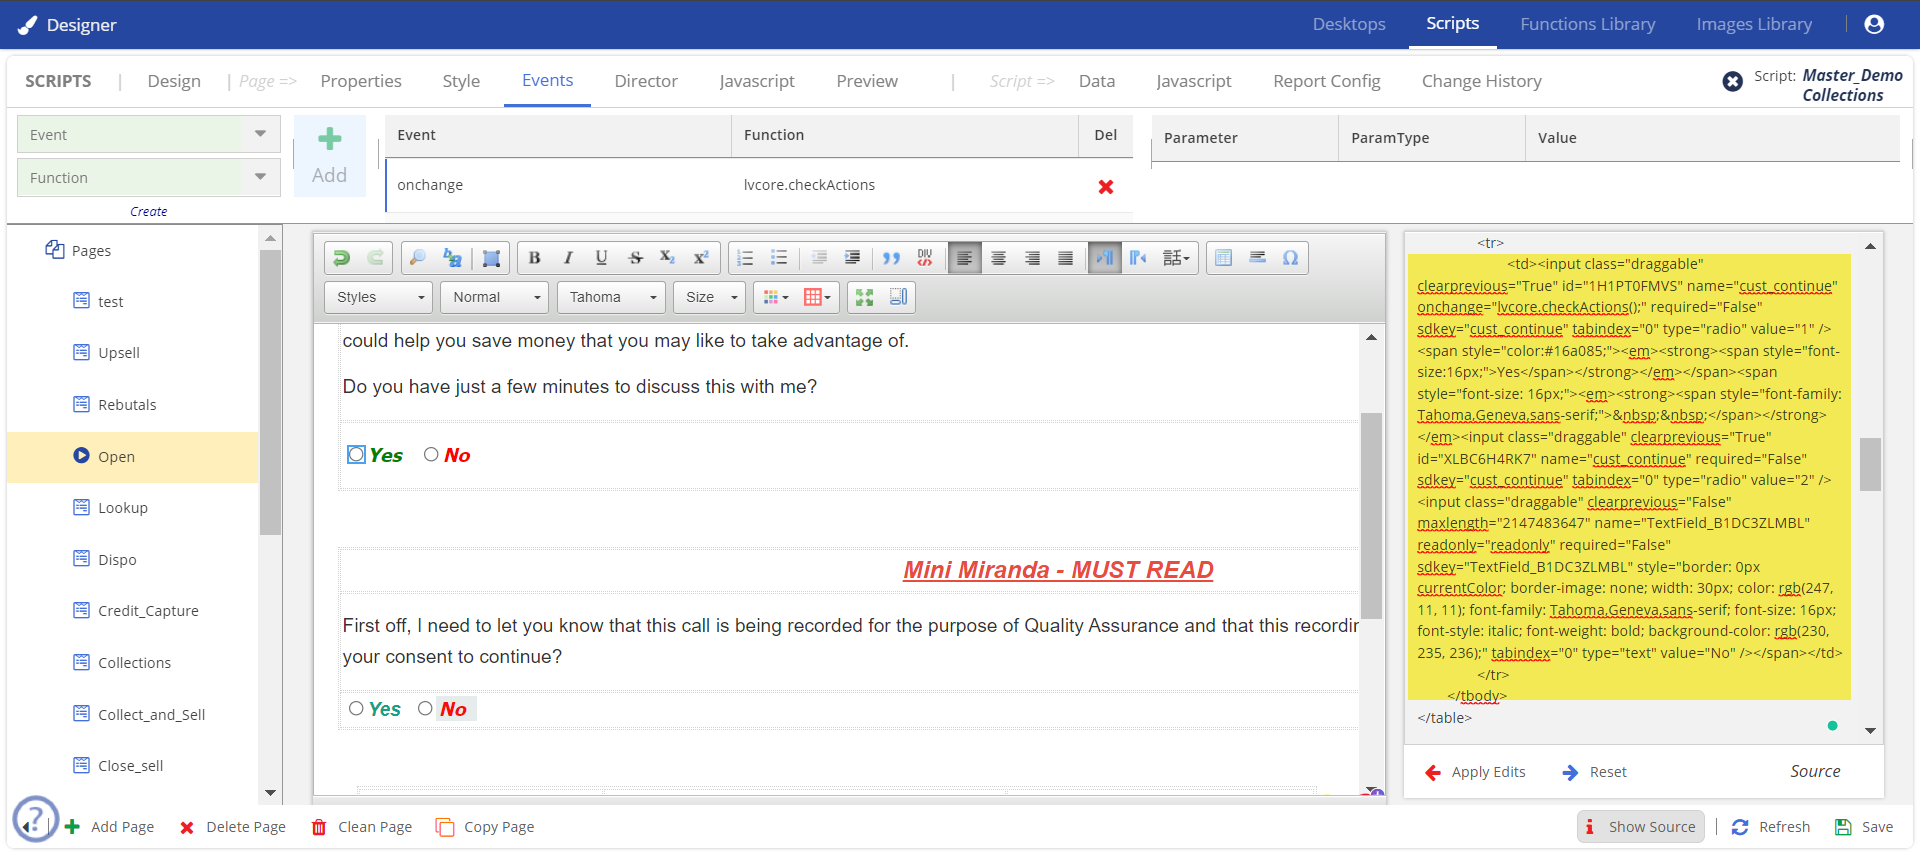
To set the event to No: