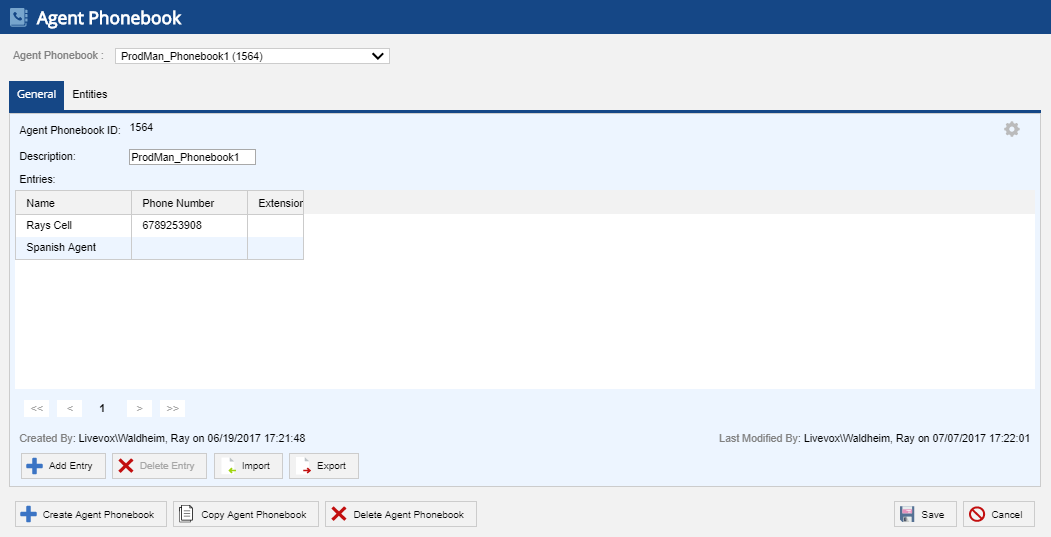
You can add, delete and edit agent phonebooks in the General tab. The following options are available within this tab.
Click on Add Entry button to display the configuration screen:
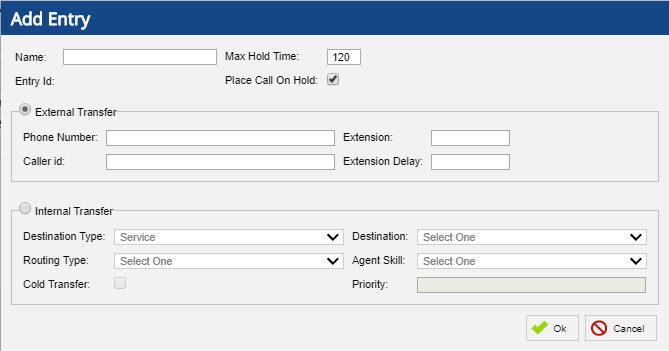
Agent Phonebook supports internal and external transfers. When selecting external transfer the following options are available:
When selecting internal transfers the following options are available:
Click on a selected entry to display the configuration screen:
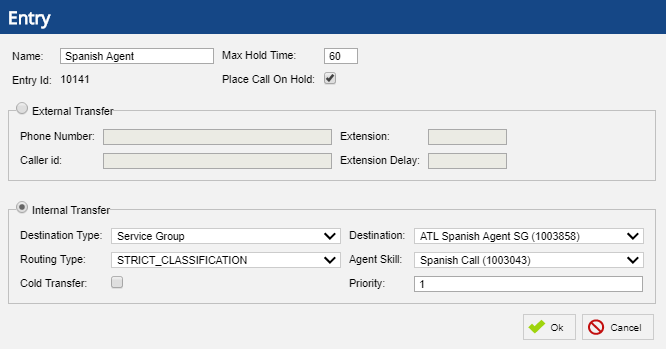
You may update the entry attributes as required. For detailed information about attributes, see Adding New Entry section. After updating required attribute, click Ok and Save.
Select the agent phonebook entry and click the Delete Entry button. Click Save.
The Agent Phonebook allows you to add phonebook contacts in bulk by importing the CSV file. To import a file of contacts click the Import button at the bottom-left.

This brings up the screen Import Agent Phonebook Contacts.
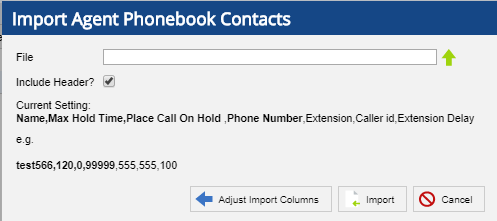
Click either the empty File field or the green arrow icon, this will allow you to navigate to the file within your local File directory. Select your file and click the Import button to finish uploading your file.
Maximum of 1000 records are processed during each import operation. |
Include Header option should be checked when data needs to be included in the first row of import file. The Current Setting will specify how to format the imported file.
Additional columns can be specified by selecting the Adjust Import Columns and clicking the check boxes next to the desired fields.
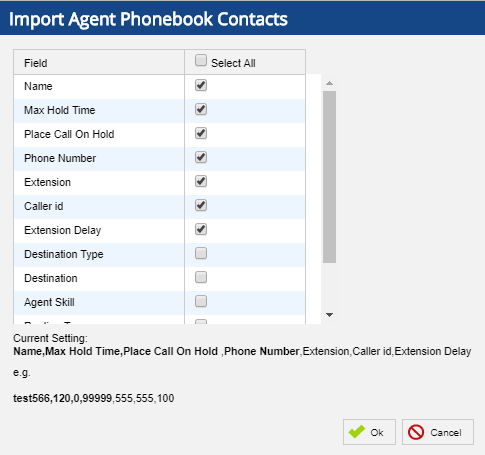
Click Ok to save and return to the previous Import Agent Phonebook Contacts screen or Cancel to discard the changes.
The Agent Phonebook editor allows you to export phonebook contacts to a CSV file. To export a file of phonebook contacts, press the Export button.
