...
| Expand | ||
|---|---|---|
| ||
The Forms tab enables you to configure the fields that appear on tickets for agents and consumers. Forms can be accessed by agents through the Agent Desktop (U-CRM) and by their customers through the Web Widget. The Forms tab contains the following subtabs:
|
| Expand | |||||||||||||||||||||||||||||
|---|---|---|---|---|---|---|---|---|---|---|---|---|---|---|---|---|---|---|---|---|---|---|---|---|---|---|---|---|---|
| |||||||||||||||||||||||||||||
| Anchor | | Creating a form | Creating a form | ||||||||||||||||||||||||||
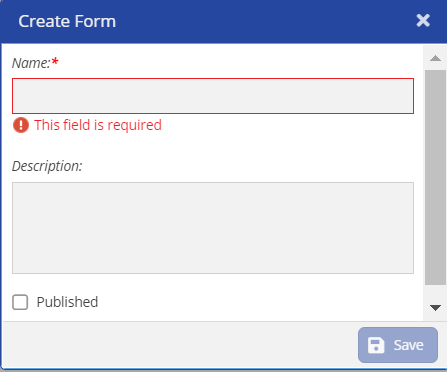
| Field | Description |
|---|---|
| Name | Enter a name for the form. |
| Description | This field is optional. Enter the description of the form. |
| Published | Select the checkbox if you want the form to be automatically published when it is created. |
Click Save.
The form is created, and the Design subtab opens.
| Expand | ||
|---|---|---|
| ||
After the form appears in the Design tab. You can add fields, set styles, validate the length, and set conditions for the fields to appear in the form. The following subtabs appear when you want to add the fields to the form:
|
| Expand | |
|---|---|
|
Design You can design the form by adding fields, labels, setting the label position, a placeholder of the fields, and columns for the form.
To design the form:
On the New Form window, click
 .
.
The Display subtab opens.
info
You can create either a stand-alone form or associate the form to Accounts, Contacts, or Tickets.
- To associate an entity to a form, enable Associate to Entity.
In the Entity field, select an Entity and then the Field from the drop-down list.
Info If you select the Entity, you must also add a field to select the Name. For example, you select the Entity as Accounts, then you must add another Field to specify the Account Name.
- if you select the FIeld as Billing then in the Label text-box the Billing appears.
- In the Label Position, select the required position from the drop-down list.
- Specify the Placeholder and then select the Column from the drop-down list.
Click
Style and specify the
Label Color and Font Size.
Info
You can edit the fields, move up or down, and delete the fields using ![]() buttons.
buttons.
If you want the font to be Bold or Italics, enable the appropriate check-boxes. If you do not select any of the options then the font will stay normal.
Click the Validation tab if you have any label constraints, you can specify the label is a mandatory field or is any based on any conditions.
To specify the conditions for the labels, click the Conditions tab and specify the required conditions.
Click Save.
Info You can edit the fields, move up or down, and delete the fields using
 buttons.
Expand title
Settings You can update the window title, submit button and add the attachments using the Settings subtab.
To update the settings:
Specify values in the following fields.
Field Description Form Titles Submit Button Success Text Error Text Theme Form Fields Submit Button Layout Columns Attachments Enable Attachments Max # number of Attachments Required
The Field Editor dialog box appears.
Configure the fields as required, and then click Save.
A preview of the form appears on the Design subtab.
| Info |
|---|
To move a field, on the preview screen, hover over the field that you want to move, and then click |
| Info |
|---|
To modify the configuration of a field:
|
Expand title Preview Expand title Activity To view all the tickets that were created using a form:
- On the Forms subtab, double-click the form for which you want to view the tickets.
The Design subtab opens. - Click the Activity subtab.
A table appears, displaying the tickets that were created using the form. The table contains the following columns:- Entity
- Number (that is, the number of the ticket)
- Created By
- Created Date
Expand title Change History
| Info |
|---|
To filter the entries, enter values in the following fields as required, and then click Search:
|
Click Save.
The form design is saved.
| Info |
|---|
To modify the form:
|
| Info |
|---|
To modify the design of the form, on the FORMS subtab, double-click the form whose design you want to modify, and then perform Steps 4 through 6. |
| title | Copying a Form |
|---|
To copy the form:
On the- Specify the fields appropriately and click Save.
- Click Settings.
The Field Editor dialog box appears. Configure the fields as required, and then click Save.
A preview of the form appears on the Design subtab.Info To move a field, on the preview screen, hover over the field that you want to move, and then click
or
Info To modify the configuration of a field:
- On the preview screen, hover over the field whose configuration you want to modify.
- Click
- Perform Step 5.
Click Save.
The form design is saved.Note - If you want the form to be available on the Designer Desktop, you must publish the form. To publish the form, on the
- FORMS subtab, select the checkbox next to the form that you want to
The Copy dialog box appears.
- publish, and then click Publish.
- If you want the form to be available on the Agent Desktop, you must map the form to the Forms element through the Desktops tab of the Designer screen of the Designer Desktop.
Info To modify
| title | Delete a Form |
|---|
the form:
- On the FORMS subtab, select the checkbox next to the form that you want to
- modify.
- Click
- Edit.
The
- Edit.
- Edit dialog box appears.
- Modify the values in the fields as required.
- Click
- Save.
Info To
modify the design of the form, on the FORMS subtab,
| title | Adding Settings to the Form |
|---|
double-click the form whose design you want to modify, and then perform Steps 4 through 6.
Expand title
Copying a Form
To
copy the form:
- On the FORMS subtab,
- select the checkbox next to the form
- that you want to
The Design subtab opens.
A table appears, displaying the tickets that were created using the form. The table contains the following columns:
- Entity
- Number (that is, the number of the ticket)
- Created By
- Created Date
- copy.
- Click Copy.
The Copy dialog box appears. - Modify the value in the Name field.
- Click Save.
To filter the tickets, enter values in the following fields as required, and then click Search:
Expand title
Delete a Form
To
delete the
form:
- On the FORMS subtab,
- select the checkbox next to the form
- that you want to
- delete.
- Click Delete.
The
- Confirm dialog box appears.
- Click
- Confirm dialog box appears.
A table appears, displaying the following columns:
- Yes.
Info To filter the
forms, on the FORMS subtab, in the Filter box, enter the text based on which you want to filter the forms.
| Expand | |||||||||||||||||||||||||||
|---|---|---|---|---|---|---|---|---|---|---|---|---|---|---|---|---|---|---|---|---|---|---|---|---|---|---|---|
| |||||||||||||||||||||||||||
You can configure a workflow for tickets so that they undergo a standard process that reduces manual work, saves time, and minimizes errors. A ticket workflow ensures that all tickets are handled in a consistent and timely manner. The Workflows tab of the Ticketing Config window enables you to configure workflows for tickets based on certain conditions when the ticket is created or updated, or when a nightly run is initiated. You can configure a ticket workflow to generate any of the following events:
The Workflows tab displays the following subtabs:
|
...