The Forms tab enables you to configure the fields that appear on tickets for agents and consumers. Forms can be accessed by agents through the Agent Desktop (U-CRM) and by their customers through the Web Widget. The Forms tab contains the following subtabs: - Design: To design the form
- Settings: To create and design your appears of the form
- Preview: To preview your design
- Activity: To view the tickets that were created using the form
- Change History: To view the history of the form
| Expand |
|---|
| | Anchor |
|---|
| Creating a form |
|---|
| Creating a form |
|---|
|
You can configure the template for a ticket on the Agent Desktop using a form.
To create and design a form: - On the Ticketing Config screen, click the Forms tab and then click New.
The Create Form window appears.
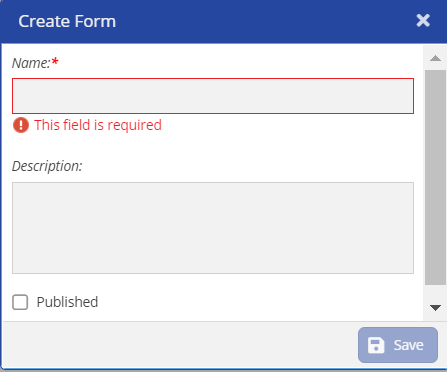
Specify the values in the following fields. | Field | Description |
|---|
| Name | Enter a name for the form. | | Description | This field is optional. Enter the description of the form. | | Published | Select the checkbox if you want the form to be automatically published when it is created. |
Click Save.
The form is created, and the Design subtab opens.
| Expand |
|---|
| title | Creating and Designing a Form |
|---|
| After the form appears in the Design tab. You can create fields, set styles, validate the length, and set conditions for the fields to appear in the form. The following subtabs appear when you want to add the fields to the form: - Display: You can specify the Field Type, Label, Placeholder, and Column.
- Style: You can specify the Label Color and Font Size. You can also specify if the text should be Bold or Italic.
- Validation: You can specify the Minimum Length and Maximum Length of the field. You can set the condition by choosing No, Always, and On-Conditions.
- Conditional: You can specify if the field should be Display or Hide, select the When the Form Field type, and also set the value in the Has the Value.
Display WindowYou can design the form by creating a field, label, label position, placeholder, columns for the form. | Note |
|---|
The form must be already created for designdesigning a form. For steps, see Creating a Form. |
To design the form: - A On the new Form page opens.Click , click
 Image Modified. Image Modified.
The Display subtab opens.
|
- Specify the fields appropriately and click Save.
- Click Settings.
The Field Editor dialog box appears. Configure the fields as required, and then click Save.
A preview of the form appears on the Design subtab. | Info |
|---|
To move a field, on the preview screen, hover over the field that you want to move, and then click  or as required. or as required. |
| Info |
|---|
To modify the configuration of a field: - On the preview screen, hover over the field whose configuration you want to modify.
- Click .
- Perform Step 5.
|
Click Save.
The form design is saved.
| Note |
|---|
- If you want the form to be available on the Designer Desktop, you must publish the form. To publish the form, on the FORMS subtab, select the checkbox next to the form that you want to publish, and then click Publish.
- If you want the form to be available on the Agent Desktop, you must map the form to the Forms element through the Desktops tab of the Designer screen of the Designer Desktop.
|
| Info |
|---|
To modify the form: - On the FORMS subtab, select the checkbox next to the form that you want to modify.
- Click Edit.
The Edit dialog box appears. - Modify the values in the fields as required.
- Click Save.
|
| Info |
|---|
To modify the design of the form, on the FORMS subtab, double-click the form whose design you want to modify, and then perform Steps 4 through 6. |
| Expand |
|---|
| To copy the form: - On the FORMS subtab, select the checkbox next to the form that you want to copy.
- Click Copy.
The Copy dialog box appears. - Modify the value in the Name field.
- Click Save.
|
| Expand |
|---|
| To delete the form: - On the FORMS subtab, select the checkbox next to the form that you want to delete.
- Click Delete.
The Confirm dialog box appears.
- Click Yes.
|
| Info |
|---|
To filter the forms, on the FORMS subtab, in the Filter box, enter the text based on which you want to filter the forms. |
|
| Expand |
|---|
| title | Adding Settings to the Form |
|---|
|
|
| Expand |
|---|
| title | Viewing the Form Activity |
|---|
| To view all the tickets that were created using a form: - On the FORMS subtab, double-click the form for which you want to view the tickets.
The Design subtab opens. - Click the Activity subtab.
A table appears, displaying the tickets that were created using the form. The table contains the following columns:- Entity
- Number (that is, the number of the ticket)
- Created By
- Created Date
| Info |
|---|
To filter the tickets, enter values in the following fields as required, and then click Search: - Ticket Number
- Ticket Created Date
- Ticket Closed Date
|
|
| Expand |
|---|
| title | Viewing the Form History |
|---|
| To view the history of a form: - On the FORMS subtab, double-click the form for which you want to view the history.
- The Design tab opens.
- Click the Change History tab.
A table appears, displaying the following columns:- Changed By
- Changed on
- Short Description
| Info |
|---|
To filter the entries, enter values in the following fields as required, and then click Search: - Action (that is, Insert, Update, or Delete)
- Changed By (that is, the user ID)
|
|
|